5.2
BODY AND STEERING
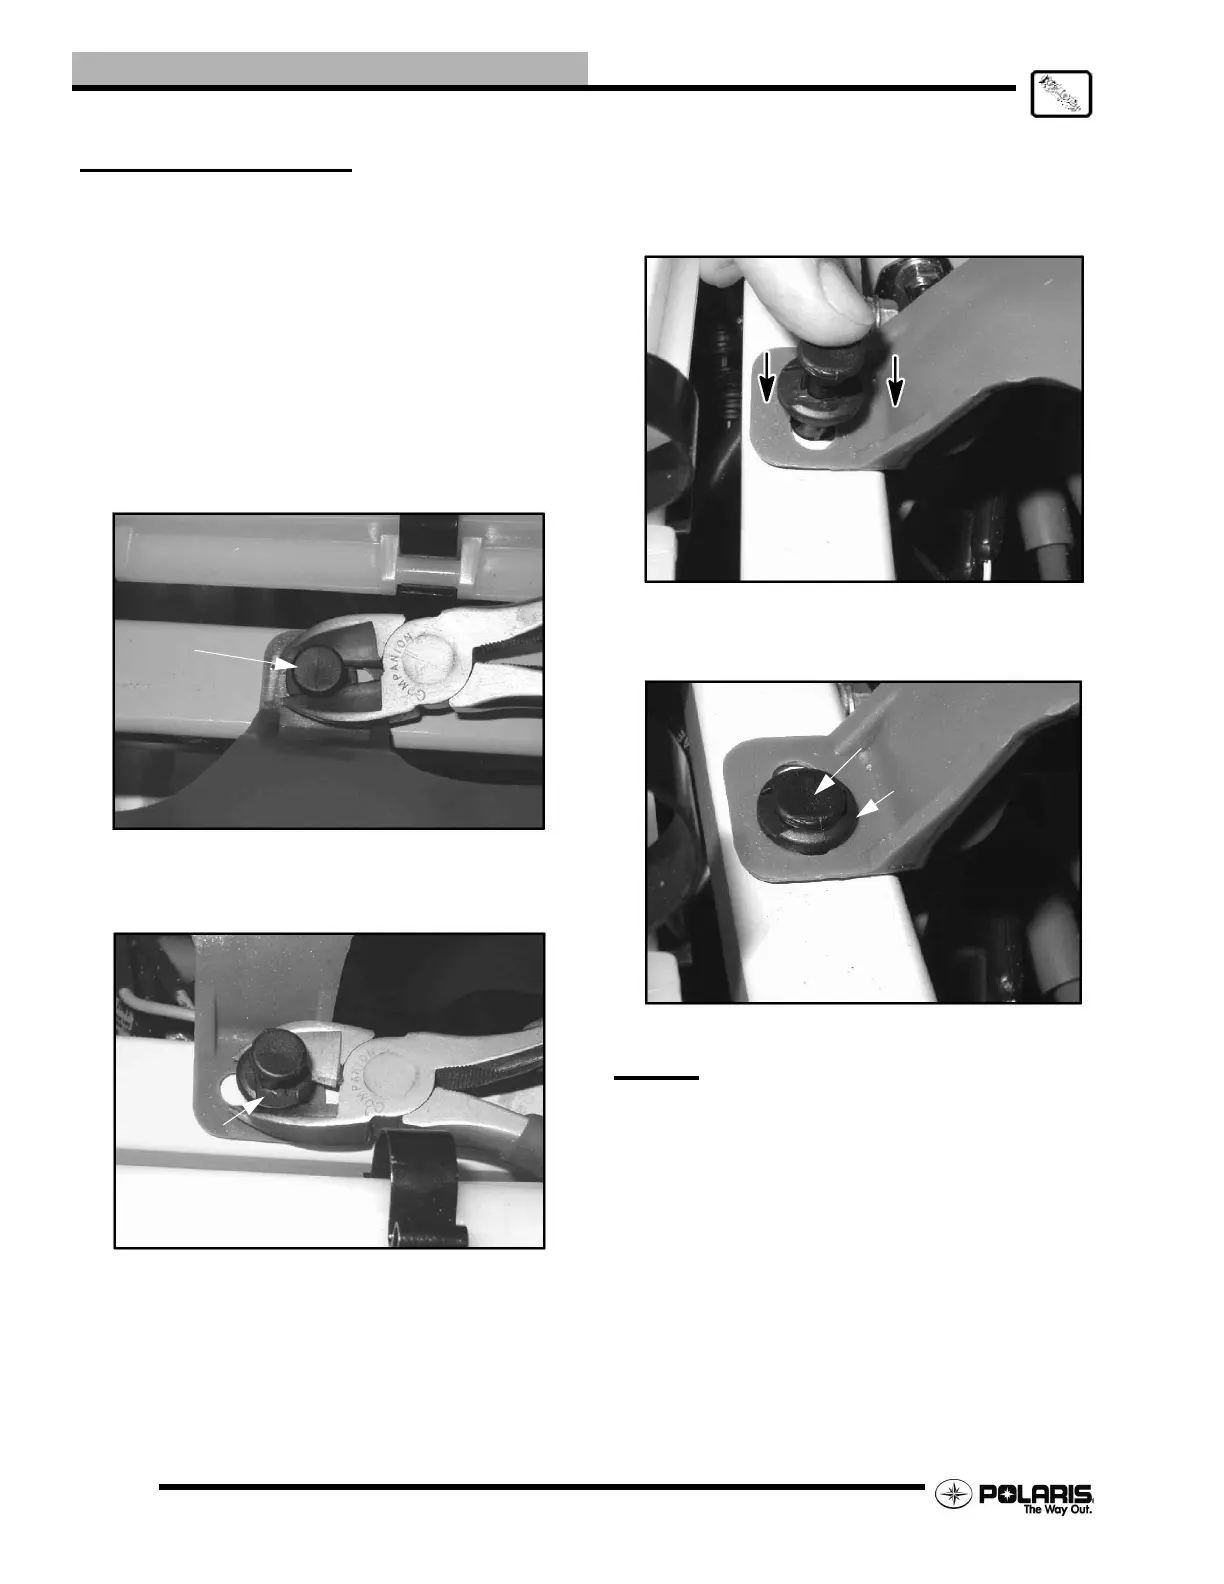
PLASTIC INSERT
Removal / Installation
Some Polaris ATVs use a two piece plastic insert in place of a
metal screw. The plastic inserts are simple to remove and
install.
1. Use a a pair of diagonal side cutters to lift the plastic insert
(A) until you feel some slight pressure or lift the insert
approximately 1/4" (6.35 mm). Apply just enough
pressure on the side cutters to lift up on the insert. DO
NOT apply too much pressure on the side cutters, or
damage to the insert will occur.
2. Next, use the diagonal side cutters under outside insert (B)
to completely remove the assembly. NOTE: The inside
insert (A) will still be installed in the outside insert (B).
NOTE: The inside insert (A) will still be installed in
the outside insert (B).
3. To install the inserts, press outside insert (B) into the hole.
Press inside insert (A) until it snaps into place.
NOTE: The outside insert (B) should be flush
surface after installation.
The inside insert (A) should be flush with the top of the
outside insert (B).
SEAT
SEAT REMOVAL/INSTALLATION
Side panel removal is quick and easy, use the following
instructions for removal and installation.
1. Remove seat by releasing the latch and lifting up on the
A
B
A
B
 Loading...