5.9
BODY / STEERING / SUSPENSION
5
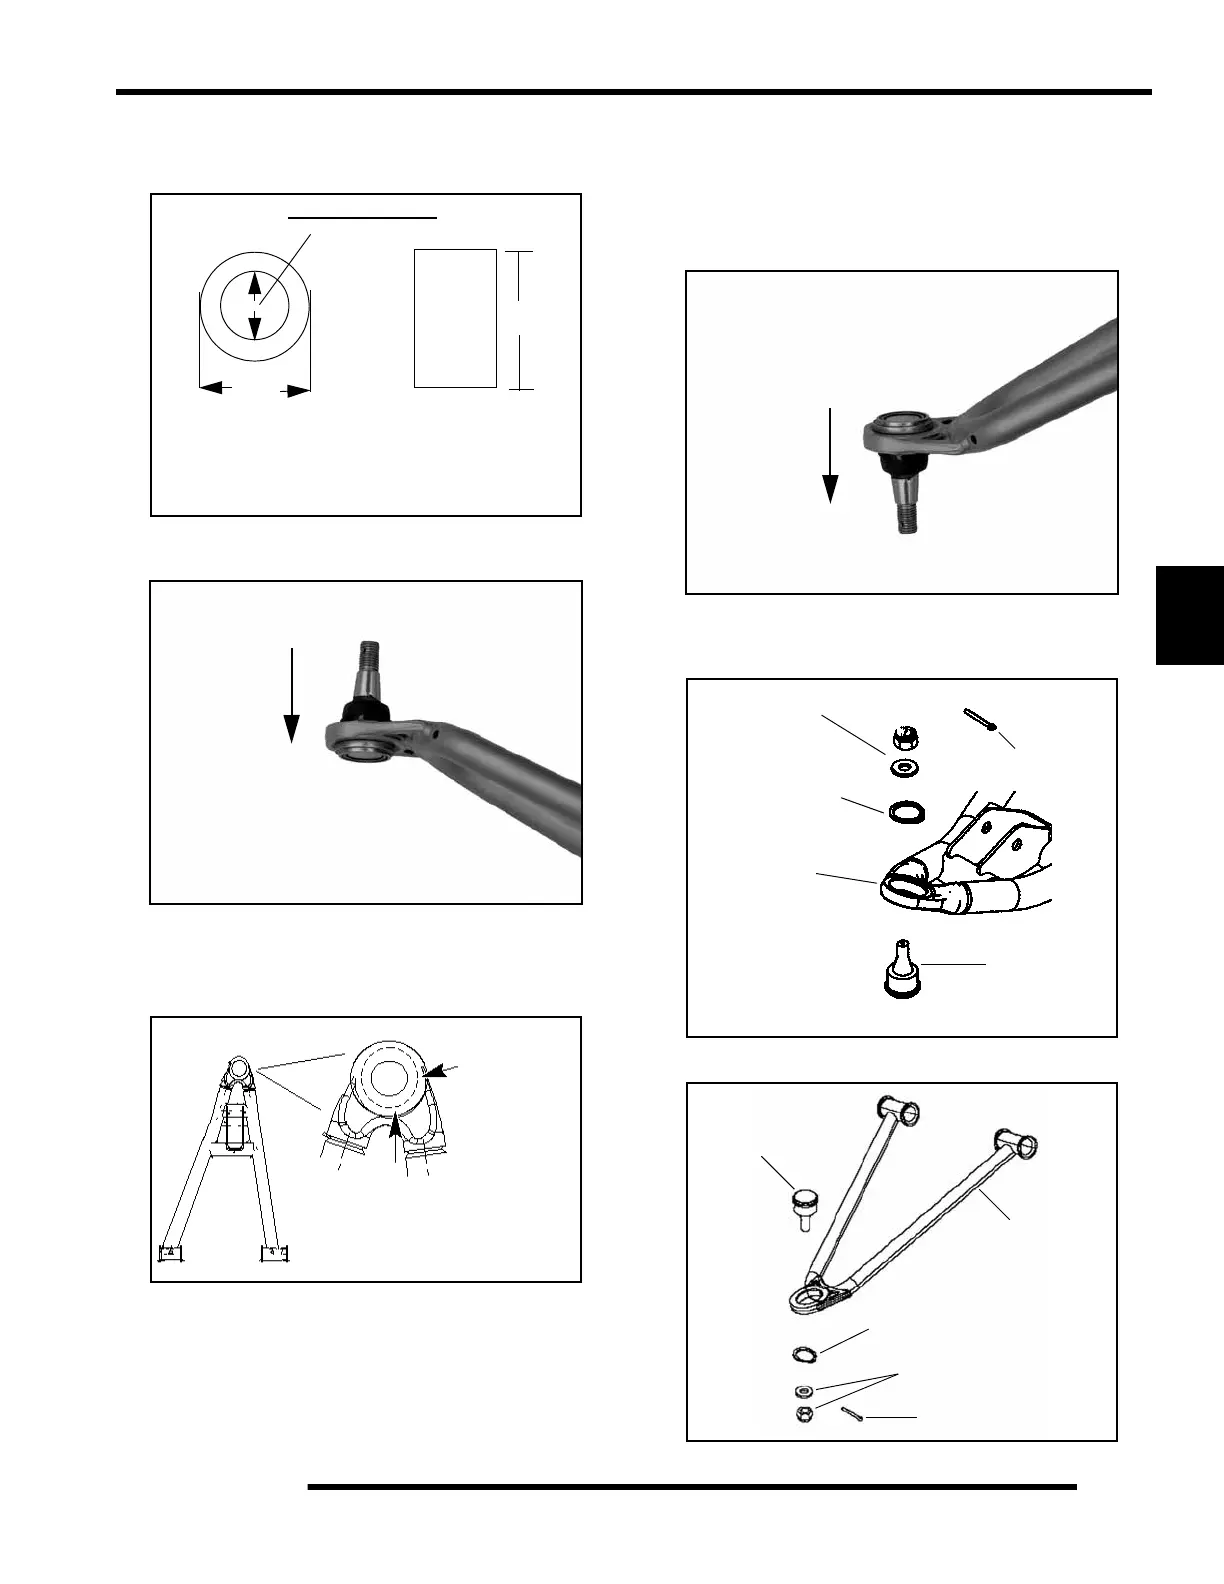
3. A driver must be used for the removal of the ball joints. Use
the dimensions below to fabricate or locate the correct size
driver to use in the following process.
4. Use a press and correct size driver to remove the ball joint
from the A-arm.
NOTE: The driver must fit the inside diameter of the
A-arm. This will allow the ball joint to be properly
pressed out of the A-arm without damaging the A-
arm.
Installation
1. Place the A-arm in the correct position for ball joint
installation. Face the A-arm end flat on top of the driver.
Carefully drive the ball joint into place until the ball joint
is properly installed.
2. After the new ball joint is installed into the A-arm, install
a NEW retaining ring. Upon A-arm installation onto the
steering hub, install a NEW cotter key.
1.75 in
(4.45 cm)
1.375 in.
(3.49 cm)
3 in.
(7.62 cm)
* Outside diameter of driver cannot be any larger than
1.75 in. Inside diameter cannot be any smaller than
1.375 in. Driver must be 3 in. or taller.
Driver Dimensions
Press out of the A-arm
in this direction
Upper A-arm Shown
Correct
Driver Placement
The driver must fit the inside
diameter of the A-arm end.
Lower A-arm Shown
Press into the A-arm
in this direction
Upper A-arm Shown
NEW Cotter Key
Nut & Washer
NEW
Retaining Ring
Lower A-arm
Ball Joint
Nut & Washer
NEW
Retaining Ring
Upper A - arm
NEW Cotter Key
Ball Joint
 Loading...