INSTALLATION
Harmony Ball Return Manual – 400-254-022 19 Rev. Date 3/16
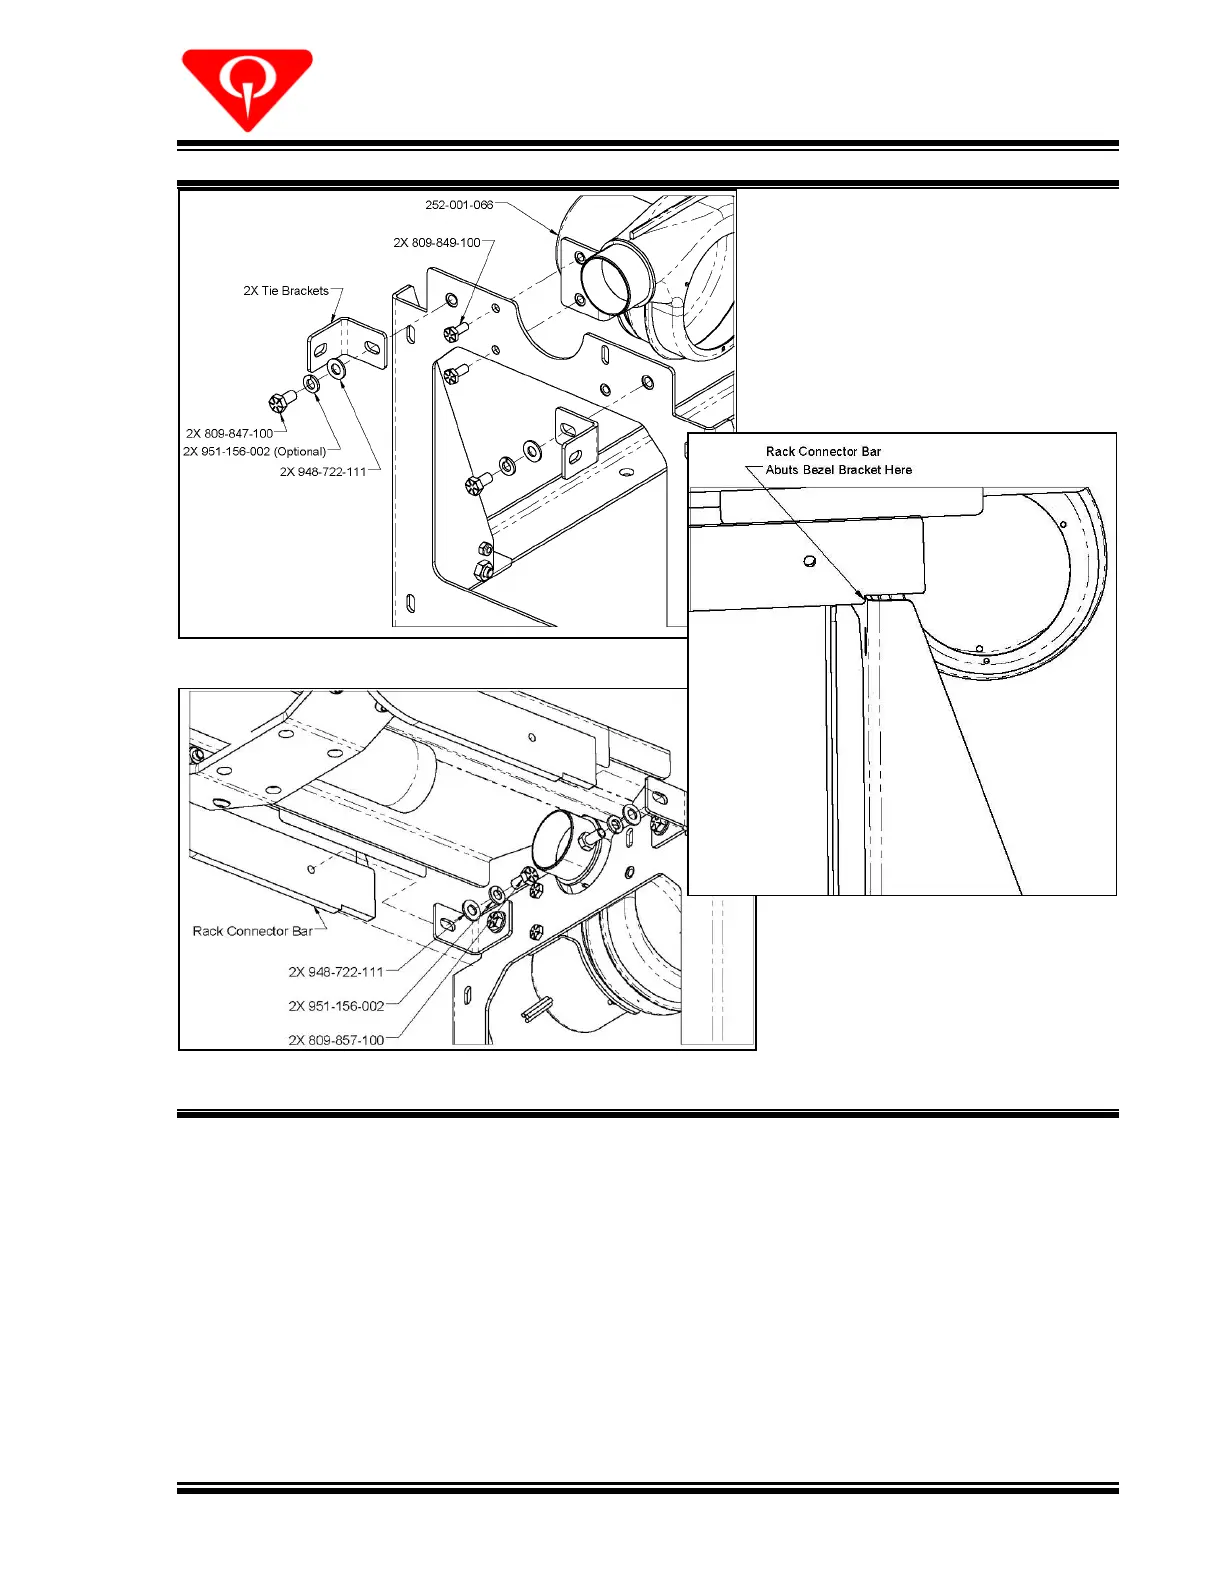
Figure 16, Rack to Ball Lift Attachment
Bezel hidden for clarity.
7. Tighten the two (2) connector bar screws (809-857-100). Loosen the two (2) screws that
attach the tie brackets to the bezel support and center the rack to the ball lift. Tighten the
screws. Roll a ball into the ball lift until it touches the v-wheel. Release the ball and note its
transition onto the tray. Adjust the rack position to achieve a smooth transition. If
necessary, transition rails can also be adjusted.
a) Ensure the ball does not contact the front edge of the tray or ball damage can occur.
If this happens, the lift must be shimmed higher.
8. For maple approaches, drill a 1/4" [6mm] diameter hole through each mounting hole
location of pedestal base. For synthetic approaches, drill 9/32” [7mm] holes.
 Loading...