INSTALLATION PROCEDURE 31 October 2001
1-18
- For C226 -
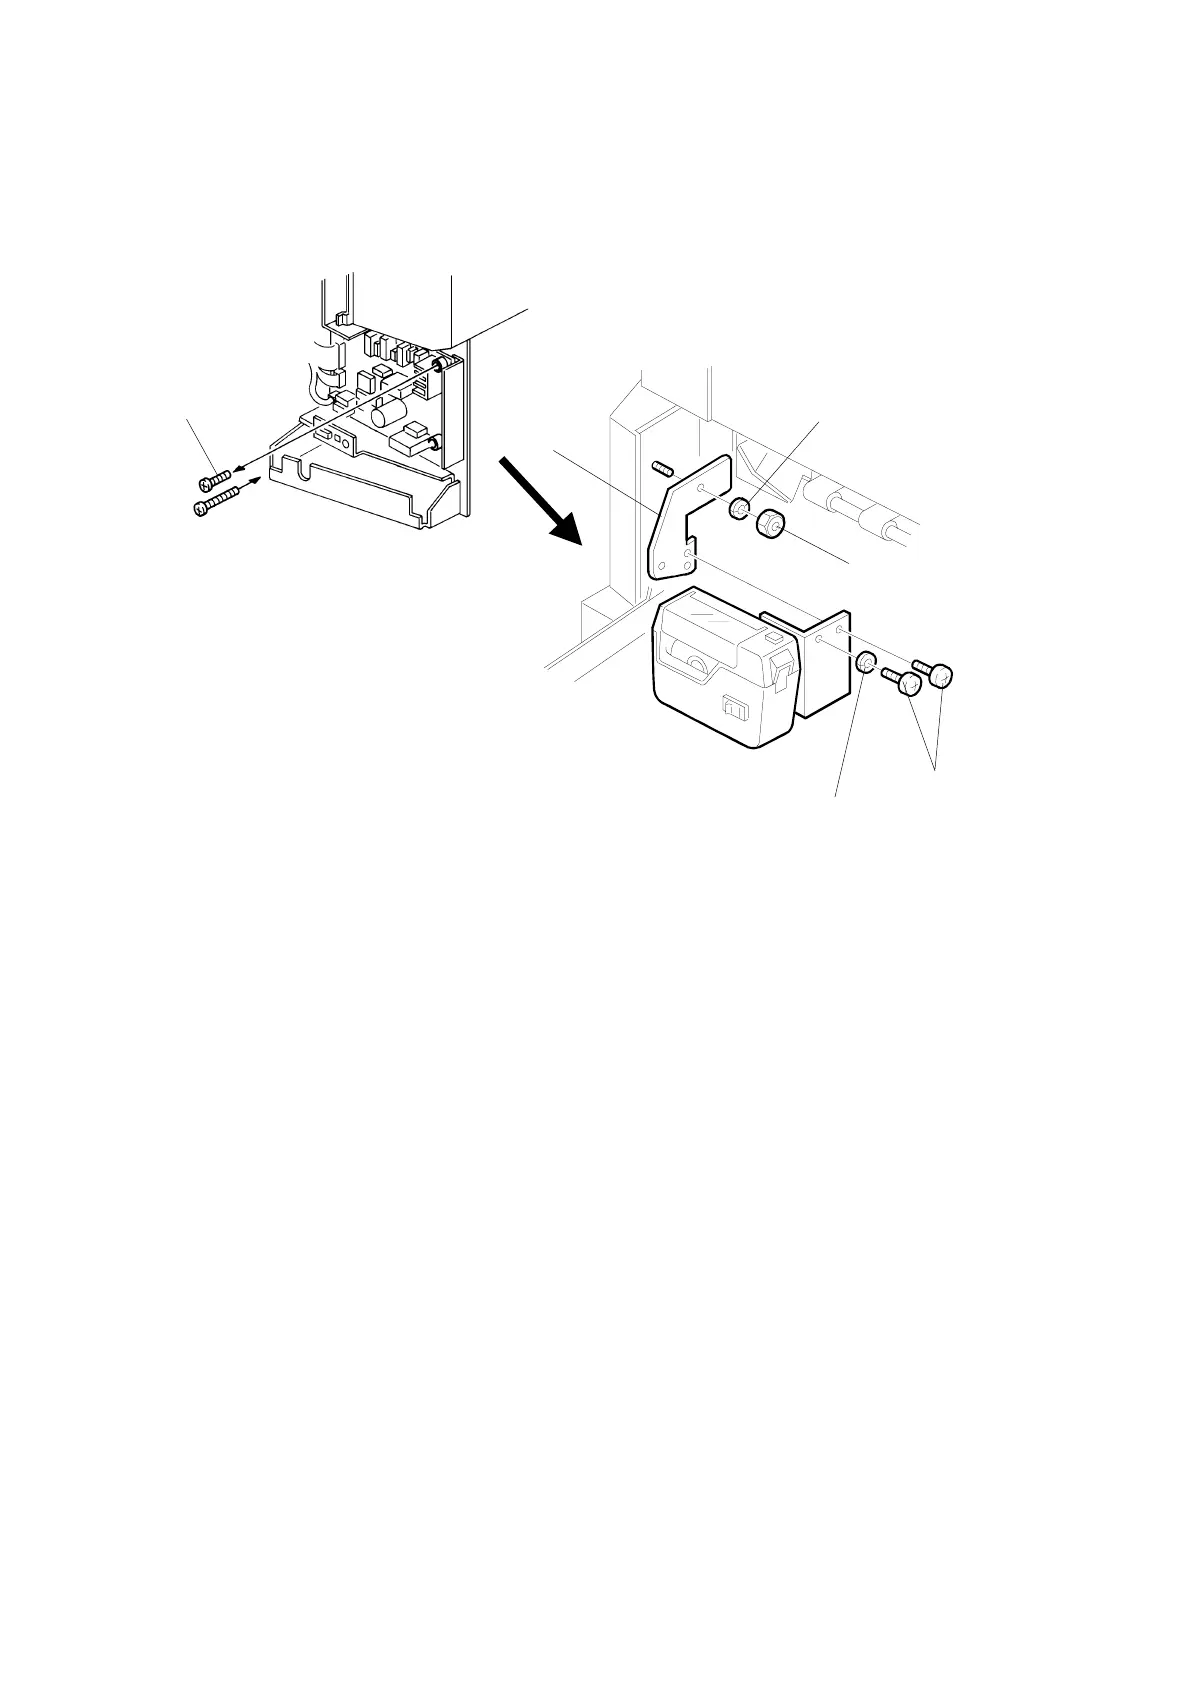
Main Body:
1. Turn off the main switch and unplug the power cord.
2. Remove the rear cover (6 screws).
3. Replace the screw [A], to secure the AC drive board with M4 x 25 screws
(accessories).
4. Reinstall the rear cover.
5. Install the auxiliary bracket [B] on the main body with the hexagon nut [D]
(accessories) as shown.
NOTE: Install the lock washer [C] (accessories) with the nut.
Tape Marker:
6. Install the tape marker on the auxiliary bracket with two M4 x 8 screws [E]
(accessories).
7. Install the lock washer [F] (accessories) with one of the two screws.
8. Refer to "Common Steps".
C238I516.PCX
C238I517.WMF
[A]
[B]
[C]
[D]
[F]
[E]
 Loading...


