31 October 2001 INSTALLATION PROCEDURE
1-21
Installation
- Common Steps -
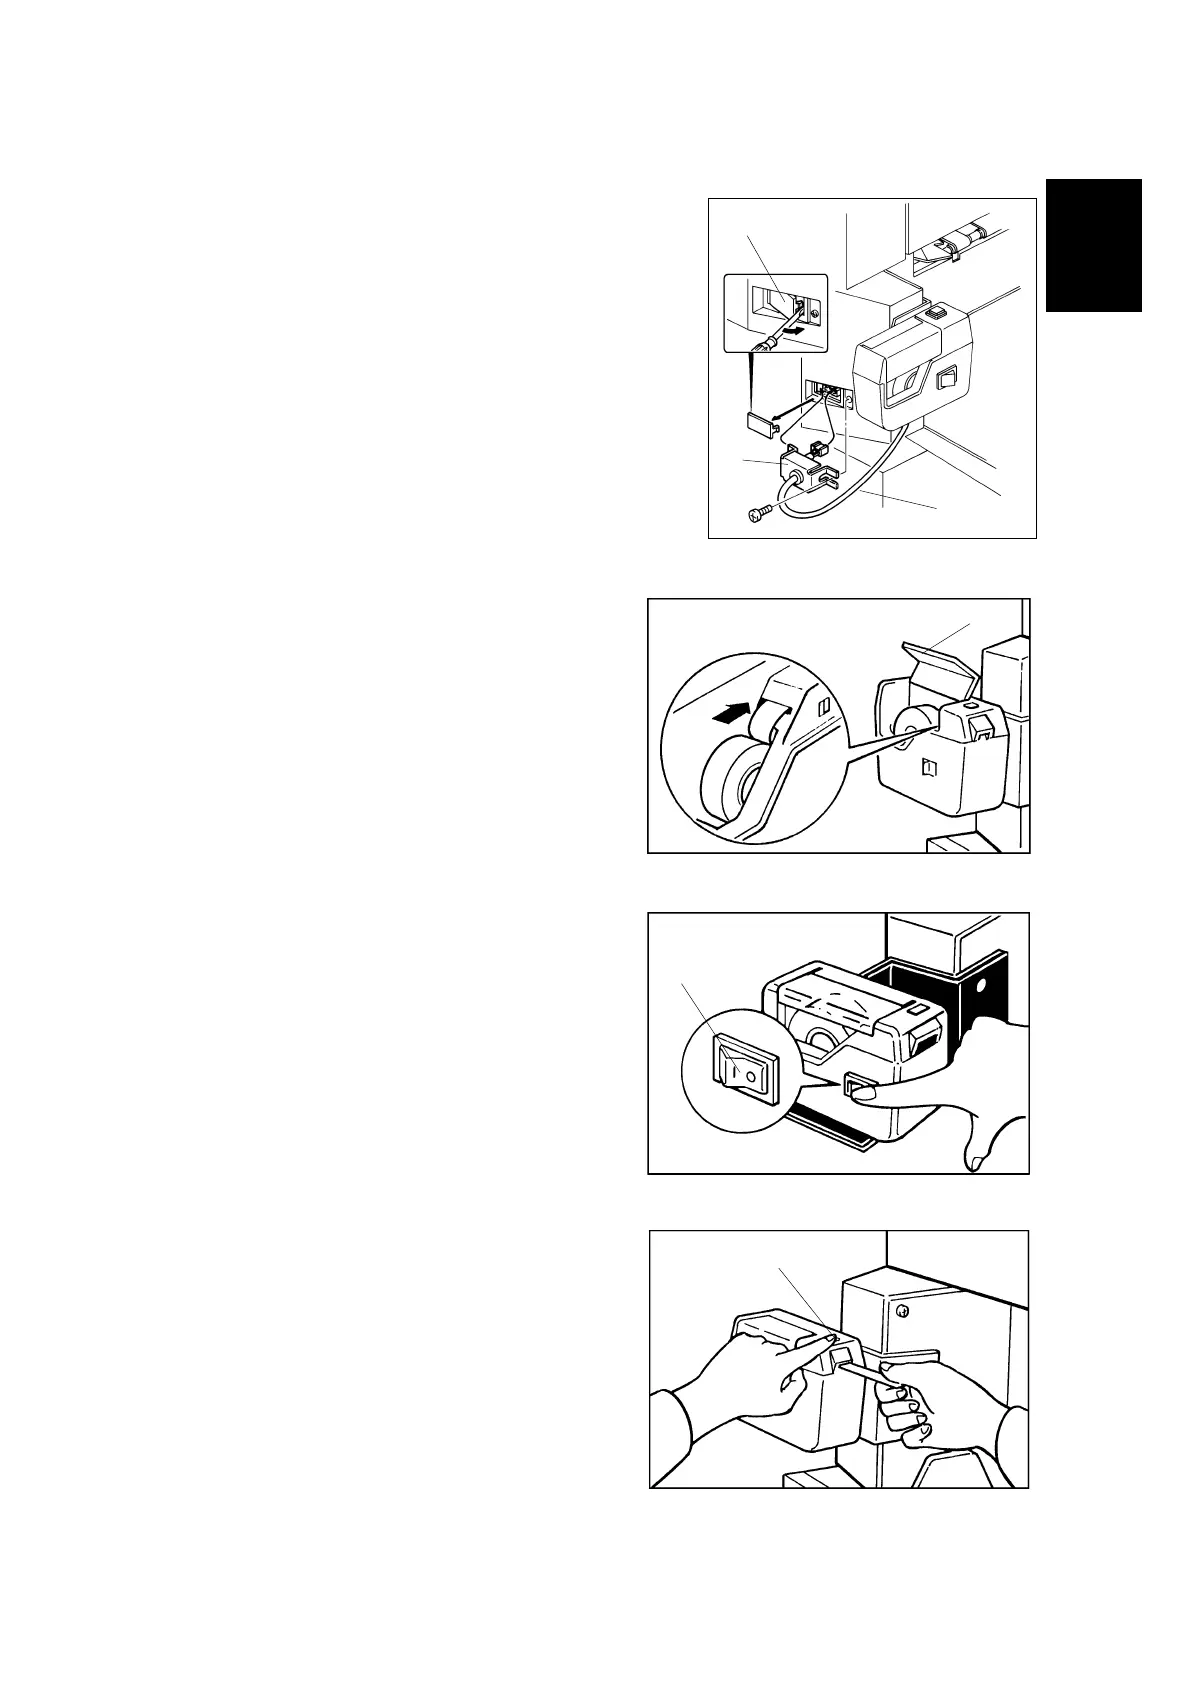
1. Remove the small cap in the rear cover of the
main body [A]. Then, connect the tape
marker cable [B] to the main body, and install
the connector cover [C] using one of the rear
cover securing screws. (For C238 and C238,
this has already been done.)
2. Open the tape marker cover [D]. Then,
insert the leading edge of the tape into
the tape entrance until it stops as
shown in the illustration [E].
NOTE: Be sure that the tape is
installed in the proper direction.
If it is not, the tape marker will
not work correctly.
3. Turn on the main switch of the main
body and set the SP mode to activate
the tape marker. (Refer to the service
program table.)
4. Turn on the tape marker switch [F].
5. Press the tape cut button [G] to cut off
the leading edge of the tape.
6. Check the tape marker operation using
the Memory/Class modes of the main
body.
C238I518.PCX
C238I519.PCX
C238I520.PCX
C238I521.PCX
[A]
[B]
[C]
[D]
[E]
[F]
[G]
 Loading...


