Notes
• Be sure to
tum
on the receiver when the video and
audio signals
of
a playback component are being
output to a
TV
via the receiver. Unless the power is
turned on, neither video nor audio signals will be
transmitted.
• When connecting optical digital cords, insert the
plugs straight in until they click into place.
• Do not bend
or
tie optical digital cords.
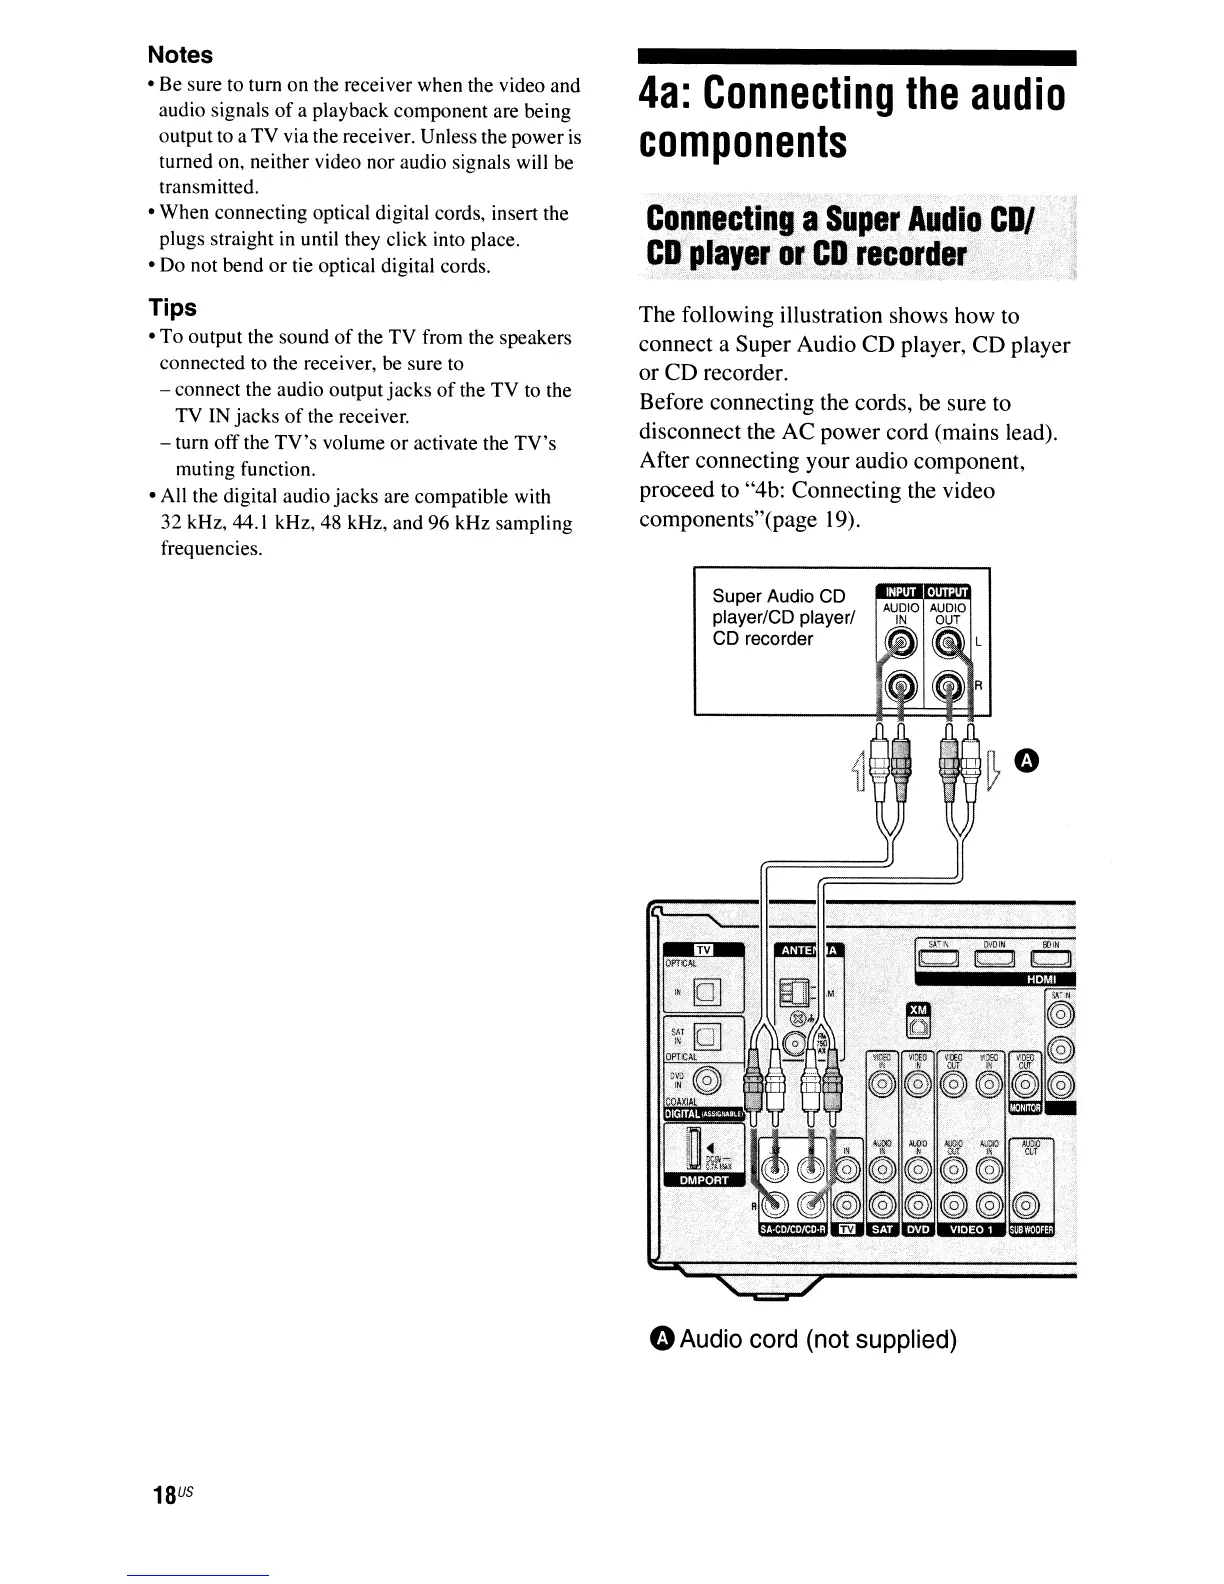
4a:
Connecting
the
audio
components
COi1n'~!ing
aSup~~~lIdi.
CD
pla,.r
or
CD
recorde
(,,',:
;',
=:f;"-';;»~";"
,"
..
AUDIO AUDIO
IN
OUT
Super Audio CD
player/CD player/
CD recorder
TV
n
11r-..--....
....
!I----.I.AWO,ij",(i.:)
AOO(}
Ai.W
NDO
lJJ
&.to;
0
~
<®
®
~
Ctl
o0®®®®
OPTiCAL
The following illustration shows how to
connect a Super Audio CD player, CD player
or CD recorder.
Before connecting the cords, be sure to
disconnect the AC power cord (mains lead).
After connecting your audio component,
proceed to "4b: Connecting the video
components"(page 19).
Tips
•
To
output the sound
of
the
TV
from the speakers
connected to the receiver, be sure to
- connect the audio output
jacks
of
the
TV
to the
TV IN
jacks
of
the receiver.
-
tum
off
the
TV's
volume
or
activate the
TV's
muting function.
• All the digital audio
jacks
are compatible with
32 kHz, 44.1 kHz, 48 kHz, and 96 kHz sampling
frequencies.
o
Audio
cord
(not
supplied)
18
US
 Loading...