COMPONENT INFORMATION
2-10
FREEZER COMPONENTS
Freezer Fan Motor - Model 501F
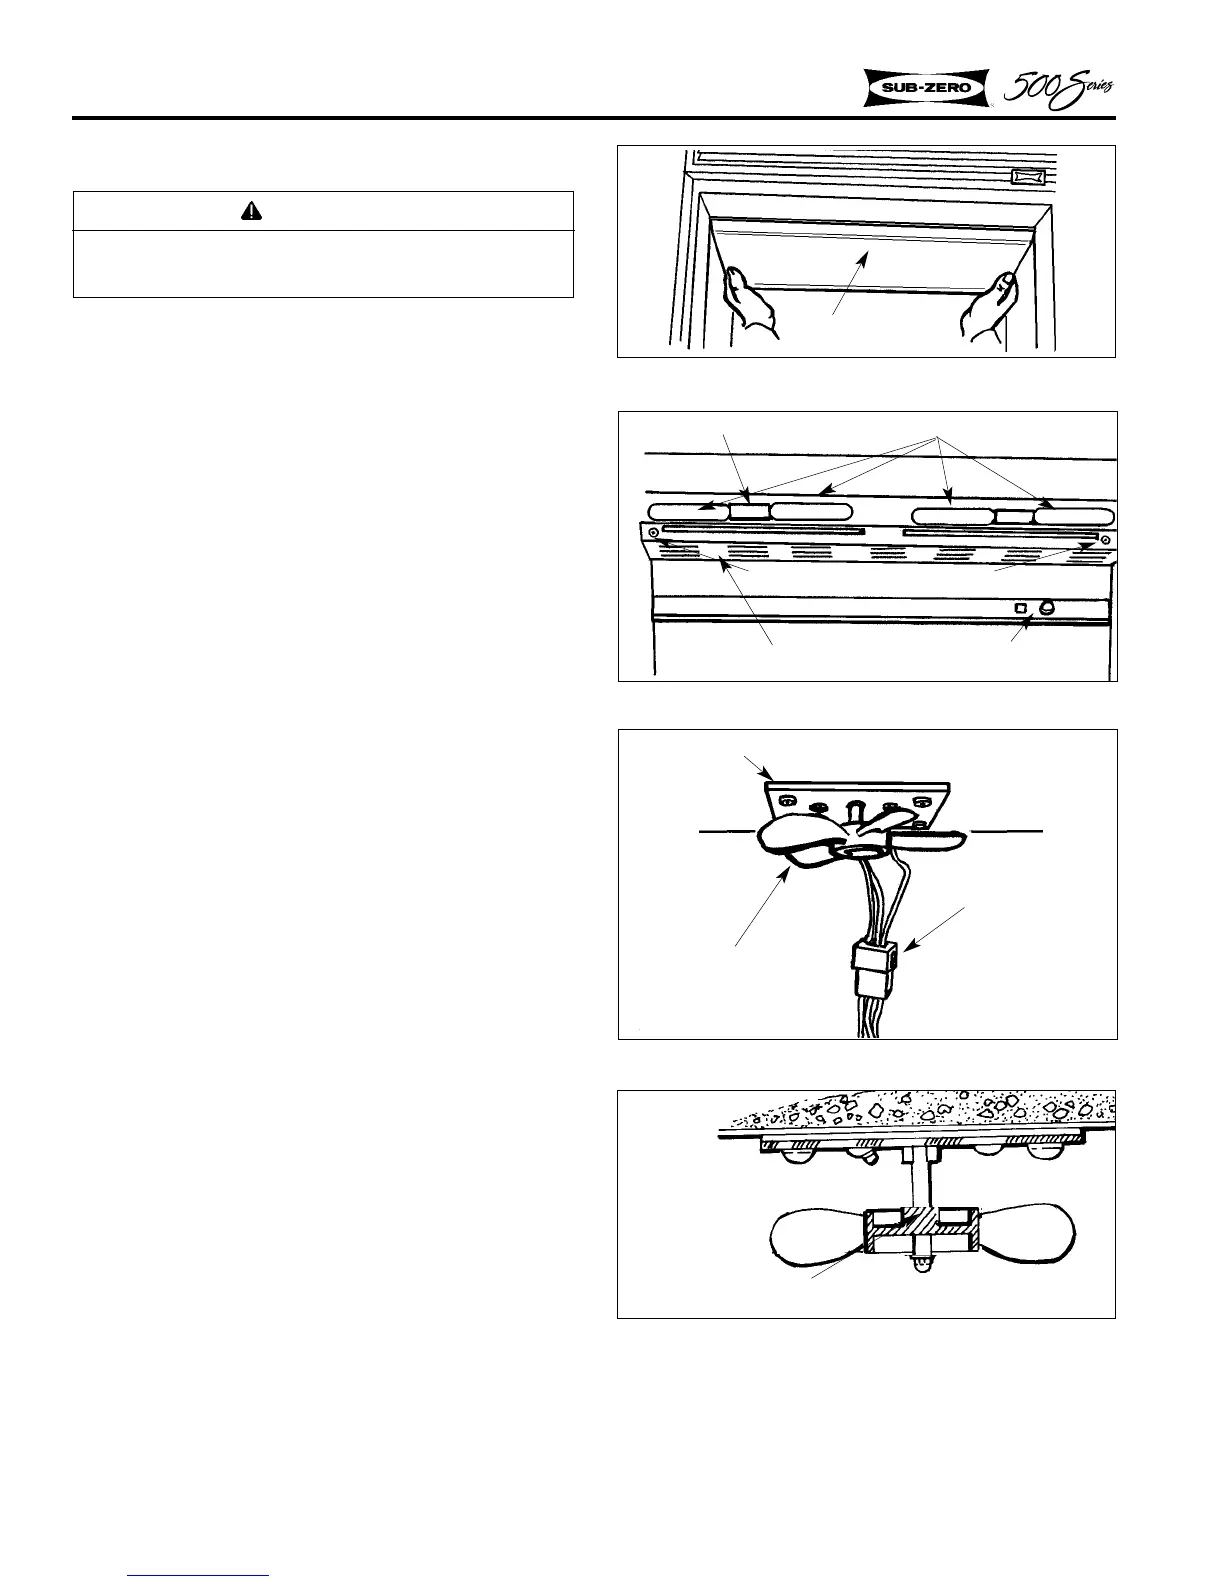
1. Remove the overhead light diffuser by grasp-
ing the back edge and pulling forward to
release, then drop the front edge out of the
channel. (Figure 2-24).
2. Remove the two screws from front of fan
guard and lift out (Figure 2-25).
3. Tilt the evaporator cover out at the top and lift
off of the posts at the bottom.
4. Remove the screws holding the fan shroud in
place and disconnect the lighting electrical
leads.
5. Remove the fan bracket screws and pull out
the bracket and fan motor assy. (Figure 2-26).
6. Disconnect the motor electrical connection
(Figure 2-26).
7. To reassemble, reverse steps 1-6.
NOTE: Clamp position should always be UP
(Figure 2-27).
NOTE: As a service part replacement, white fan
blade, part no. 3-15-006-0, must be used prior to
S/N 663116/P679466. From S/N 663116/P679466
to M/P1004775, use the black fan blade, part no.
3-15-045-0. Starting with S/N M/P1004775, use
grey fan blade, part no. 3-15-052-0.
NOTE: Fan blade position after Serial Number
1004775 is 1-5/8".
WARNING
Always disconnect electrical power to equip-
ment before attempting repairs.
Figure 2-26. Evaporator Fan Blade Assy.
Fan Blade
Wire Connection
Fan Bracket
Figure 2-27. Evaporator Fan Assy.
Clamp Up
Figure 2-25. Fan Guard
Fan Guard
Light Bulb
Screw, #8-15 x 3/4, Truss Head
Light Socket
Control Knob
Figure 2-24. Light Diffuser
Light Diffuser
501F
 Loading...