COMPONENT INFORMATION
2-16
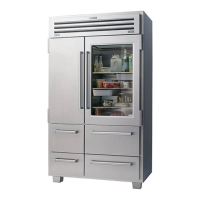
Figure 2-43. Carriage Slides
Models 532, 542, 561
Slide
Figure 2-44. Upper Freezer Light Diffuser
Model 590
Upper Freezer
Light Diffuser
Utility Rack
Screw
Carriage Assy.
Freezer Light Shield
The linkage is connected to the ice level arm by a
connecting rod (Figure 2-42). As the linkage rais-
es or lowers, the ice level arm raises or lowers.
1. To remove the icemaker, slide the connecting
rod to the right,off of the icemaker shut-off
arm, allowing the ice level arm to drop out of
the way (Figure 2-42).
2. Remove the mounting screw at the bottom left
of the icemaker which secures the icemaker
bracket to the evaporator cover assembly.
3. Then extract the two mounting screws at the
top rear, above the icemaker mold.
4. Pull the icemaker assy. forward and disconnect
the electrical leads from the icemaker.
The carriage assy. rolls within the tracks of the
slide. To remove, push the carriage in and remove
the two front-most screws on each slide. Pull the
carriage and slides out together (Figure 2-43).
Figure 2-42. Icemaker
Shut-off Arm
Screws
Screw
Connecting Rod
Ice Level Arm
Models 532, 542, 561
Figure 2-45. Evaporator Cover Removal
Model 590
Screw
Screw
 Loading...