COMPONENT INFORMATION
2-22
Figure 2-61. Water Tank Cover
Model 590
Figure 2-62. Water Tank
Model 590
Refrigerator
Control
Freezer Control
NOTE: It is possible to reinstall the control 180
°
in the wrong position. Be sure the control readout
is proper.
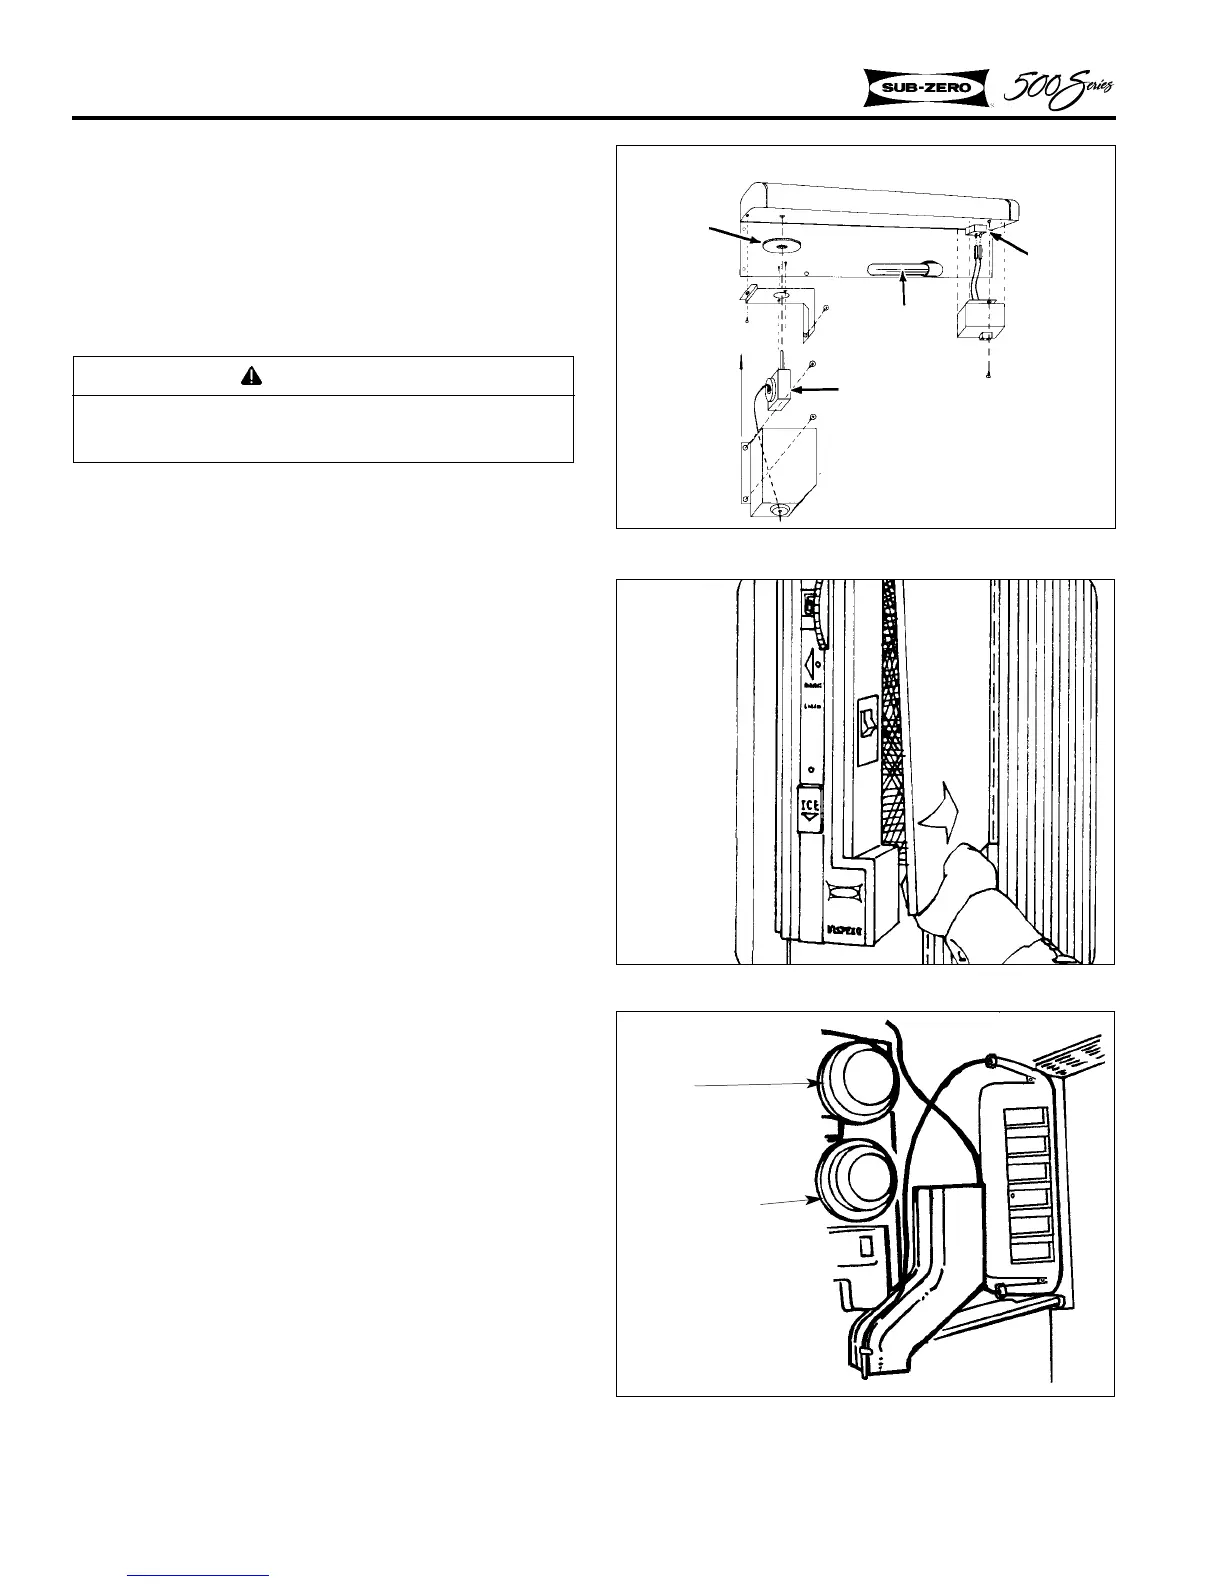
Freezer Control
1. Remove the mounting screws and remove the
freezer control panel.
2. Disconnect the wiring block from the back of
the panel and pull the panel out.
3. The freezer control and ice maker switch can
be accessed from the back of the panel (Figure
2-60).
CONTROLS - MODEL 590
Refrigerator Control
1. Remove the water tank cover (Figure 2-61).
2. Remove the mounting screw located on the
backside of the control panel, then remove the
control assy.
3. Remove the three panel screws.
4. Remove the control dials, then remove the
control (Figure 2-62 & 2-63) by unscrewing
the mounting screws.
NOTE: Complete dual control instructions accom-
pany replacement refrigerator control.
Freezer Control
1. Remove the water tank cover (Figure 2-61).
2. Remove the mounting screw located on the
backside of the control panel, then remove the
control assy.
3. Remove the three panel screws.
4. Remove the control dials (Figure 2-62 & 2-
63), then remove the control by unscrewing
the mounting screws.
Figure 2-60. Freezer Control Area
Model 532, 542, 561
WARNING
Always disconnect electrical power before
attempting repairs.
Icemaker
Switch
Light Bulb
Control
(view from underneath)
Freezer
Control
Dial
 Loading...