COMPONENT INFORMATION
2-17
Ice Maker Assembly - Model 590
1. To access the ice maker, lift up and remove the
freezer utility rack (Figure 2-44), then remove
the top light diffuser. Remove the ice bucket.
2. Remove the front evaporator cover (Figure 2-
45). It is secured with two screws on top and
two screws on the bottom.
3. Remove rear air duct.
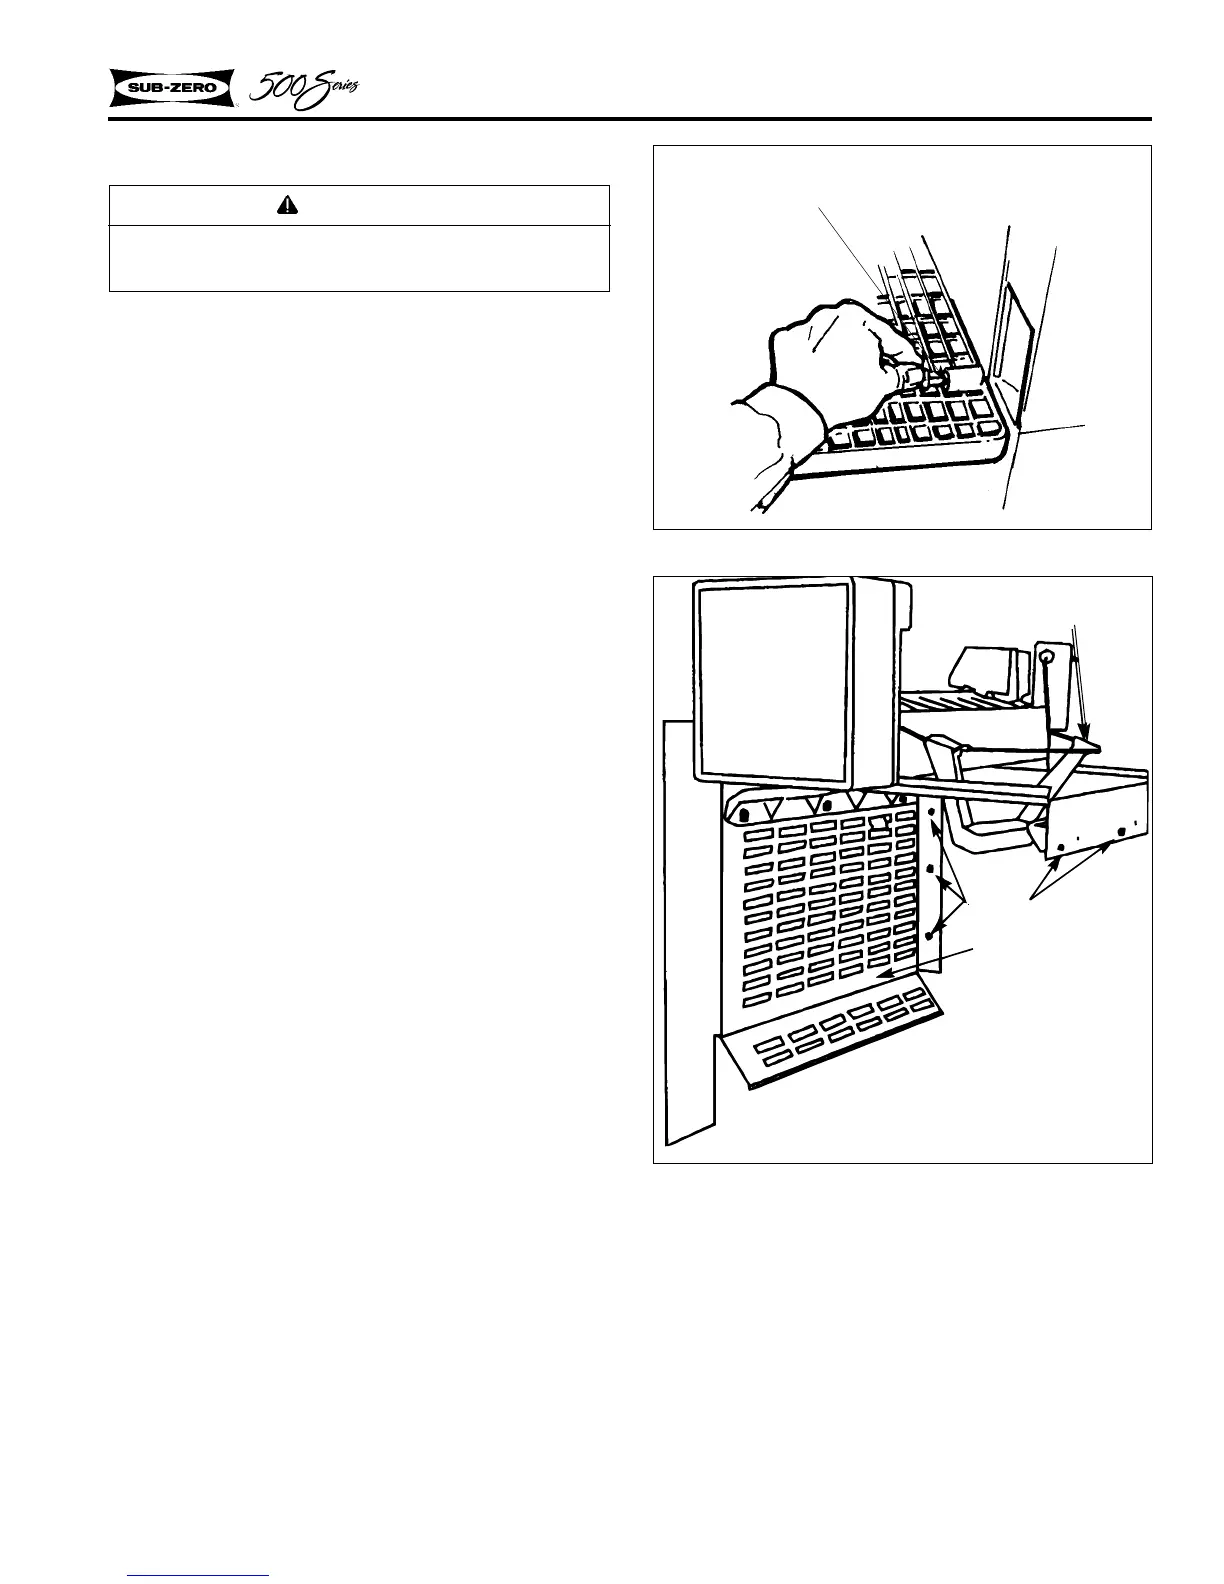
4. Remove the lower evaporator cover by pulling
out the two snap pins (Figure 2-46).
5. Remove the bucket mainframe assy. by
unscrewing three screws located on the freezer
side wall along with the three screws located
on the back wall (Figure 2-47).
6. Drop down the bucket mainframe assy.
Detach the wiring harness and remove the ice
maker.
NOTE: It is not necessary to drop the bucket
mainframe assy. to replace the modular head.
WARNING
Always disconnect electrical power to equip-
ment before attempting repairs.
Figure 2-46. Lower Evaporator Cover
Figure 2-47. Lower Evaporator Cover
Model 590
Snap Pins
Ice Level Arm
Assembly
Icemaker Carriage
Assembly
Screws
 Loading...