81
EN
DE
FR
NL
ES
PT
IT
DA
NO
SV
FI
TR
EL
PL
CS
SK
HU
SL
RU
UK
HR
RO
SR
BG
ET
LT
LV
80
If you have any problems or queries please call our Customer Relations team rst for expert help and advice:
0845 602 1454 - UK (01) 677 4003 - Ireland or consult our website - www.tefal.co.uk
Problems with your steam generator?
PROBLEMS CAUSES SOLUTIONS
The steam generator does not switch on
or the iron indicator light and the «ON-
OFF» light are not lit up.
The appliance is not switched on.
Check that the appliance is plugged in
correctly to a working power socket and
that it is switched on. Press the «ON-OFF»
button.
The «AUTO-OFF» system has activated
after 30 minutes of non-use and has
switched off your steam generator.
Press the «ON-OFF» restart button located
under the control panel.
Water runs out of the holes in the
soleplate.
The soleplate is not hot enough.
Wait for the thermostat light to stop
ashing before activating the steam
control.
The water has condensed in the pipes
because you are using steam for the
rst time or you have not used it for a
few minutes.
Press the steam button while holding your
iron away from the ironing board until the
steam starts to come out.
Water streaks appear on the linen.
Your ironing board cover is soaked with
water as it is not suited to the power of a
steam generator.
Ensure that you have suitable ironing
board.
White streaks come through the holes in
the soleplate.
Scale is coming out of the boiler because
it is not being rinsed regularly.
Rinse the collector (see § descaling your
steam generator).
Brown streaks come through the holes in
the soleplate and stain the linen.
You are using chemical descaling agents
or additives in the water for ironing.
Never add any products to the water tank
(see § What water can I use?).
Your linen is not rinsed sufciently or
you have ironed a new garment before
washing it.
Ensure linen is rinsed thoroughly to
remove any soap deposits or chemicals
on new garments which may be sucked
up by the iron.
The soleplate is dirty or brown and may
stain the linen.
You are using starch.
Always spray starch on the reverse side of
the fabric to be ironed.
There is no steam or there is little steam.
The water tank is empty (red warning
light ashing).
Fill the water tank and press the «OK»
until the light goes out.
The red «tank empty» button is ashing
even though the tank has been lled.
You have not pressed the «OK» restart
button.
Press the «OK» restart button on the
control panel.
Steam comes out around the collector.
The collector is not tightened correctly.
Tighten the collector but do not
overtighten it.
The collector seal is damaged. Contact an Approved Service Centre.
Steam or water is coming out from under
the appliance.
The appliance is faulty.
Stop using the steam generator and
contact an Approved Service Centre.
The «Anti-scale» button is ashing even
though the collector has been rinsed.
You have not pressed the «OK» restart
button.
Press the «OK» restart button located
under the control panel.
The soleplate is scratched or damaged.
You have put your iron down on a metal
iron rest or you have ironed over a zip or
metal fastener.
Always stand the iron upright or on the
iron rest. Do not iron over a zip or metal
fastener.
Your have cleaned your soleplate with an
abrasive or metal pad.
See chapter «Cleaning the soleplate».
The red «tank empty» light is ashing and
the «ON-OFF» button does not work.
The appliance has been stored in a cold
place (approximately <10C°).
Unplug the appliance.
Wait 3 hours for the appliance to reach
room temperature.
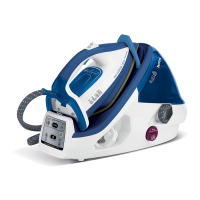
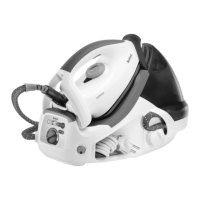
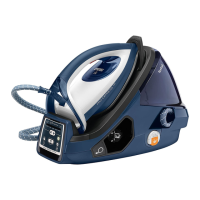
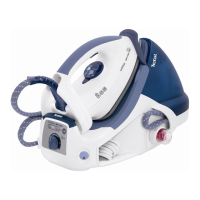
Beschreibung
System zum Fixieren des Bügeleisens auf dem Dampfgenerator - «Lock - System»
Ihr Dampfgenerator ist mit einem Haltebügel zur Verriegelung des Bügeleisens auf dem Gehäuse ausgestattet, der den
Transport und die Aufbewahrung erleichtert - fig.1:
• Verriegelung- fig.2.
• Entriegelung - fig.3.
Zum Transportieren Ihres Dampfgenerators am Griff des Bügeleisens:
- Stellen Sie das Bügeleisen auf die Ablage des Dampfgenerators und klappen Sie den Haltebügel über das Bügeleisen,
bis sie hörbar einrastet (durch ein «Klick» zu hören) - fig.2.
- nehmen Sie das Bügeleisen zum Transport Ihres Dampfgenerators am Griff hoch - fig.1.
Vorbereitung
Welches Wasser verwenden?
• Leitungswasser:
Ihr Gerät wurde für den Betrieb mit Leitungswasser entwickelt. Wenn Ihr Wasser sehr kalkhaltig ist, mischen Sie 50%
Leitungswasser mit 50% destilliertem Wasser aus dem Handel.
In einigen Küstenregionen kann der Salzgehalt Ihres Wassers hoch sein. Verwenden Sie in diesem Fall nur destilliertes
Wasser.
• Enthärter:
Es gibt mehrere Arten von Enthärtern und das Wasser der meisten kann in Ihrer Dampfbügelstation verwendet werden.
Einige Enthärter und vor allem diejenigen,
die chemische Produkte wie Salz verwenden, können jedoch weiße oder braune Spuren verursachen. Dies ist vor allem
bei Tischwasserltern der Fall.
Wenn Sie diese Art von Problem haben, empfehlen wir Ihnen, herkömmliches Leitungswasser oder Wasser aus der
Flasche zu verwenden. Wenn das Wasser ausgetauscht ist, sind mehrere Anwendungen erforderlich, um das Problem zu
lösen. Es wird empfohlen, die Dampffunktion das erste Mal auf Wäsche zu verwenden, die entsorgt werden kann, um zu
vermeiden, dass Ihre Kleidung beschädigt wird.
Beachten Sie:
Verwenden Sie niemals Regenwasser, Wasser, das Zusatzstoffe enthält (wie Stärke, Parfüm), oder Wasser aus
Haushaltsgeräten. Solche Zusatzstoffe können die Eigenschaften des Dampfs beeinussen und bei hoher Temperatur
in der Dampfkammer Ablagerungen verursachen, die zu Flecken auf Ihrer Wäsche führen können.
Befüllen des Wassertanks
• Stellen Sie das Gerät horizontal auf eine feste und hitzebeständige Fläche.
• Wenn die rote Leuchtanzeige «Wassertank leer» blinkt - fig.4, ist kein Dampf mehr vorhanden. Der Wassertank ist leer.
• Trennen Sie die Dampfstation vom Stromnetz. Öffnen Sie die Verschlussklappe des Wassertanks - fig.5.
• Füllen Sie den Behälter mithilfe eines Krugs mit Wasser auf, und achten Sie darauf, dass die «MAX»-Anzeige nicht
überschritten wird - fig.6.
• Schließen Sie die Verschlussklappe des Wassertanks - fig.7.
• Schließen Sie die Dampfstation wieder ans Stromnetz. Drücken Sie die «ON-OFF»-Taste - fig.8 auf dem Bedienfeld, bis
die Kontrollleuchte erlischt, um das Gerät neu zu starten, bevor Sie mit dem Bügeln fortfahren.
1. Komfortgriff
2. Dampftaste
3. Temperaturkontrollleuchte des Bügeleisens
4. Easycord System für Netzkabel
5. Bügeleisenablage
6. Netzkabel
7. Staufach für das Netzkabel
8. Dampfstoßtaste «Power-Zone»
9. Haltebügel zum Fixieren des Bügeleisens auf dem
Dampfgenerator
10. Verschlussklappe des Wassertanks
11. Wassertank 1,7 L
12. B
oiler zur Dampferzeugung (im Inneren des Gehäuses)
13. Dampfkabel
14. Dampfkabelkanal
15. Abdeckung des Kalk-Kollektors
16. Kalk-Kollektor
17. Bedienfeld
a. Kontrollleuchte «Entkalken»
b. Kontrollleuchte «Wassertank leer»
c. Restart Taste «OK»
d. Beleuchteter Ein-/Ausschalter «ON-OFF»
e. Beleuchtete Taste «ECO MIN»
18. Ultra-Gliss-Bügeleisensohle
BITTE LESEN SIE DIE SICHERHEITSANWEISUNGEN AM ANFANG
DER BROSCHÜRE, BEVOR SIE IHR GERÄT BENUTZEN.
1800129605 GV7550 E0.indd 81 22/02/13 14:16
 Loading...