STEP
7:
Add
Motor
Oil
to
Engine
A. The machine was shipped
without oil
in
the engine. Fill the
engine crankcase with oil before
starting. The
4HP
engine requires
approximately
21
ounces; the
5HP
engine approximately 19 ounces.
B. Use a clean, high quality deter-
gent oil having an
A.P.I. service
classification
of
SF
or SG.
• For outdoor temperatures above
32°F., use SAE 30 oil (SAE
10W30 is an acceptable substitute,
but may result in increased oil con-
sumption).
•
For
outdoor temperatures below
32°F., use
SAE
5W30 oil (SAE
lOW is an acceptable substitute).
For
temperatures below
O°F.
only,
SAE
OW30 is an acceptable
substitute.
•
Do
not use SAE lOW
40
oil.
C.
With the machine on level
ground, remove the oil fill plug on
STEP
8:
Install
the
Collection
Bag
Detailed instructions for installing
the collection bag are given on
Page 20
of
this Manual. See
"Installing or Emptying the
Collection Bag."
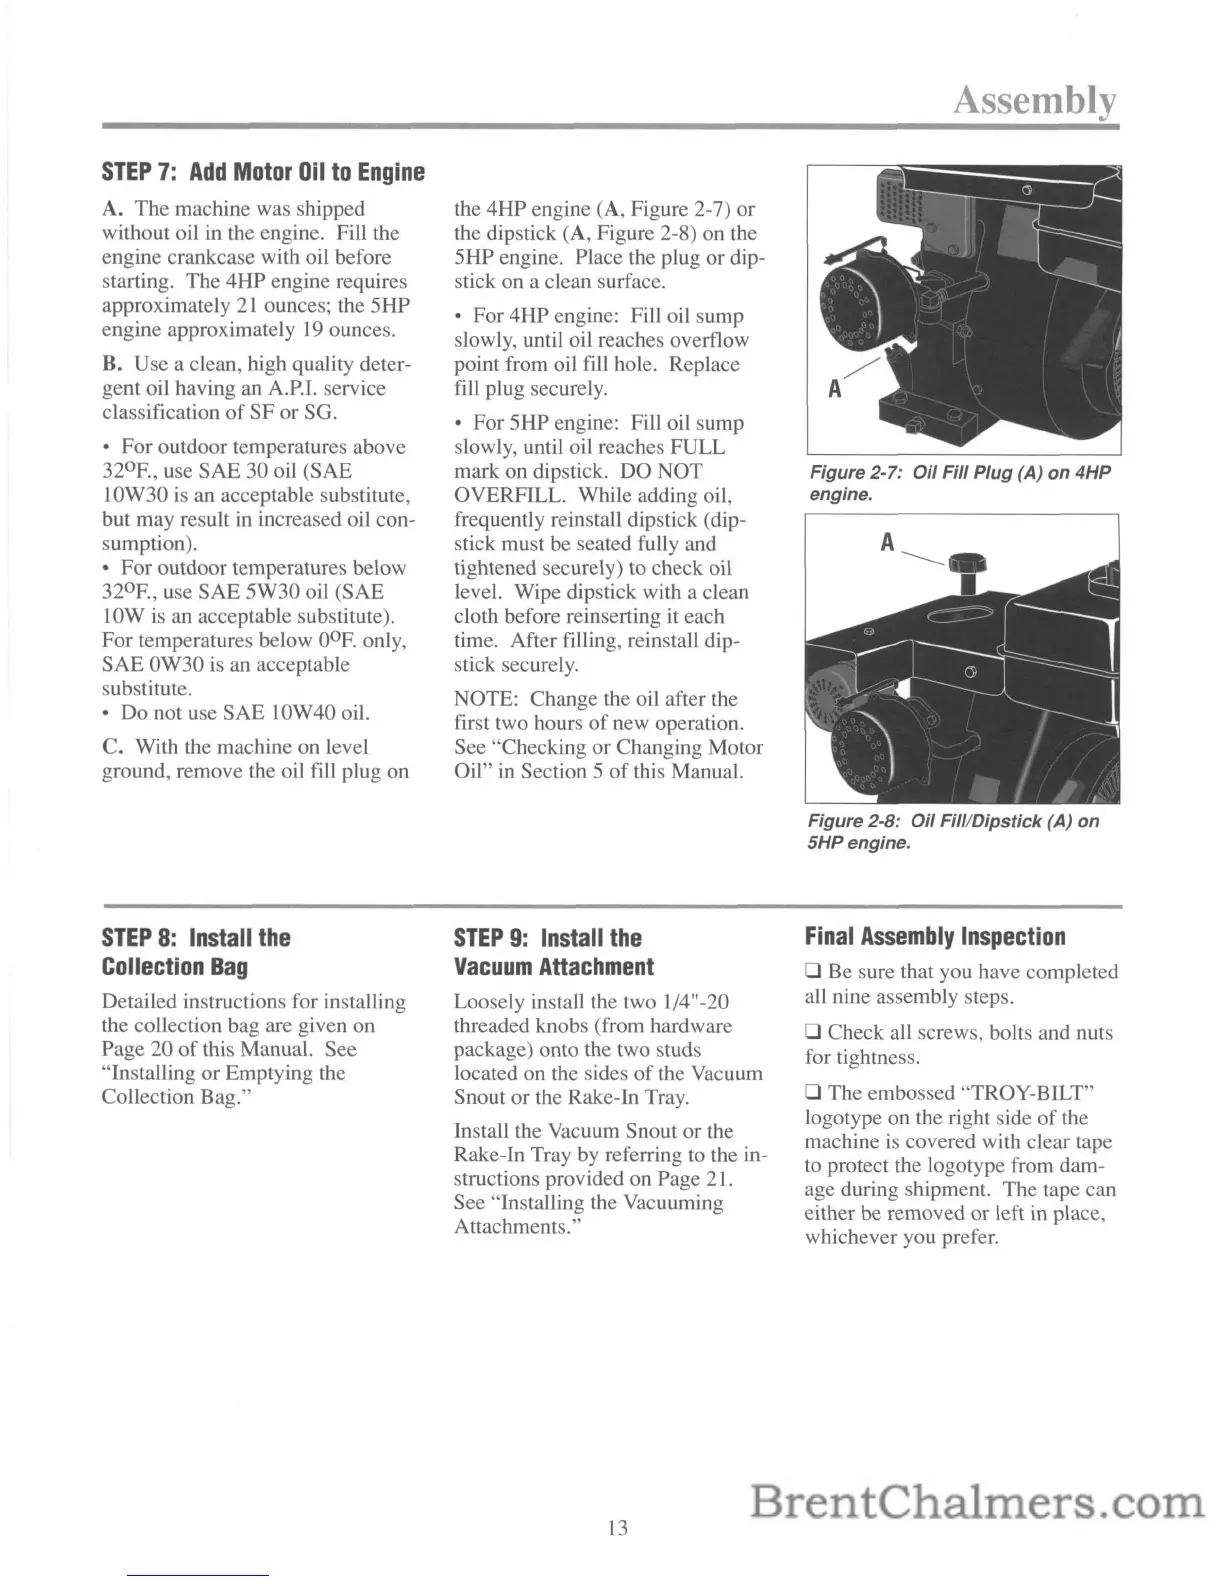
the
4HP
engine (A, Figure 2-7) or
the dipstick (A, Figure 2-8) on the
5HP
engine. Place the plug or dip-
stick on a clean surface.
• For
4HP
engine: Fill oil sump
slowly, until oil reaches overflow
point from oil fill hole. Replace
fill plug securely.
• For 5HP engine: Fill oil sump
slowly, until oil reaches
FULL
mark on dipstick. DO NOT
OVERFILL. While adding oil,
frequently reinstall dipstick (dip-
stick must be seated fully and
tightened securely) to check oil
level. Wipe dipstick with a clean
cloth before reinserting it each
time. After filling, reinstall dip-
stick securely.
NOTE: Change the oil after the
first two hours
of
new operation.
See "Checking or Changing Motor
Oil" in Section 5
of
this Manual.
STEP
9:
Install
the
Vacuum
Attachment
Loosely install the two 1/4"-20
threaded knobs (from hardware
package) onto the two studs
located on the sides
of
the Vacuum
Snout or the Rake-In Tray.
Install the Vacuum Snout or the
Rake-In Tray by referring to the in-
structions provided on Page 21.
See "Installing the Vacuuming
Attachments."
13
Assembly
Figure 2-7:
Oil
Fill
Plug
(A) on 4HP
engine.
Figure
2-8:
Oil
Fill/Dipstick
(A) on
5HPengine.
Final
Assembly
Inspection
o
Be
sure that you have completed
all nine assembly steps.
o Check all screws, bolts and nuts
for tightness.
o The embossed "TROY-BILT"
logotype on the right side
of
the
machine is covered with clear tape
to protect the logotype from dam-
age during shipment. The tape can
either be removed or left in place,
whichever you prefer.
 Loading...