NOTE: Complete the following
steps that apply
to
your model
(either 4HP or 5HP) ChipperNac.
E. 4HP MODEL:
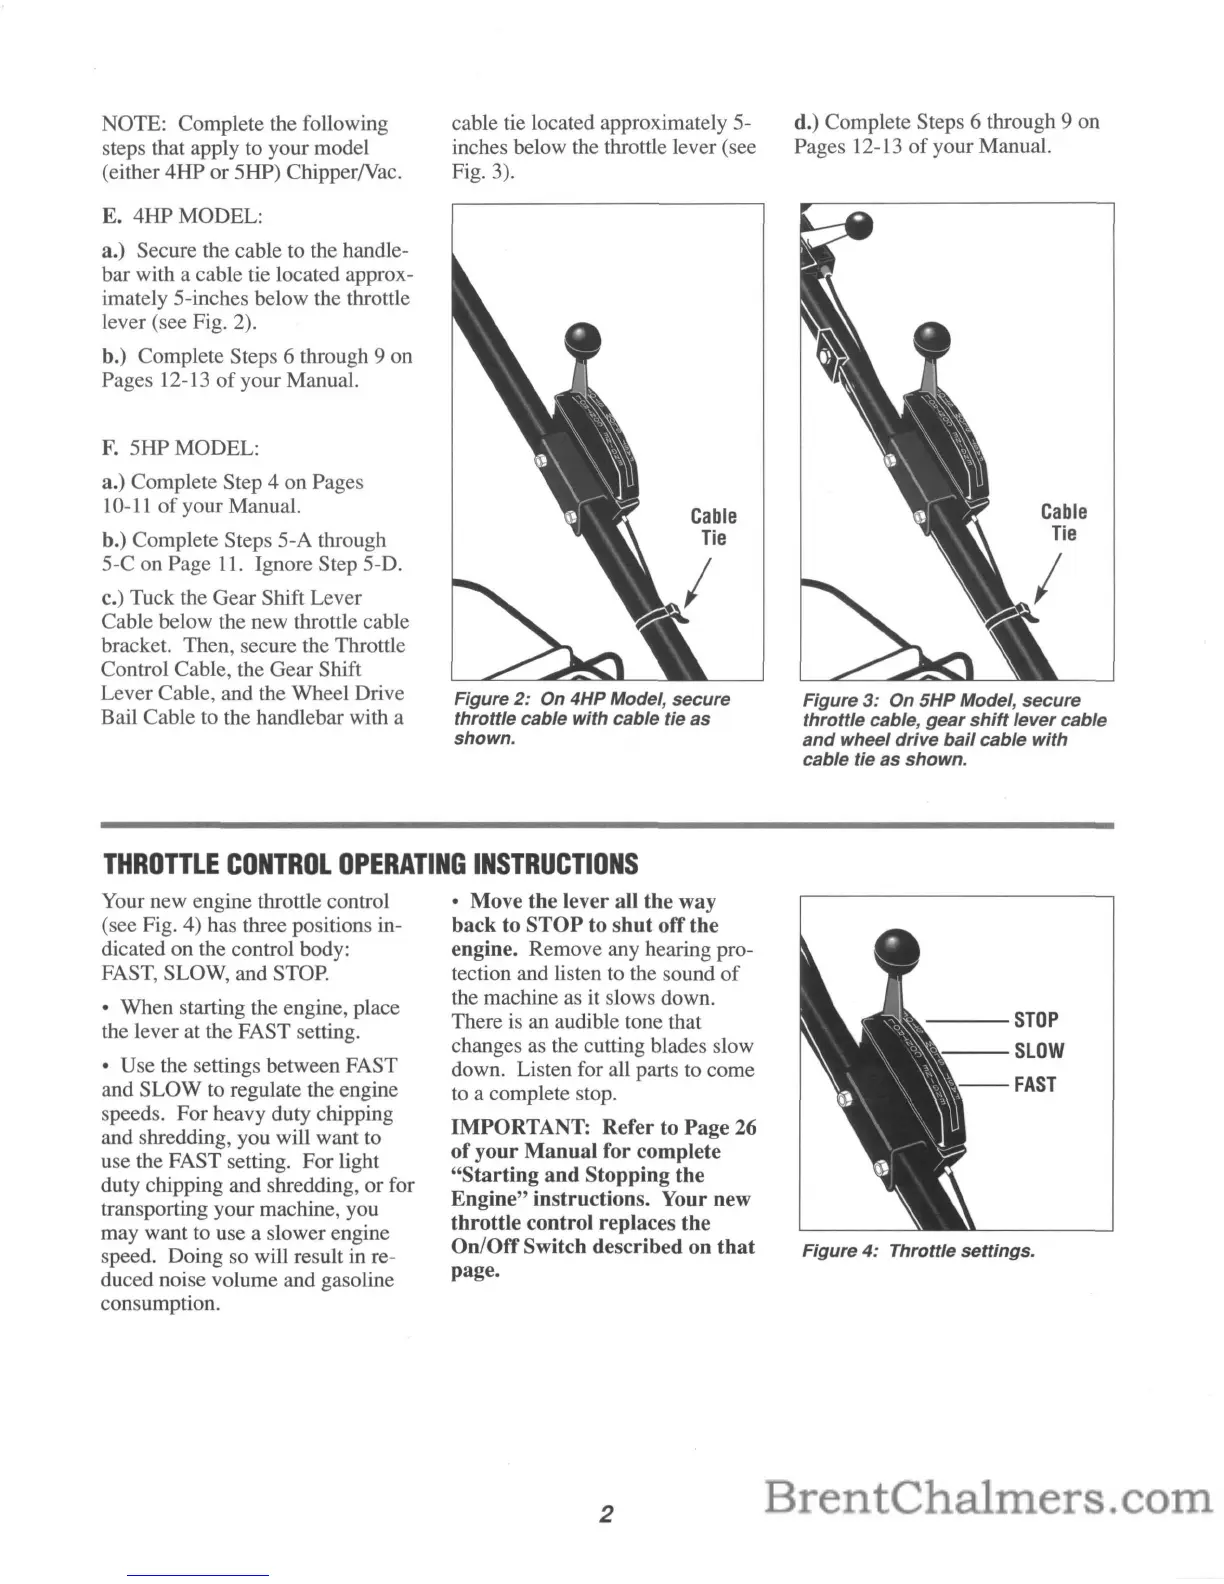
a.) Secure the cable
to
the handle-
bar with a cable tie located approx-
imately 5-inches below the throttle
lever (see Fig. 2).
b.) Complete Steps 6 through 9 on
Pages 12-13
of
your Manual.
F.
5HP MODEL:
a.) Complete Step 4 on Pages
10-11
of
your Manual.
b.) Complete Steps 5-A through
5-C on Page
11.
Ignore Step 5-D.
c.) Tuck the Gear Shift Lever
Cable below the new throttle cable
bracket. Then, secure the Throttle
Control Cable, the Gear Shift
Lever Cable, and the Wheel Drive
Bail Cable
to
the handlebar with a
cable tie located approximately 5-
inches below the throttle lever (see
Fig. 3).
Cable
Tie
Figure
2:
On 4HP Model, secure
throttle cable with cable tie
as
shown.
d.) Complete Steps 6 through 9 on
Pages 12-13
of
your Manual.
Cable
Tie
Figure
3:
On 5HP Model, secure
throttle cable,
gear
shift
lever cable
and
wheel drive
bail
cable with
cable tie
as
shown.
THROTTLE
CONTROL
OPERATING
INSTRUCTIONS
Your new engine throttle control
(see Fig. 4) has three positions in-
dicated on the control body:
FAST, SLOW, and STOP.
• When starting the engine, place
the lever at the FAST setting.
• Use the settings between FAST
and SLOW to regulate the engine
speeds. For heavy duty chipping
and shredding, you will want to
use the FAST setting. For light
duty chipping and shredding, or for
transporting your machine, you
may want to use a slower engine
speed. Doing so will result in re-
duced noise volume and gasoline
consumption.
• Move the lever all the way
back
to
STOP
to
shut
offthe
engine. Remove any hearing pro-
tection and listen
to
the sound
of
the machine
as
it slows down.
There is an audible tone that
changes
as
the cutting blades slow
down. Listen for all parts
to
come
to
a complete stop.
IMPORTANT: Refer to Page 26
of
your
Manual
for complete
"Starting
and
Stopping the
Engine" instructions. Your new
throttle
control replaces the
On/Off
Switch described on
that
page.
2
---STOP
--SLOW
--FAST
Figure
4:
Throttle settings.
 Loading...