ENGINE
MAINTENANCE
Maintenance/Repairs
CAUTION
Before
inspecting,
cleaning
or
servicing
the
machine,
shut
off
engine,
disconnect
spark
plug
wire,
and
make
sure
that all moving parts
have
come
to
a complete
stop.
Failure
to
follow
these
in-
structions
can
result
in
per-
sonal injury
or
property
damage.
CHECKING
AND
CHANGING
THE
ENGINE
OIL
•
Check
oil level
every
five oper-
ating hours and before using
equipment
each
day.
•
Change
oil after first
two
hours
of
new
operation
and
every
25 op-
erating hours thereafter.
IMPORTANT:
Change
oil
more
often
when
operating
in
ex-
tremely
dusty
or
dirty
conditions.
To
Check
Oil
level:
1. Place the
machine
on level
ground.
Shut
off
the engine, dis-
connect the spark plug wire
from
the spark plug,
and
make sure
that all moving parts have come to
a complete stop.
2.
Clean
the area
around
the oil
fill plug (A,
Figure
5-1)
or
the dip-
stick
cap
(A,
Figure
5-2) to avoid
contaminating the oil with dirt, etc.
Remove
the
oil
fill plug
or
dipstick
cap.
3.
On
the
4HP
engine, the oil
should
be
at
the
overflow
point
in
the oil fill hole.
If
the oil level is
low, add
recommended
oil.
See
"STEP
7:
Add
Motor
Oil
to
Engine"
on
Page
13.
After
check-
ing
or
adding oil, replace the oil
fill plug securely.
4.
On
the
5HP
engine, wipe the
dipstick with a clean rag, reinstall
the dipstick securely, then
remove
the dipstick.
If
the oil is
not
up to
the
FULL
mark
on
the dipstick,
add
recommended
oil.
See
"STEP
7:
Add
Motor
Oil to
Engine"
on
Page
13.
After
checking
or
adding
oil, replace
the
dipstick securely.
To
Change
Oil:
1.
Change
the oil while the
engine
is still
warm
from
recent
operation.
Shut
off
the engine
and
discon-
nect the spark plug wire from the
spark plug.
2.
An
oil drain plug is located at
the front and rear
of
the engine (see
B,
Figures 5-1 and 5-2). Either
plug
may
be used.
3.
Prop
up the
machine
so
that the
selected oil drain plug is at the
lowest point on the engine.
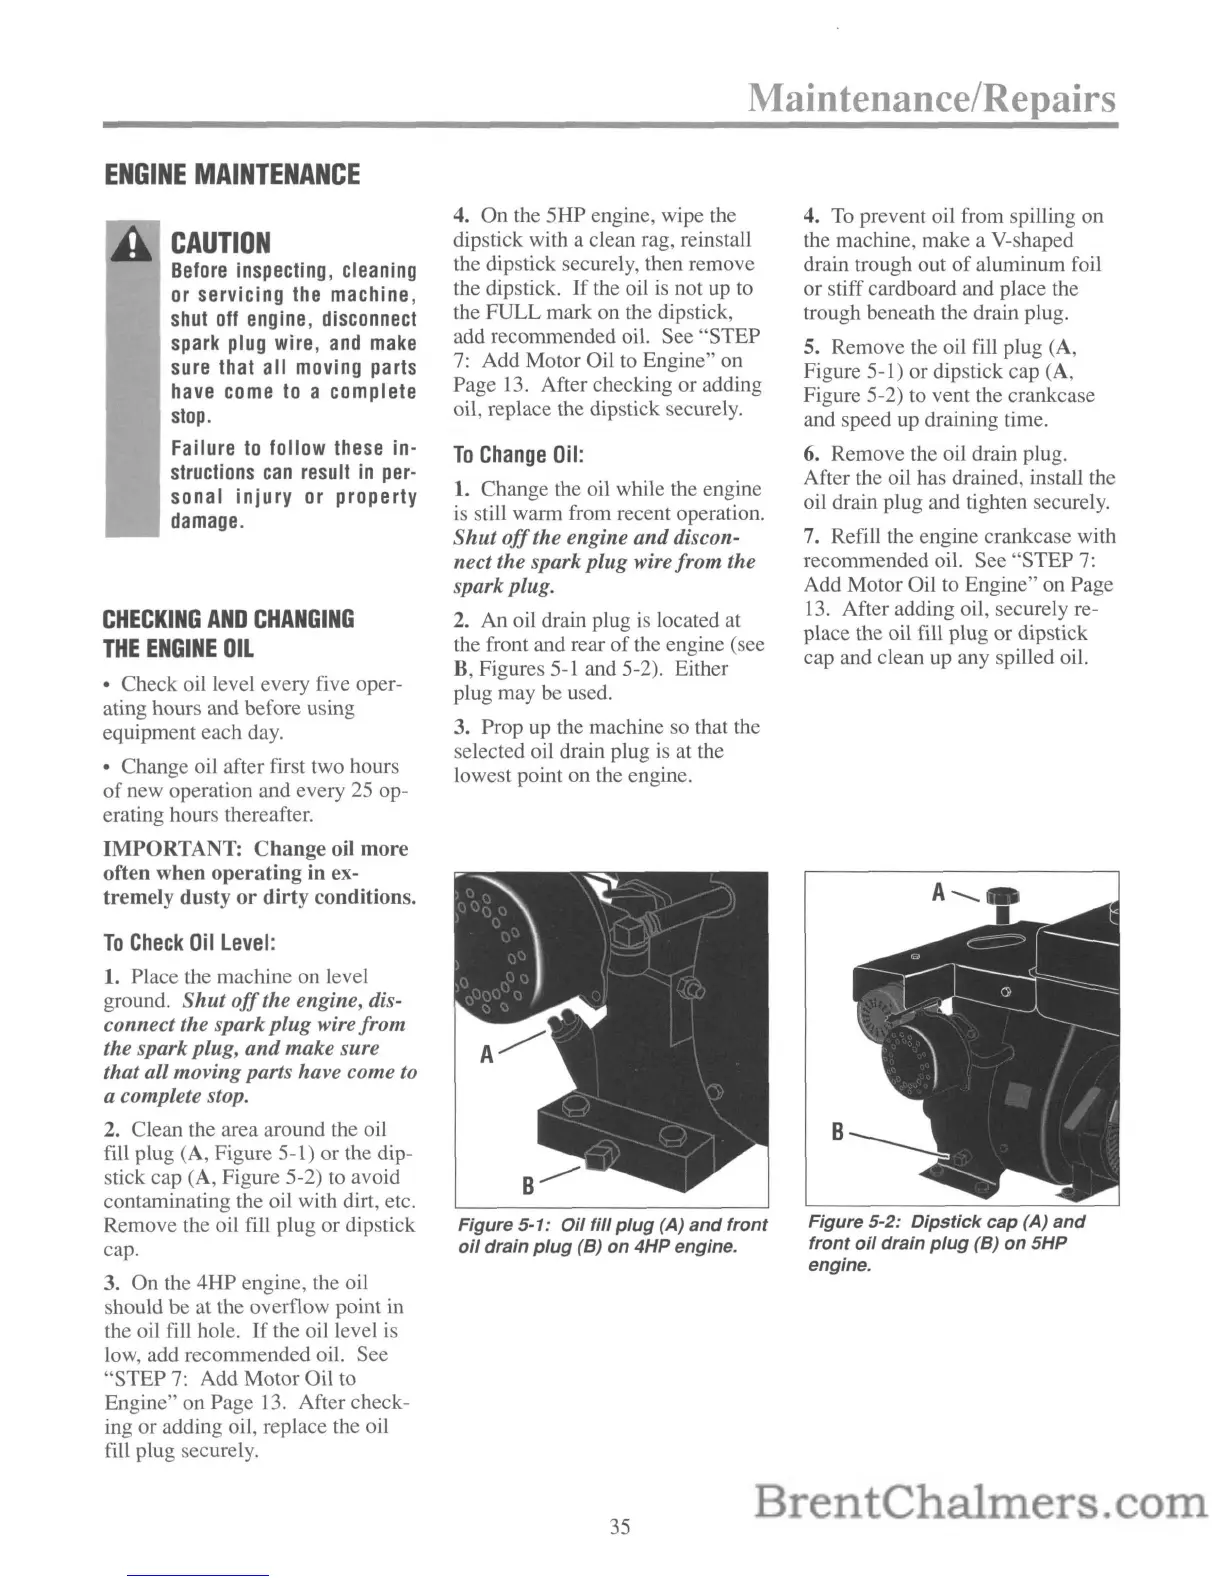
Figure 5-1:
Oil
fill
plug
(A)
and
front
oil
drain
plug
(B)
on
4HP engine.
35
4. To prevent oil from spilling
on
the machine,
make
a V-shaped
drain trough
out
of
aluminum
foil
or
stiff cardboard and
place
the
trough beneath the drain plug.
5.
Remove
the oil fill
plug
(A,
Figure
5-1)
or
dipstick cap (A,
Figure 5-2) to
vent
the crankcase
and speed up draining time.
6.
Remove
the oil drain plug.
After
the oil has drained, install the
oil drain plug
and
tighten securely.
7. Refill the
engine
crankcase with
recommended
oil.
See
"STEP
7:
Add
Motor
Oil to
Engine"
on
Page
13.
After
adding oil, securely re-
place
the oil fill
plug
or
dipstick
cap
and clean up any spilled oil.
Figure 5-2:
Dipstick
cap (A)
and
front
oil
drain
plug
(B)
on
5HP
engine.
 Loading...