38
Piston and connecting rod
15
Slide the piston and connecting rod through the cyl-
inder bore and down to the big end journal. Turn the
connecting rod so that the arrow on the upper side
of the piston points towards the front end of the en-
gine.
16
Remove the protective tubes from the connecting
rod screws. Clean the connecting rod bearing cap
and the lower bearing shell. Install the bearing shell
in the cap with the locking lug slid well into the cut
out. Lubricate the bearing with engine oil. Install the
cap and ensure that the unit number is the same as
on the connecting rod and that the numbers are on
the same side. Install new nuts for the connecting
rod screws. Tighten them evenly and in stages to
47 Nm.
17
Check that the crankshaft can be freely turned.
18
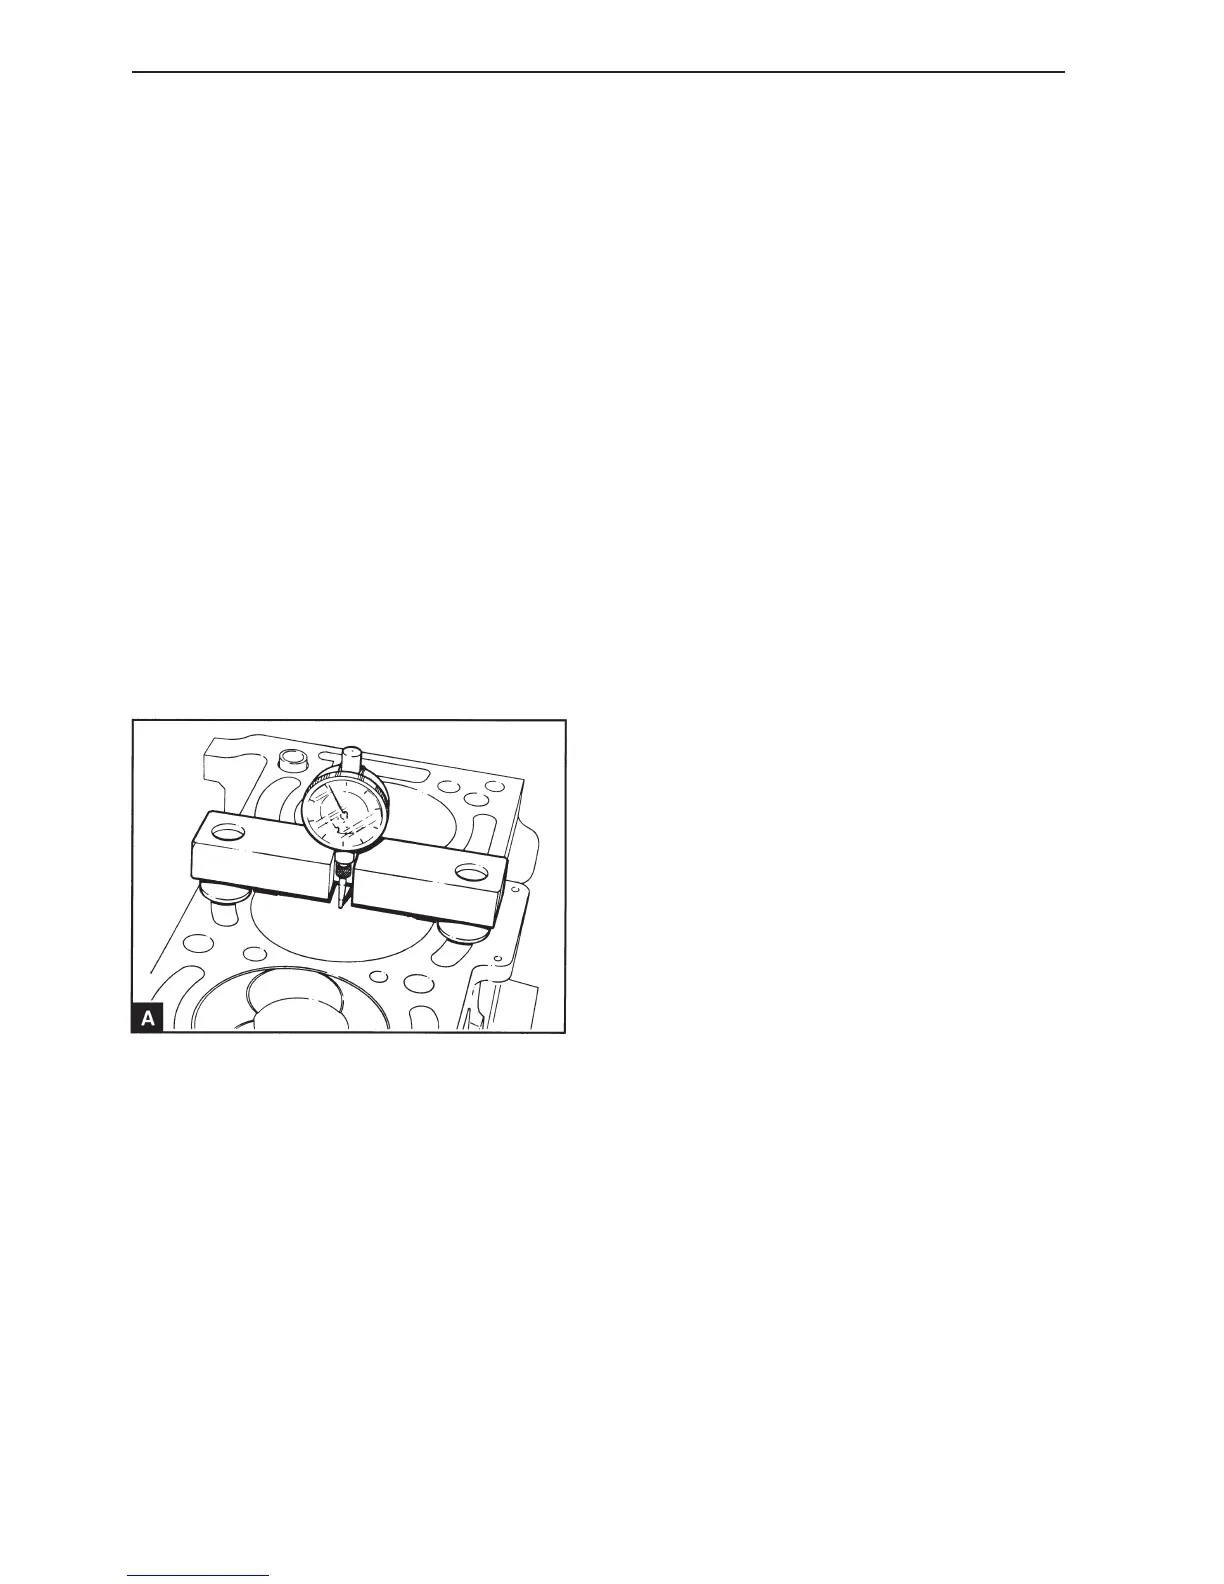
Check the piston height above the cylinder block
surface with the piston height measuring tool (A).
Place the measuring tool on a flat surface and zero
the measuring scale. Turn the crankshaft until the
piston is approximately at top dead center. Locate
the measuring tool over the cylinder bore with the
dial gauge measuring point in contact with the pis-
ton. Turn the crankshaft so that the piston moves to
its highest position and note the value. The correct
value for the piston height is given in the Workshop
manual “Technical data”. If a new service piston of
a lower height class has been installed, see opera-
tion 13A-05, the piston height may be 0.10 mm low-
er than the lowest parameter. The piston may not be
higher than the upper limit. Metal must not be re-
moved from the upper side of the piston.
19
Install the oil screen and extractor pipe if required,
operation 18A-04.
20
Install the oil pan, operation 18A-03.
21
Install the cylinder head assembly, operation 12A-
07.
22
Fill the oil pan to the correct level with approved en-
gine oil.
23
Fill the engine coolant system.
 Loading...