41
Piston and connecting rod
8
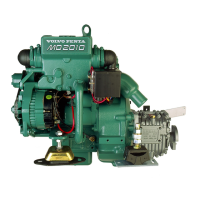
Place the connecting rod with piston upside down.
The locating lug (B2) on the connecting rod must be
on the same side as the arrow (B1) on the under-
side of the piston.
9
Lubricate the piston bolt position in the piston with
fresh engine oil and slide in the piston bolt towards
the snap ring. If the piston bolt has difficult to insert,
heat the piston to 40°-50°C before the piston bolt is
installed.
10
Install a new snap ring in the other piston bolt posi-
tion on the piston. Ensure that it goes into the
groove correctly.
11
Install the piston rings, operation 13A-04.
Piston and piston rings,
inspection (13A-06)
1
Check the piston for wear and damage.
2
Check that the piston rings can move freely in its
groove and that no ring is broken.
3
Remove the piston rings, operation 13A-04. Clean
the piston ring and the piston ring grooves.
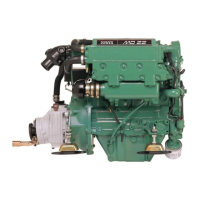
4
Install the new piston rings in the piston ring groove
and check the ring groove wear using the feeler
gauge (A). Compare the piston ring play in the
groove to the values that apply to new components
in the Workshop Manual “Technical Data”. Replace
the cylinder if necessary.
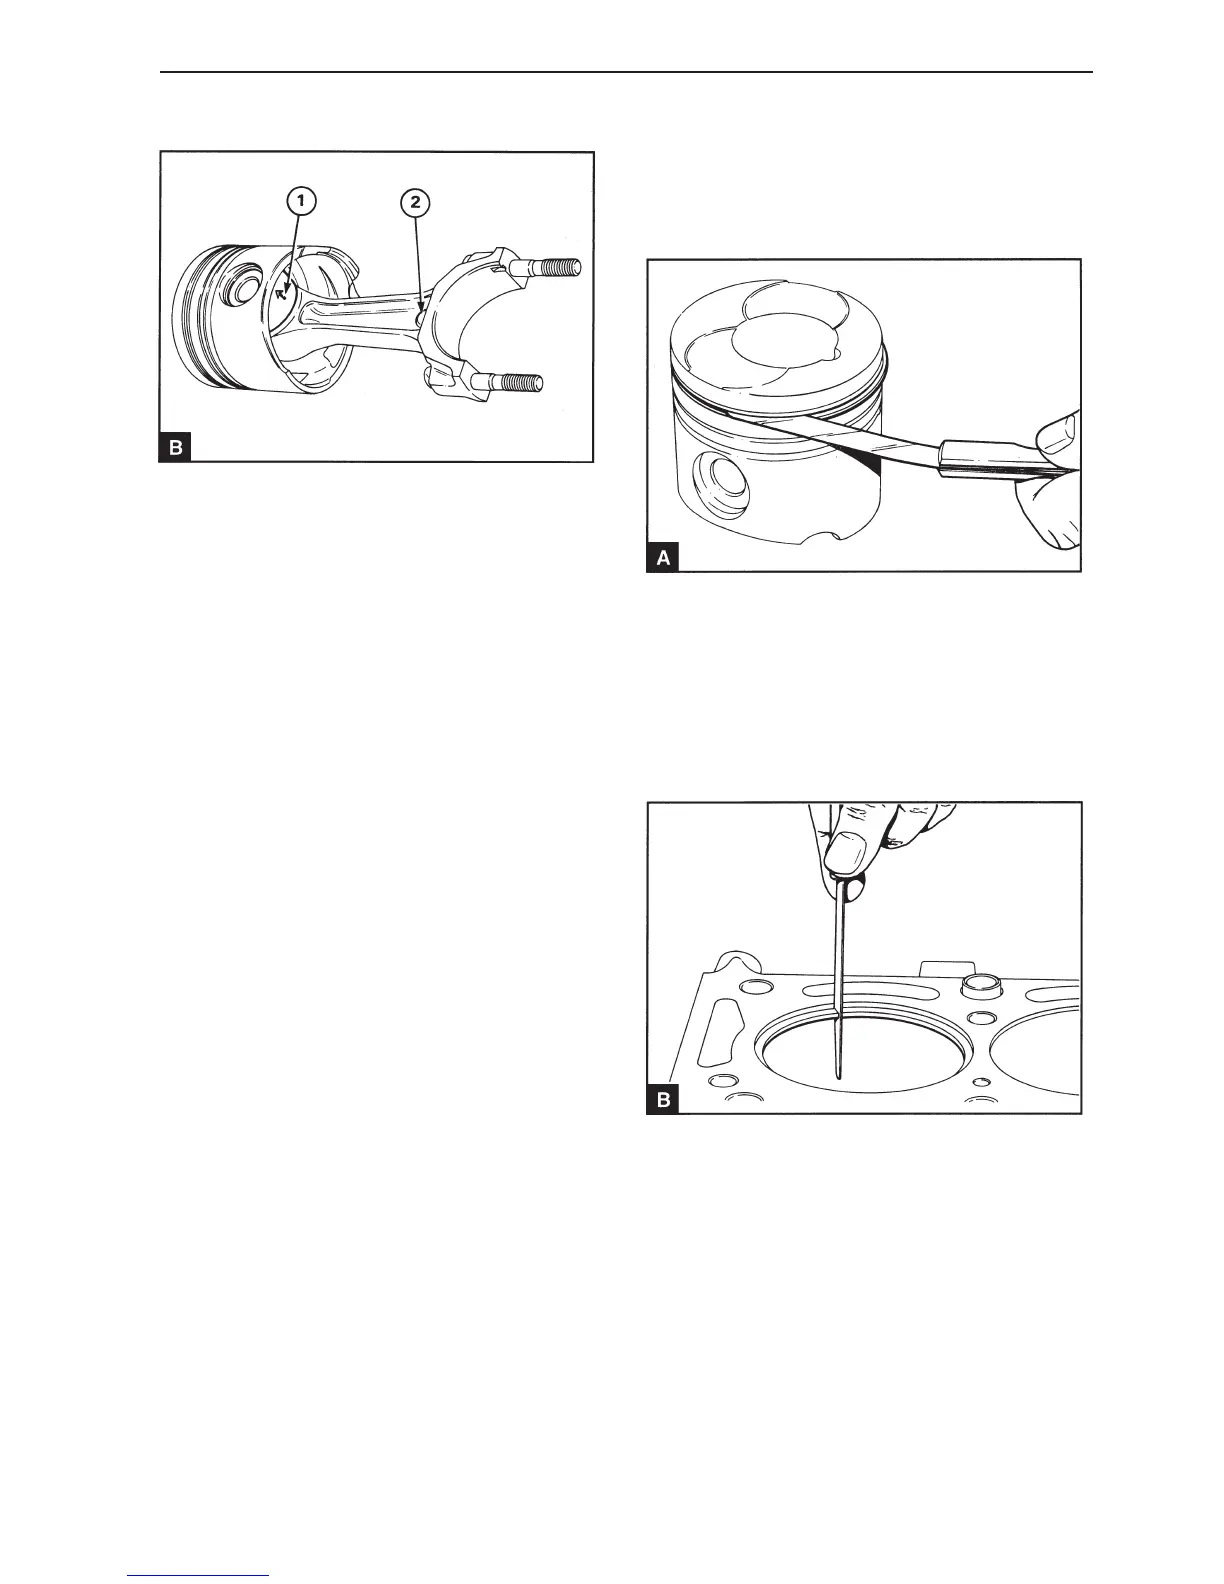
5
Check that all the soot has been removed from the
upper section of the cylinder bore. Install the piston
rings in the upper section of the cylinder bore and
measure the ring gap with a feeler gauge (B). The
expander ring must be installed on the oil scraper
ring when the ring gap is measured. The ring gap for
the new components is given in the Workshop man-
ual “Technical data”.
 Loading...