Electrical
Key Switch 70-21
70
Key Switch
Key Switch
WARNING! For your safety against electric shock
and to protect electrical components, perform
the following tasks:
• Remove Low Power B+ (CONT) high voltage
fuse.
• Remove DC/DC high voltage fuse.
• Disconnect the negative lead from the 12 volt
battery.
NOTICE: Before carrying out any work on the
electrical system, remove the key from the key
switch.
Tools Required (includes tools required for
parent jobs):
• T25
• T30
• 2mm hex wrench
• 3/16” standard screwdriver
• 10mm socket and ratchet
• locking pliers
New Fasteners Required:
• Cable ties (quantity: 4)
• Break away hex bolt set PN: 90-0293701
(quantity: 1 package)
Removal
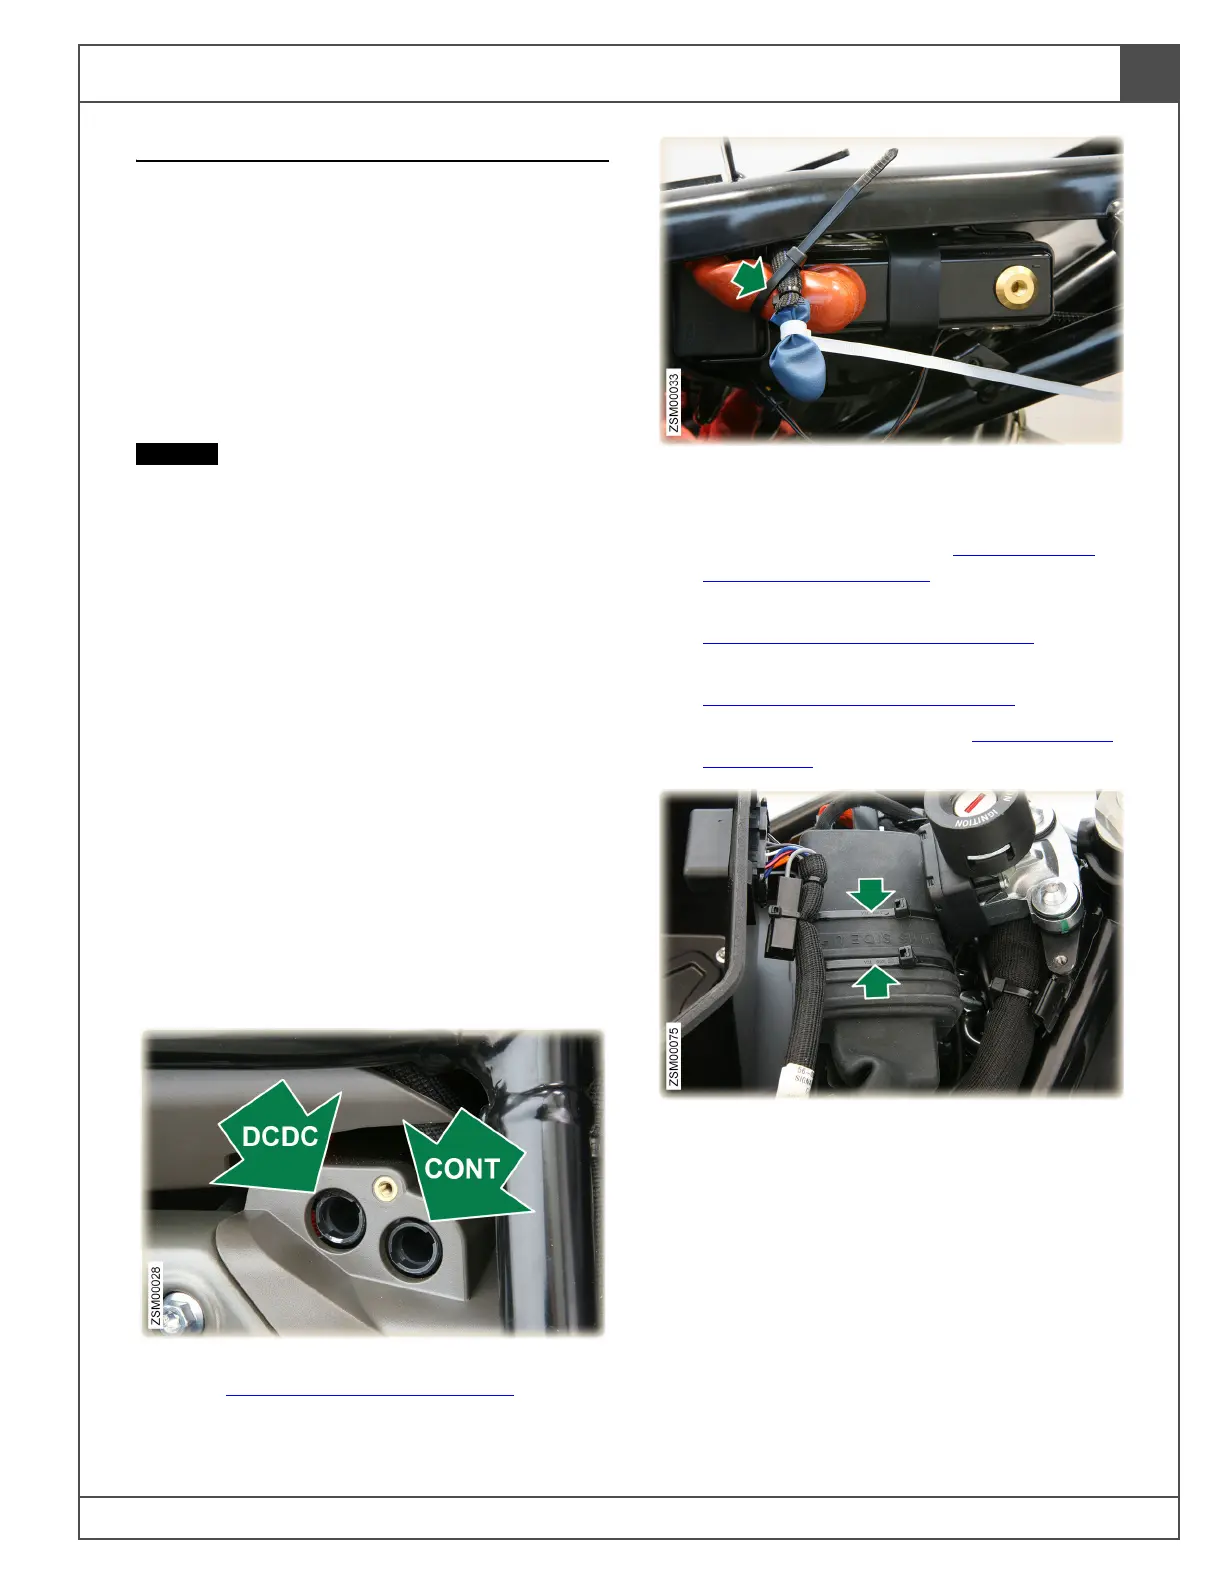
1. Remove high voltage DCDC and CONT fuses.
See High Voltage Fuses, page 70.1.
2. Unbolt the negative battery terminal eyelet.
Cover eyelet with insulating material. Use
cable tie to secure negative battery wire to the
positive battery cable. See 12 Volt Battery
(Disconnect), page 70.3.
3. Remove headlight upper fairing. See
Headlight Upper Fairing, page 60.2.
4. Remove left and right outer side fairings. See
Side Fairings (Outer), page 60.14.
5. Remove tank assembly. See Tank Removal,
page 60.10.
6. Cut cable ties (x2) securing CCM to the HCU
bracket.
Note: Replace cable ties (x2) during the
installation process.
7. Set CCM aside to gain access to key switch
harness connector.

 Loading...