34/72 Installation
BoschRexrothAG, axial piston variable pump A4VSO, RE 92050-01-X-B1/2019.08.23
CAUTION
Risk ofdamage with inside-reservoir installation!
To prevent damages to the axial piston unit, all plastic parts (e.g. protective
caps,covers) must be removed prior to installation in the reservoir.
▶ Remove all plastic parts before installing the axial piston unit in the reservoir.
Make sure that noparts ofthem remain inthe reservoir.
▶ Axial piston units with electrical component must not be installed below the
hydraulic fluid level.
4
3
SB
h
t min
h
min
R(L)
T
U
K
1,2
S
h
t min
h
min
R(L)
T
U
S
K
1,2
SB
1)
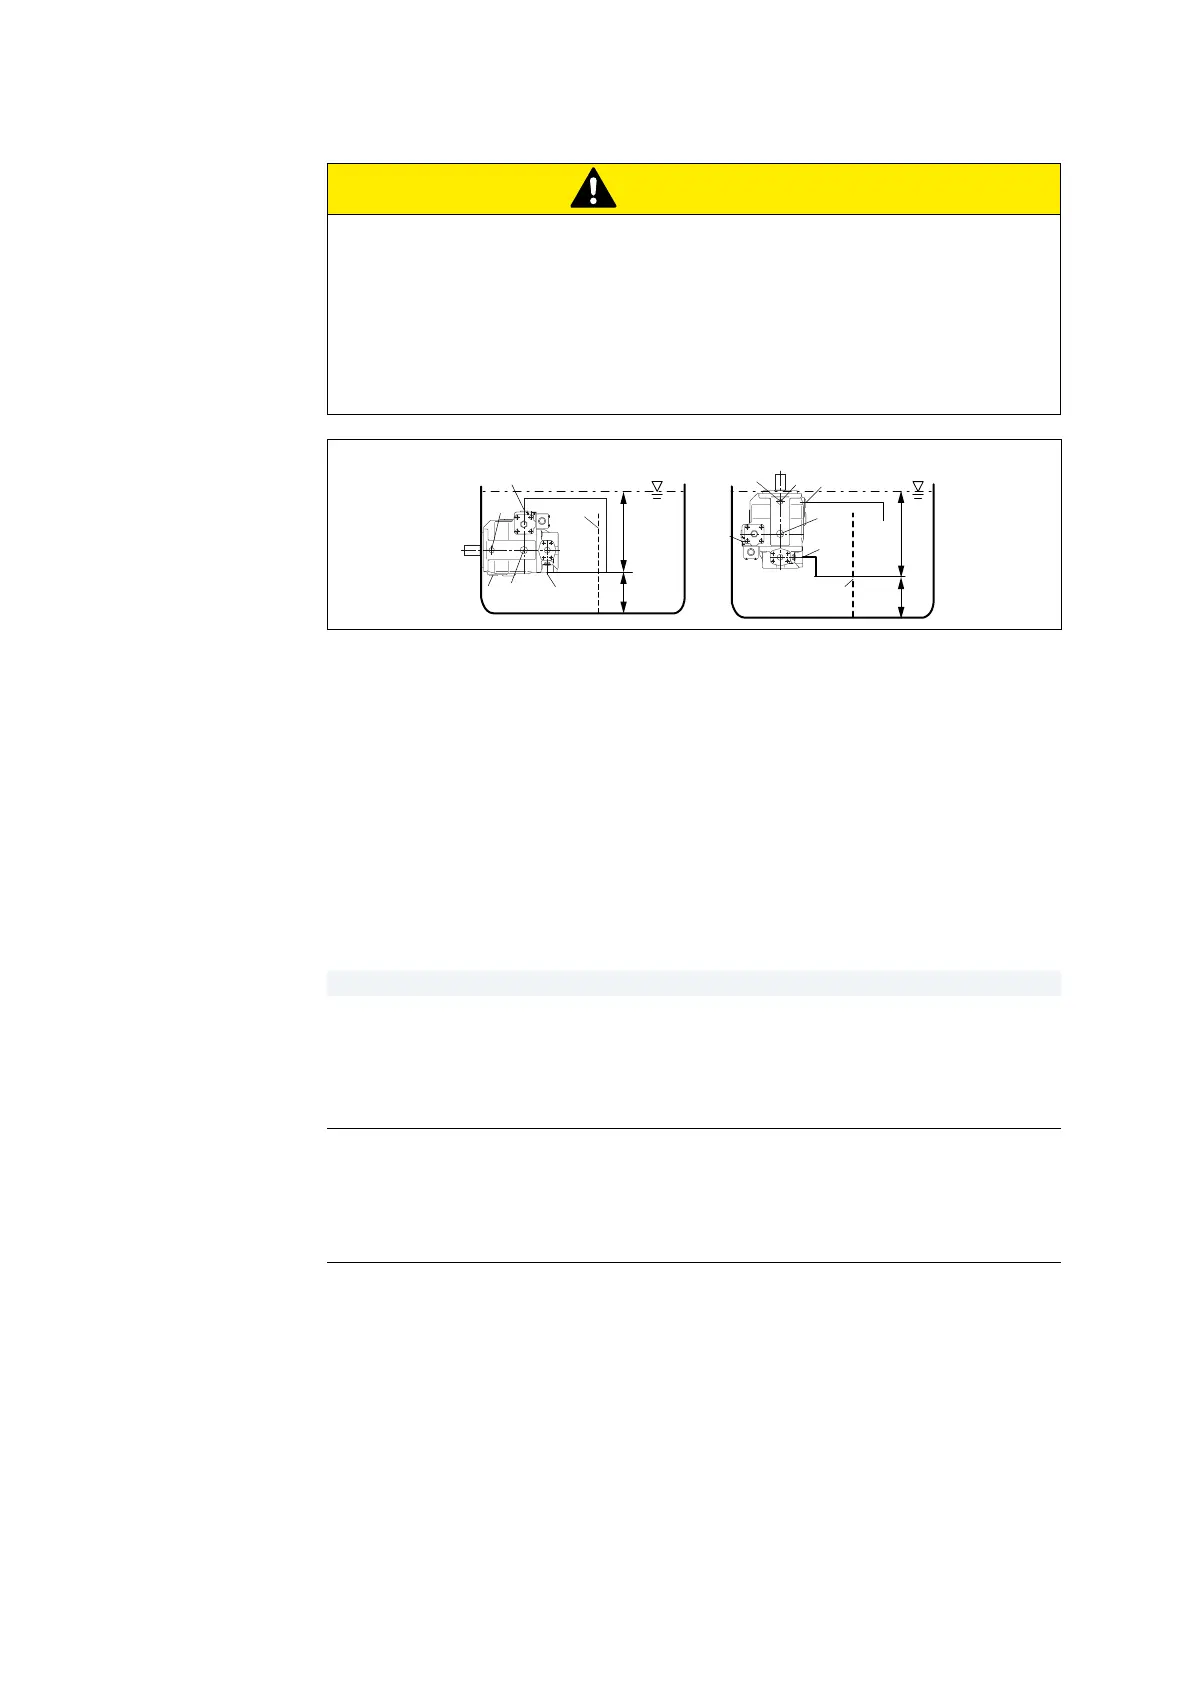
Fig. 7: Inside-reservoir installation with horizontal installation position3 and vertical installation
position 4
1)
Install bearing flushing, please refer to data sheet (Part II) for minimum flushing flow
R(L) Fluid filling and air bleeding
(drainport)
h
min
Minimum required distance
toreservoir bottom (100mm)
T Fluid drain h
t min
Minimum required immersion depth
(200mm)
S Suction port SB Baffle (baffle plate)
U Flushing port
Table 13: Inside-reservoir installation
Installation position Air bleed Filling
3 (drive shaft horizontal) via the highest open
portR(L)
With piping:
The axial piston unit must be filled before
the piping is attached.
Without piping:
Automatically via all open ports, by
position below hydraulic fluid level
4 (drive shaft
verticallyup)
Via the highest open
portT and bearing
flushing U
With piping:
The axial piston unit must be filled before
the piping is attached.
Without piping:
Automatically via all open ports, by
position below hydraulic fluid level
7.3.3 Above-reservoir installation
Above-reservoir installation means that theaxial piston unit isinstalled above
theminimum fluid level ofthereservoir.
 Loading...