4 - 18
Adjustment
Adjustment
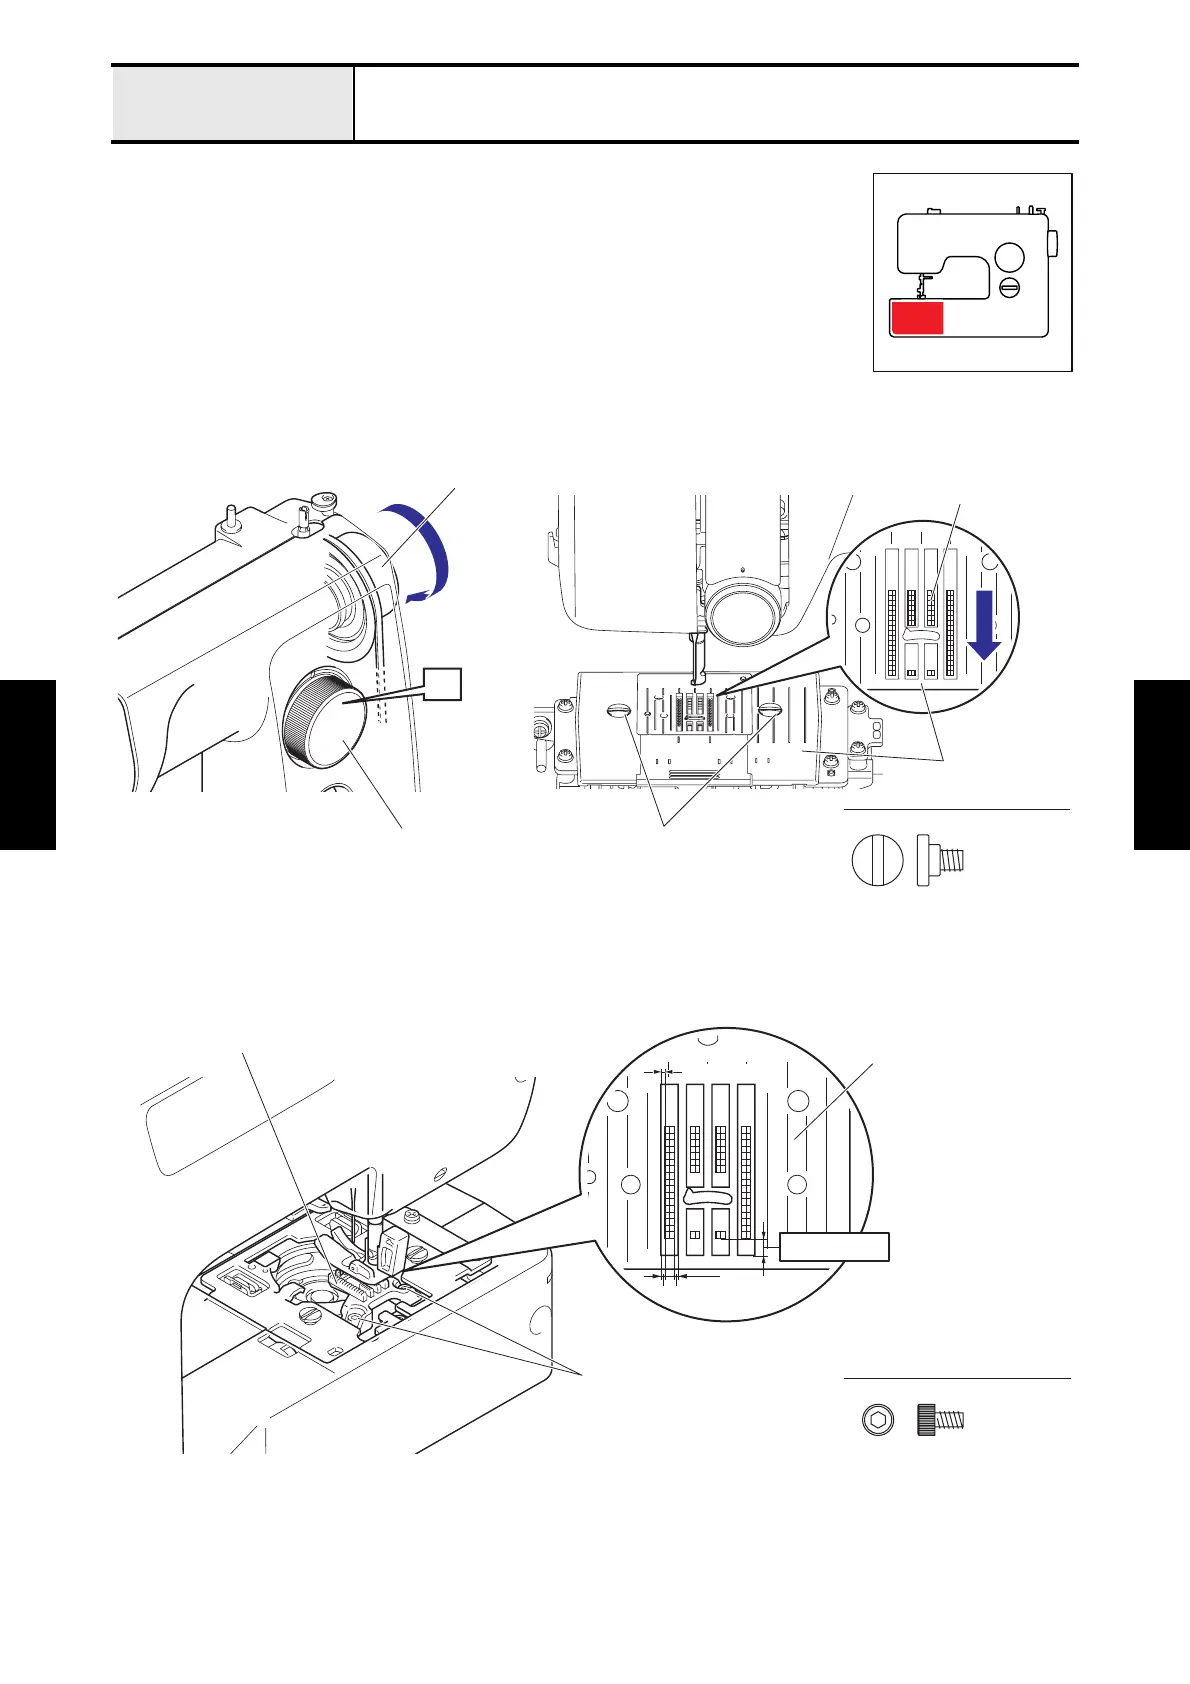
Adjustment Feed dog position (front/back and left/right)
[Standard]
•
At pattern selecting dial [10] (straight stitch/center base line/feed length: maximum), the
minimum clearance between the front of the feed dog and the needle plate should be 0.6 to
1.3 mm.
•
The left and right clearance between the feed dog and the needle plate should be the same.
[Adjustment]
1. Remove the presser foot and the presser foot holder.
2. Turn the pattern selecting dial until the [10] is the topmost position.
3. Turn the pulley by hand and move the feed dog to the front position.
4. Remove the two screws of the needle plate assy, and remove the needle plate assy.
5. Loosen the two screws of the feed dog. Set the needle plate assy temporarily, and adjust the position of the
feed dog.
6. Tighten the two screws of the feed dog to secure the feed dog to the feed stand assy.
7. Tighten the two screws of the needle plate assy to secure the needle plate assy to the feed module.
Screw needle plate
10
Pattern
selecting dial
Pulley
Screws
Feed dog
Needle plate assy
Bolt, Socket M3X5
Feed dog
Screws
with hex wrench 2.5 mm
Parallel
0.6 - 1.3 mm
a b a = b
Needle plate assy
 Loading...