4 - 23
Adjustment
Adjustment
Adjustment Left and right stitch of buttonhole stitch length
<From previous page>
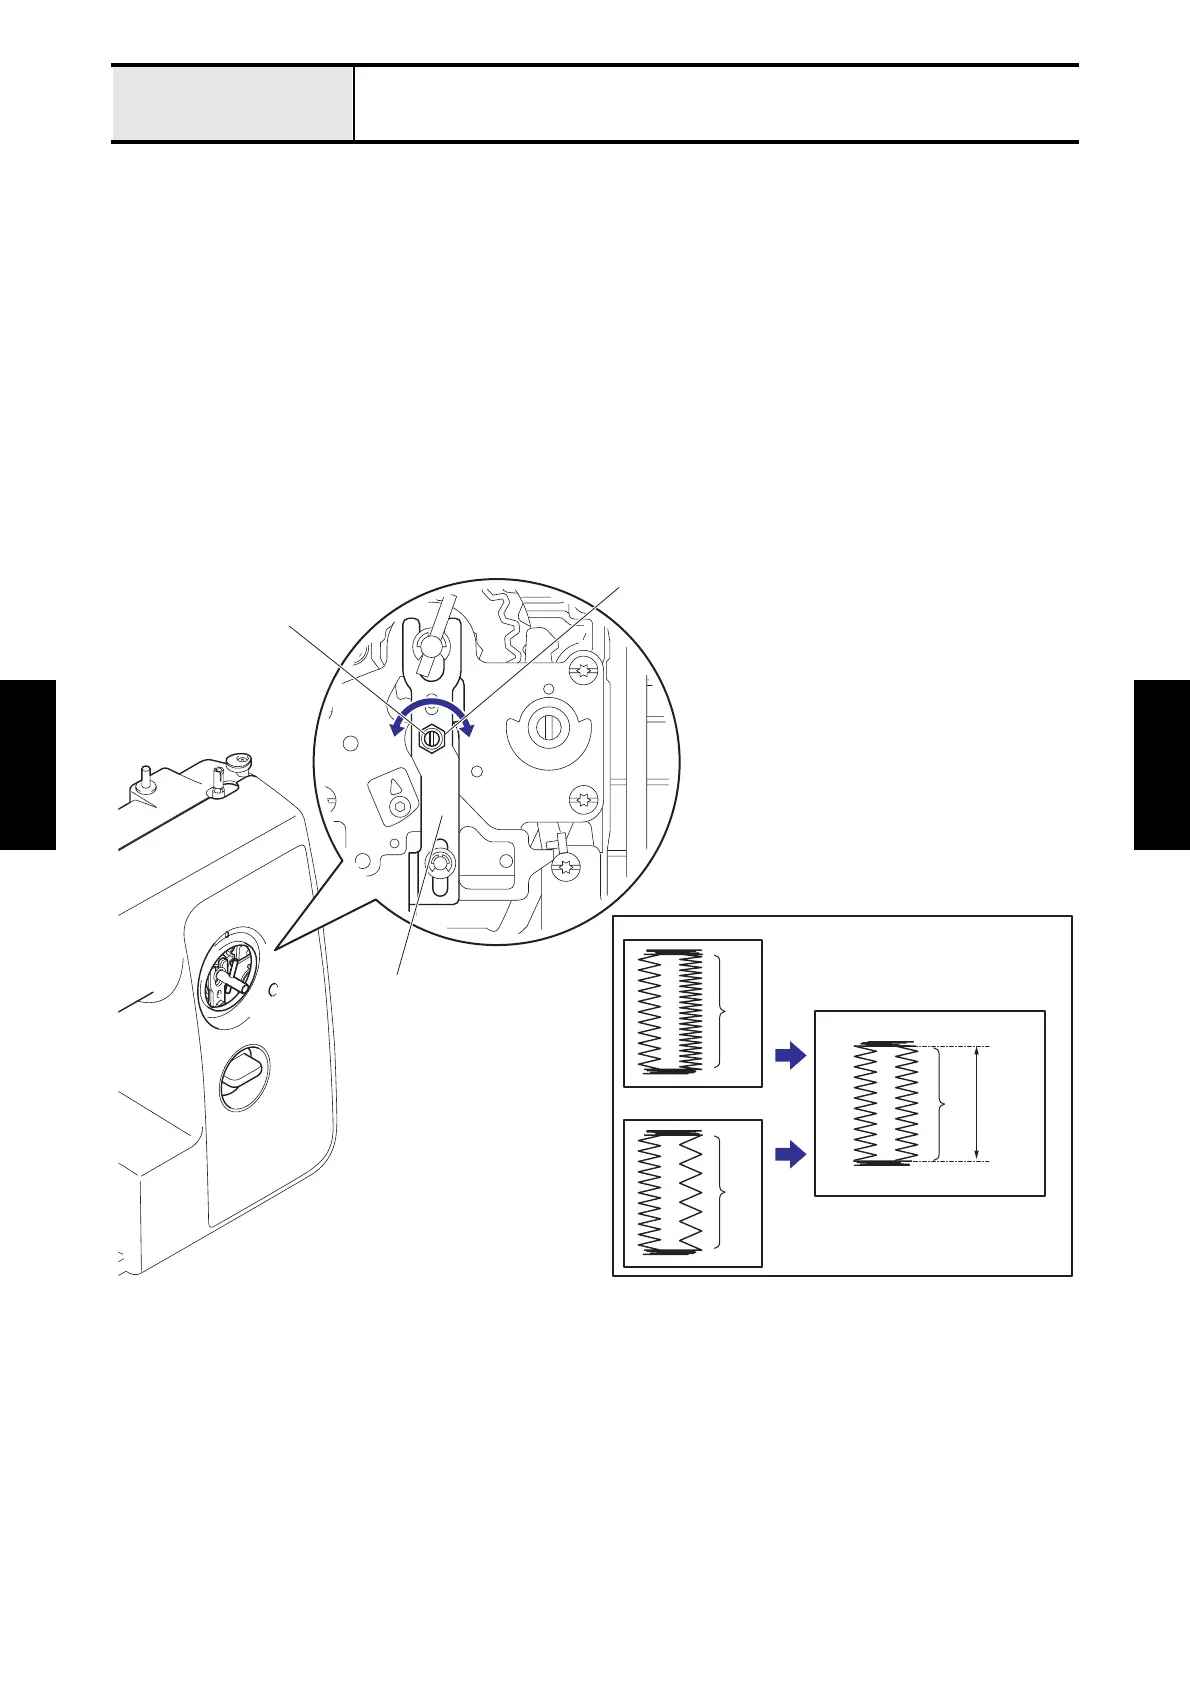
Adjustment of the stitch length of “d” (right forward stitch)
5. Remove the pattern selecting dial.
6. Loosen the nut 4 of the feed adjusting screw on the feed regulator plate A/B.
7. Adjust the stitch length of the right forward stitch by turning the feed adjusting screw on the feed regulator plate A/B.
*Key point
• The number of right forward stitches should be 35 to 50 per 20 mm.
*Key point
• Turn the feed adjusting screw to the direction “A”.
→ Right forward stitch length is longer. (The number of stitches decreases) (Fig. 1 “A”)
• Turn the feed adjusting screw to the direction “B”.
→ Right forward stitch length is shorter. (The number of stitches increases) (Fig. 1 “B”)
8. Tighten the nut 4 of the feed adjusting screw on the feed regulator plate A/B to secure the feed adjusting screw.
*Key point
• When tightening the nut 4 of the feed adjusting screw, keep the feed adjusting screw from moving.
<To next page>
Feed regulator plate A/B
A
Nut 4
Feed adjusting screw
NG
A
B
NG
OK
d
d
d20 mm
d = 35 - 50 stitches
Fig. 1
B
 Loading...