Basic of Assembly
2 - 46
Main frame and Covers
Basic of
Assembly
Basic of
Assembly
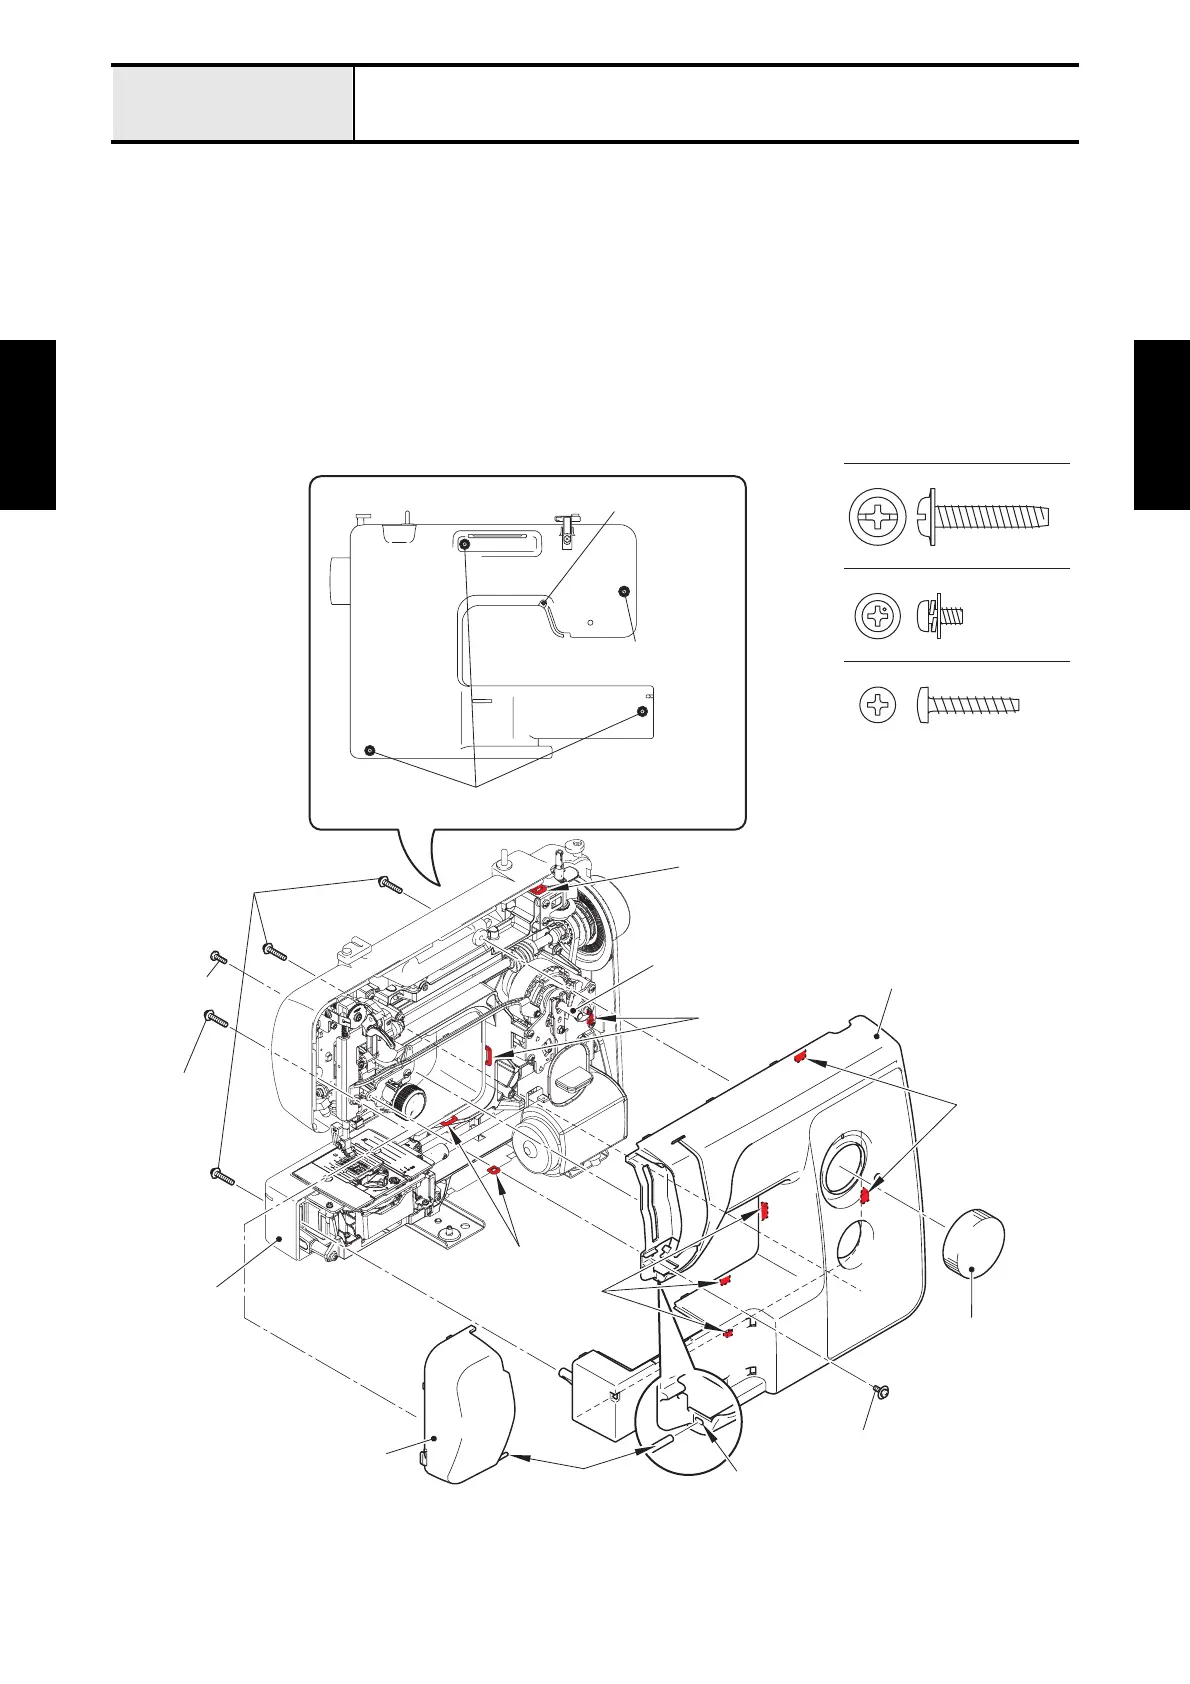
2 Attachment of Face plate assy and Front cover assy
1. Set the front cover assy to the rear cover assy, and hang the five hooks of front cover assy on the five
hook trays of rear cover assy.
2. Secure the front cover assy to the arm bed with the three screws (taptite, cup P M4X20) and the screw
(taptite, bind P M3X16) from the rear cover side. And tighten the screw (screw, pan (S/P washer)
M3X6) to the front cover side.
3. Attach the pattern selecting dial to the shaft of pattern selecting unit assy.
4. Insert the pin of face plate assy into the positioning hole of front cover assy, and set the face plate assy
to the rear cover assy, and secure it with the screw (taptite, cup P M4X20) from the rear cover side.
→Refer to 3 - 60 Assembly of Face plate assy.
Taptite, Cup P M4X20
Screw, Pan (S/P washer) M3X6
Taptite, Bind P M3X16
Taptite, cup P M4X20
Taptite, cup P M4X20
Taptite, bind P M3X16
Taptite, cup P
M4X20
Hook tray
Hook trays
Face plate assy
Front cover assy
Pattern
selecting dial
Taptite, cup P M4X20
(Face plate assy)
Taptite, bind P
M3X16
Screw, pan (S/P washer) M3X6
Hooks
Hooks
Hook trays
Shaft of pattern
selecting unit assy
Rear cover assy
Pin
Positioning hole
 Loading...