30
Boat Rigging
Battery Installation
Battery Installation
Each outboard requires its own starting battery.
Select a battery that meets or exceeds the mini-
mum requirements.
Battery Recommendations
Battery Location
Proper installation will prevent battery movement
while underway.
• Secure all batteries in protected locations
• Place battery as close to the outboard as possi-
ble
• Battery location must provide access for peri-
odic maintenance
• Use battery mounting trays or battery boxes on
all battery installations
• Connections and terminals must be covered
with an insulator
• Battery connections must be clean and free
from corrosion
• Read and understand the safety information
supplied with the battery before installation.
Battery Connections
IMPORTANT: Connect the battery positive (+)
cable to the battery positive (+) post FIRST. Con-
nect the battery negative (–) cable to the battery
negative (–) post LAST.
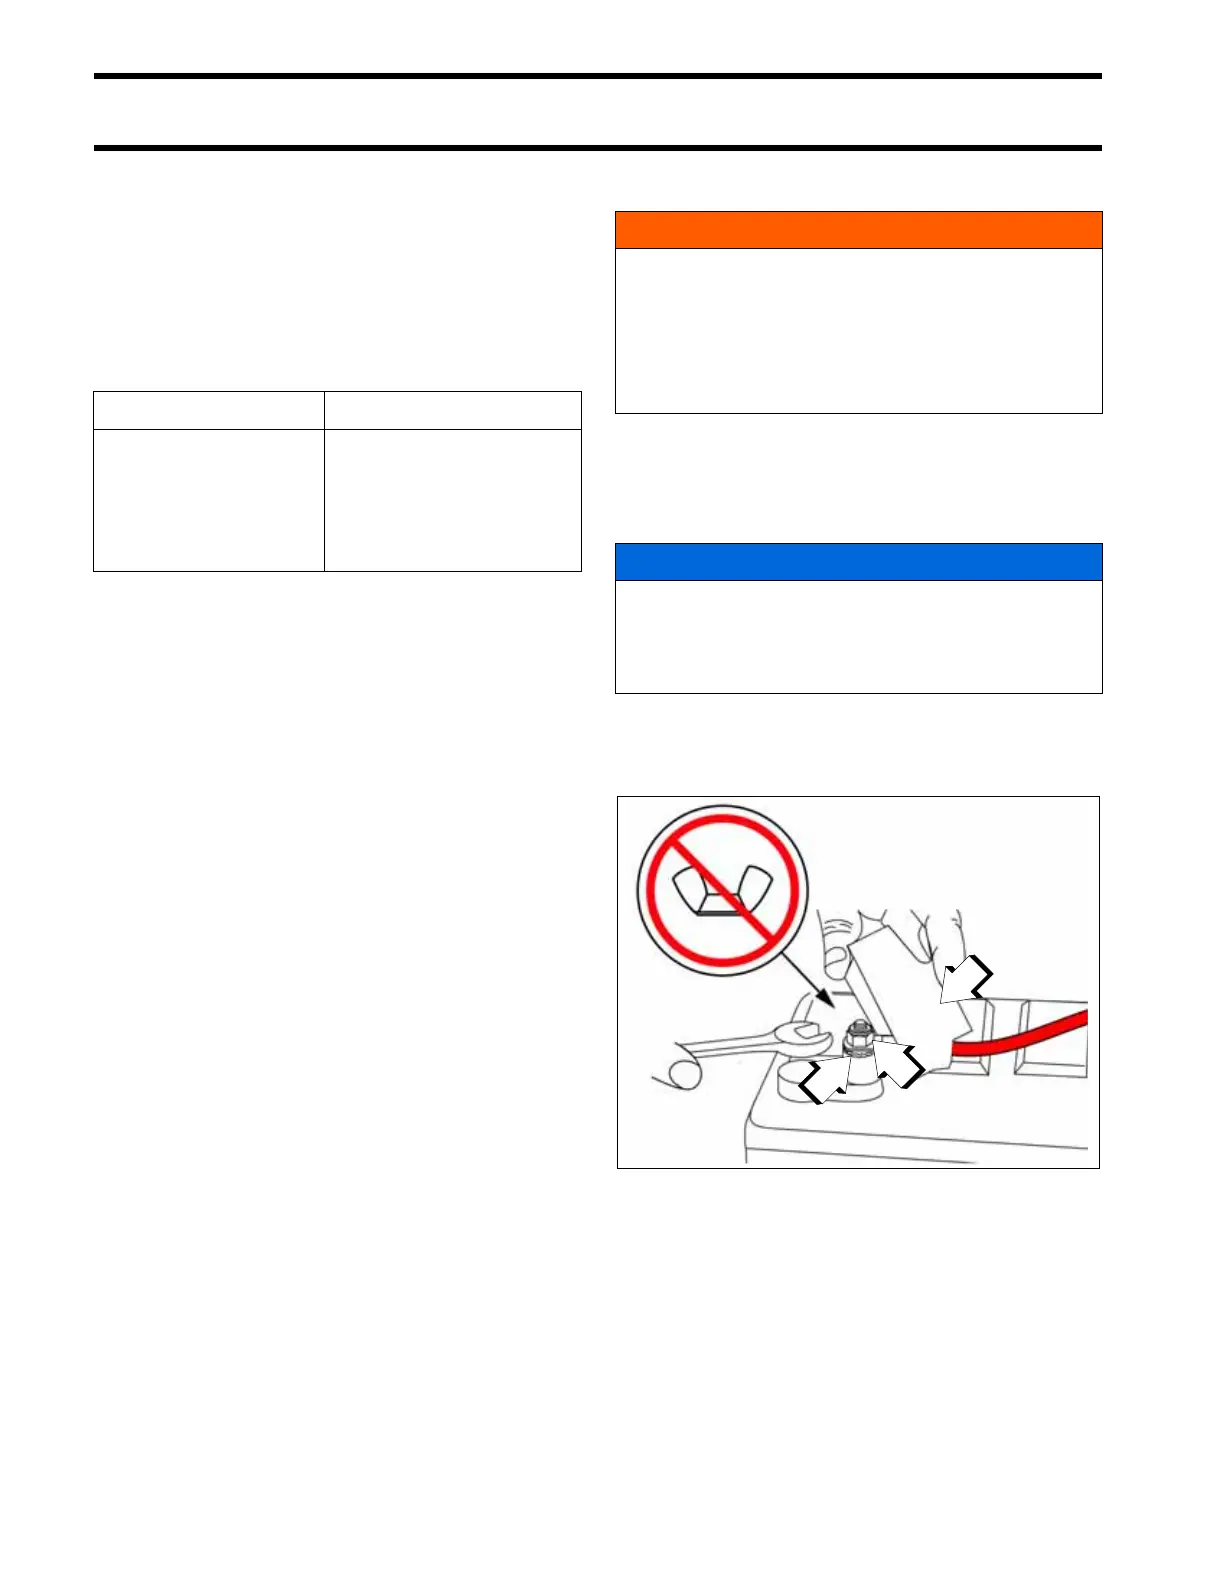
Install a starwasher on the threaded battery post.
Stack cables from the outboard, then cables from
accessories. Finish this connection with a hex nut.
Tighten all connections securely. Apply Tri-
ple-Guard grease to prevent corrosion.
Outboard Model Battery Rating
150 – 200 HP,
66° V6
200 H.O.–300 HP,
74° V6
675 CCA (845 MCA), or
800 CCA (1000 MCA)
below 32°F (0°C)
107 amp-hr in extreme
applications
WARNING
Keep the battery connections clean, tight, and
insulated to prevent their shorting or arcing
and causing an explosion. If the battery
mounting system does not cover the connec-
tions, install protective covers. Check often to
see that connections stay clean and tight.
NOTICE
Do not use wing nuts to fasten ANY battery
cables. Wing nuts can loosen and cause elec-
trical system damage not covered under war-
ranty.
Marine Style Battery Post
1. Starwasher
2. Hex nut
3. Terminal Insulator
009166

 Loading...