Check SiUS041111
120 Service Diagnosis
5.7 “Inverter Checker” Check
Check No.15 Characteristics
If an abnormal stop occurs due to compressor startup failure or overcurrent output when using
inverter unit, it is difficult to judge whether it is caused by the compressor failure or other failure
(control PCB, power module, etc.). The inverter checker makes it possible to judge the cause of
trouble easily and securely. Connect this checker as a quasi-compressor instead of compressor
and check the output of inverter.
Operation Method
Step 1
Be sure to turn the power off.
Step 2
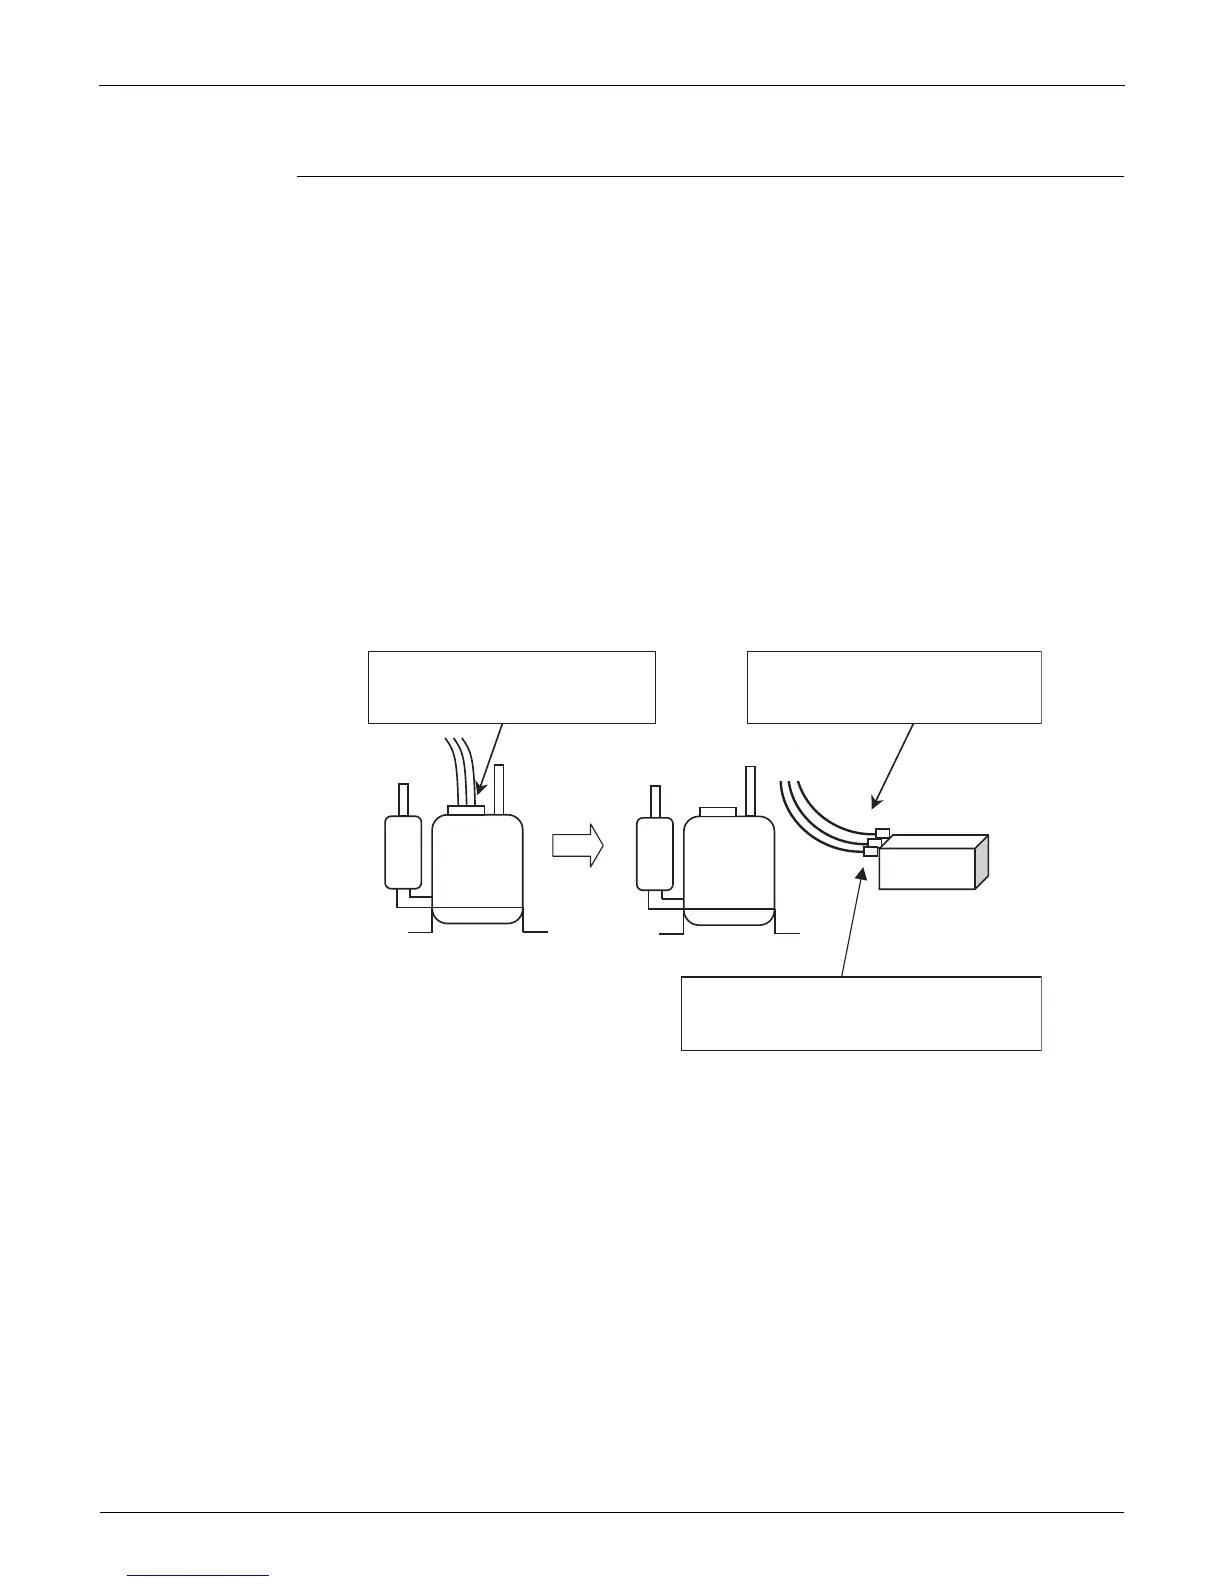
Install the inverter checker instead of a compressor.
Note:
Make sure the charged voltage of the built-in smoothing electrolytic capacitor drops to 10 VDC
or below before carrying out the service work.
Reference:
If the terminals of the compressor are not FASTON terminals (difficult to remove the wire on the
terminals), it is possible to connect wires available on site to the outdoor unit from the output
side of the PCB. Do not connect them to the compressor at the same time, otherwise it may
result in incorrect detection.
(1) Remove the terminals from
the compressor.
(2) Connect the terminals to the
terminals of the inverter
checker.
Compressor
Inverter checker
Be careful not to touch the terminals
(U,V,W) each other. Otherwise, high
voltage is applied.
 Loading...