FAULT FINDING AND REPAIR
4-24 20509 Issue 7 Jan 2018
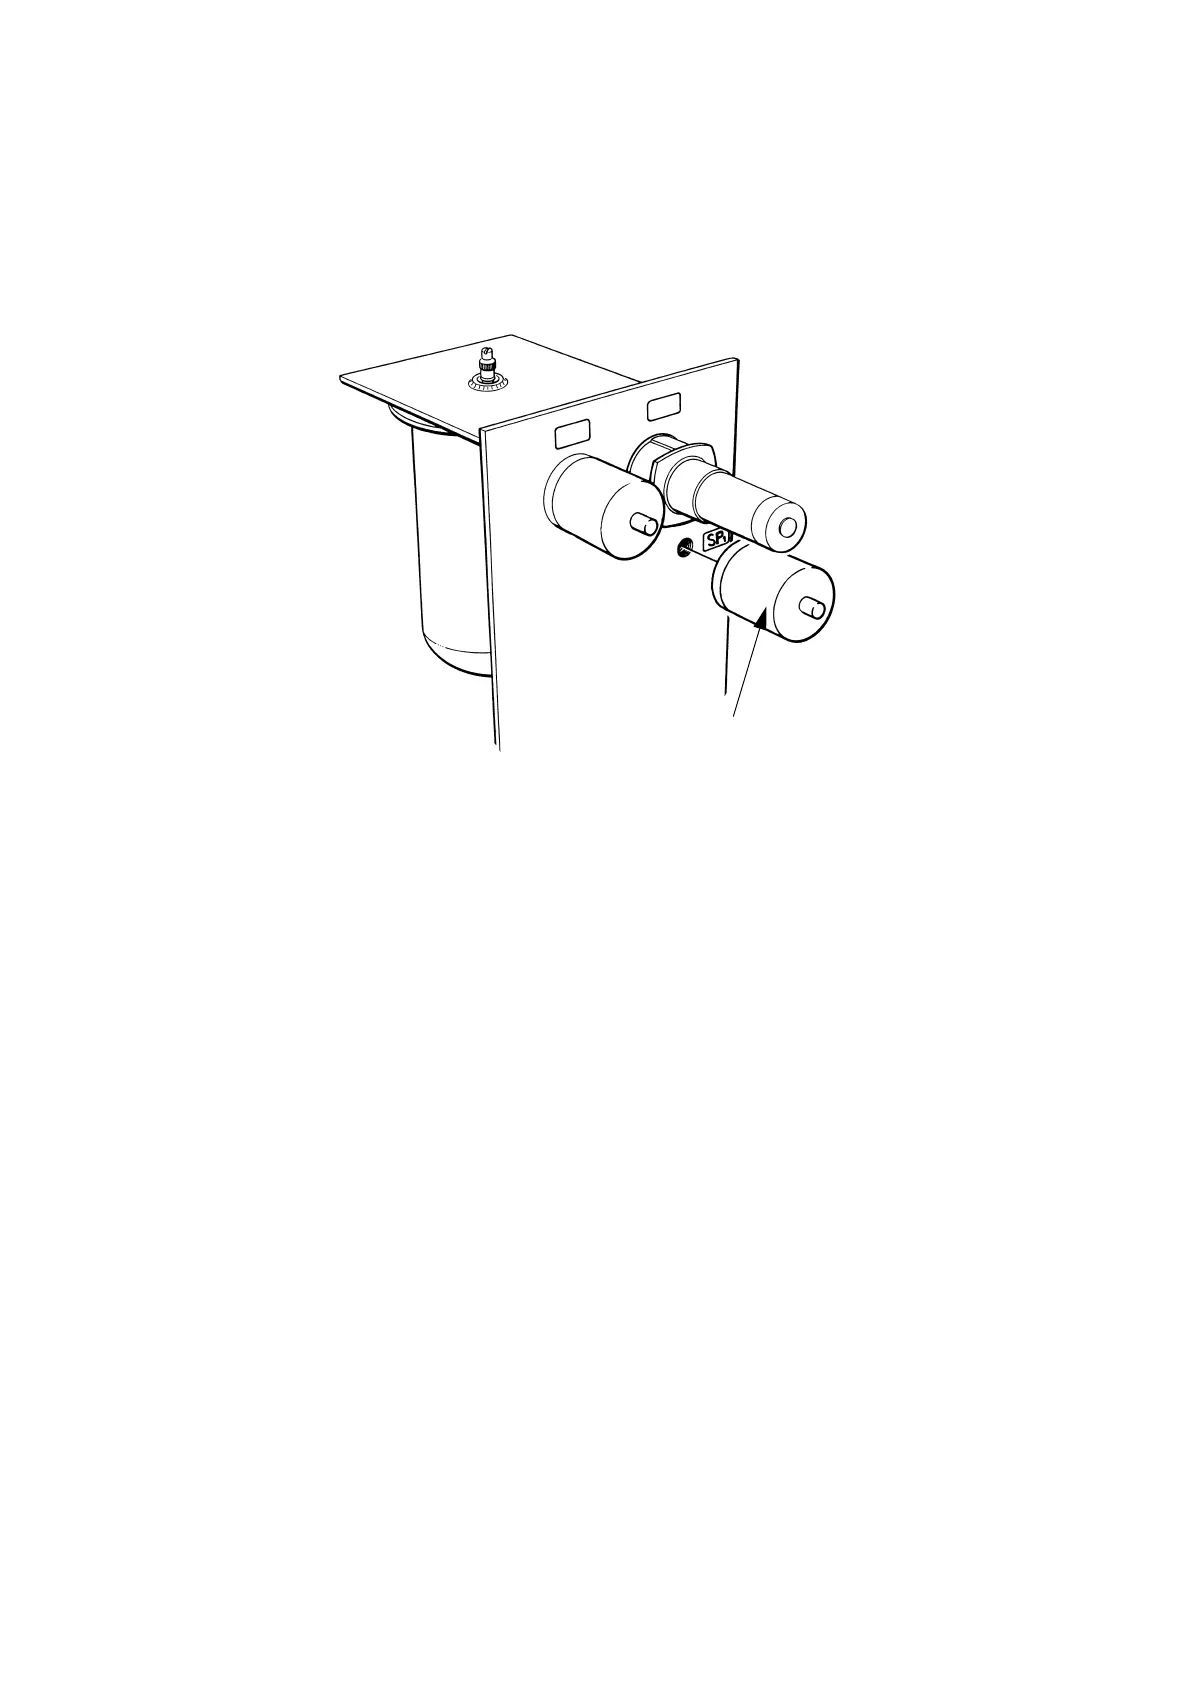
Vacuum Switch Replacement
Note: The vacuum switch contains delicate components and must be
handled with care. It is also factory set and should not be
adjusted.
The printer must be switched off and the cabinet cover removed. Place
tissue in the cabinet base to catch escaping ink.
(1) Depressurise the ink system.
(2) Remove the heat shrink sleeve from the wires and vacuum switch
body.
(3) Pull off the connectors on the vacuum switch (make a note of the
connections).
(4) Unscrew and remove the complete unit.
(5) Add Loctite 542 to the thread on the new vacuum switch and screw
into the manifold block.
(6) Reconnect the wiring and fit the heat shrink sleeve over the vacuum
switch body.
(7) Repressurise the system.
 Loading...