EasyManua.ls Logo

Domino Macrojet 2 User Manual

Default Icon
114 pages
To Next Page IconTo Next Page
To Previous Page IconTo Previous Page
Page #78 background imageLoading...
Page #78 background image
FAULT FINDING AND REPAIR
4-26 20509 Issue 7 Jan 2018
Accumulator Check
The accumulator provides the working reservoir of ink. It has a reserve
capacity of approximately 70ml, provided by compressing air behind a
rubber diaphragm. It may be necessary to check if a leak in the diaphragm
or the accumulator air seal has caused a reduction in the ink reserve.
Alternatively, if the diaphragm has collapsed for a reason not associated
with damage or a fault, it may need to be re-inflated. Refurbishing the
accumulator requires removal of the complete ink system.
To check that the accumulator is working to its correct capacity:
(1) Switch on the printer and allow the pump to run up the system to the
normal working pressure.
(2) Set the Pump Inhibit switch to position 0. Turn off the print head
valve.
(3) Place a calibrated beaker under a print head and loosen the screws
securing the nozzle plate.
(4) Carefully open the valve on the print head. Catch the ink escaping
from the nozzle plate in the beaker. Failure to collect more than 60ml
of ink indicates that the diaphragm has collapsed.
(5) Bleed the print head.
Reinflating the Accumulator Diaphragm
The printer must be switched off and the cabinet cover removed.
(1) Release any air pressure in the accumulator by pressing the centre of
the air valve, then remove the whole core.
TP3460-1
Calibrated
Beaker
Print Head
Valve
60ml

Table of Contents

Question and Answer IconNeed help?

Do you have a question about the Domino Macrojet 2 and is the answer not in the manual?

Domino Macrojet 2 Specifications

General IconGeneral
Print Resolution180 dpi
Substrate CompatibilityPorous
ConnectivityEthernet
Operating Temperature5°C to 40°C
Print TechnologyPiezo Drop on Demand

Summary

Part 2: Description

Printer Specification

Detailed specifications including print heads, character height, speed, and dimensions.

Ink System

Details of the ink system, its components, and operation.

Electronic System

Overview of the microprocessor, PCBs, and their functions in the system.

Adding a Print Head

Steps required to fit an additional print head to the printer.

Part 3: Maintenance Procedures

Print Quality Checks

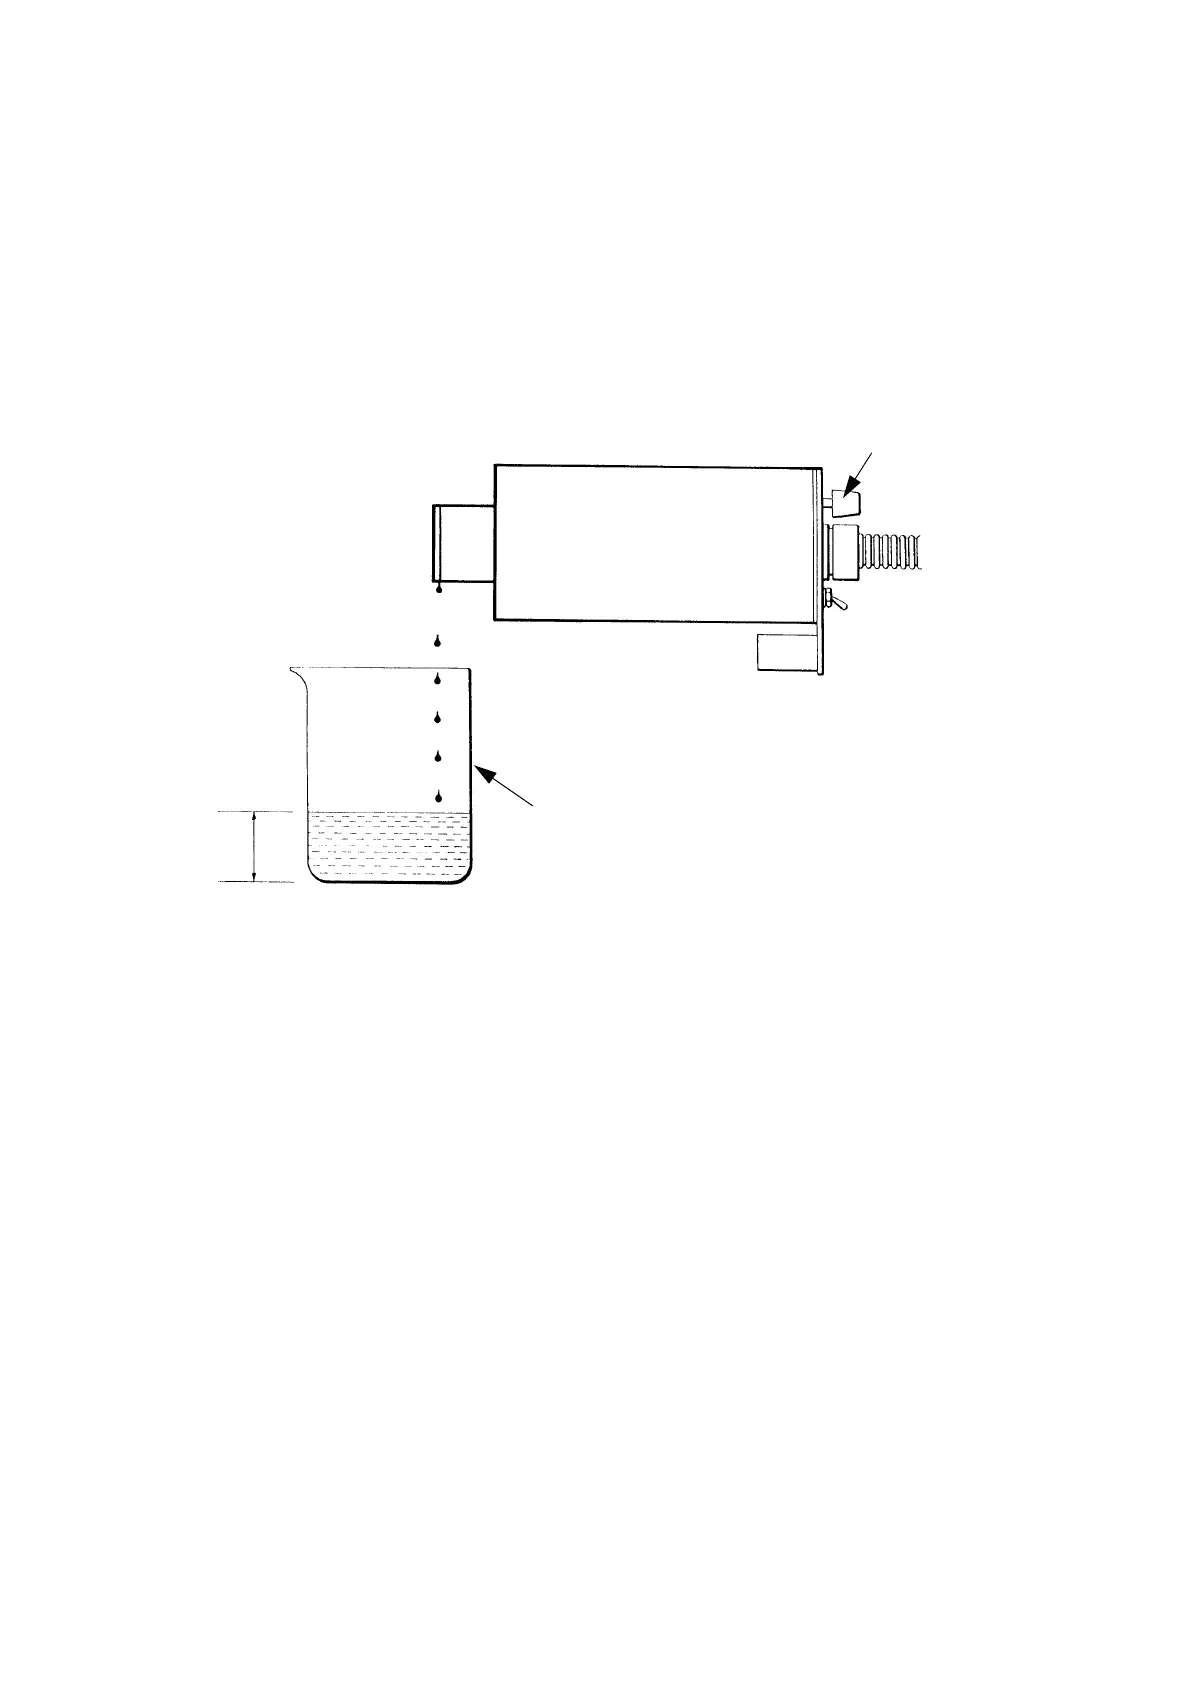
Procedures for checking and adjusting ink drop size for optimal print quality.

Ink Handling Procedures

Steps for changing inks, including flushing and refilling with different solvent bases.

Part 4: Fault Finding and Repair

Troubleshooting Common Faults

Guides for identifying and fixing ink system, print head, and electronic faults.

Print Quality Issues

Diagnosing and correcting problems affecting print output quality.

Ink System Repair

Steps for depressurising, pressurising, priming, and leak checks.

Appendix A: Installation

Component Mounting and Connection

Positioning cabinet, mounting print heads, and electrical supply connection.

Adding Print Heads

Detailed steps for fitting additional print heads and related components.

Related product manuals