Section 6: Troubleshooting
CAUTION:
This actuator is non-intrusive. Do not open the control compartment on the actuator
unless absolutely necessary. It was sealed in dry-clean conditions in the factory and
entry into this compartment should not be necessary. Unauthorized entry could void
the warranty.
6.1 Troubleshooting Problems/Corrective Action
for Actuator Operation
Symptom Probable Cause Corrective Action
Motor will not Run
Blown Control Fuse Check Fuse and Replace as necessary
Open in Control Circuit
Refer to appropriate wiring diagram and check
for continuity
Insulation Resistance Breakdown in
Motor
Perform Megger Test
No Power available to Actuator Tripped Circuit Breaker Reset Circuit Breaker
Handwheel Hard to Turn
Valve Stem improperly Lubricated Lubricate with Grease
Actuator Lubrication has broken
down
Clean out old grease and replace with
recommended lubricant
Valve packing gland too tight Loosen packing gland nuts as necessary
Drive Sleeve Bearing Failure Replace Bearing
Jammed Valve Refer to Valve Maintenance
Valve only opens or closes
partially with motor
Torque Switch Setting too low Check Setting and Reset if necessary
Limit Switch Improperly Set
Check Switch Actuation and re-calibrate if
necessary
Torque switch is properly set,
but actuator Torque’s out in
mid-travel, open or closed
direction
Damaged or bent valve stem Refer to Valve Maintenance
Valve packing too tight Refer to Valve Maintenance
Jammed Valve (obstruction in line) Refer to Valve Maintenance
Handwheel will not operate
valve
Handwheel shaft bearing assembly
malfunction
Repair or replace as necessary
Sheared gear key or Stripped Gearing Replace as necessary
PS Shifter Position or Malfunction Replace Gear(s)
Broken Handwheel Shaft Repair or replace as necessary
Broken Valve Stem or Stripped Stem
Nut
Repair or replace as necessary
Motor runs but will not operate
the valve
Motor Bearing Assembly Malfunction Repair or replace as necessary
Sheared gear key (fastener pin) Replace
Stripped Gearing Replace
Broken Valve Stem or Stripped Stem
Nut
Repair or replace as necessary
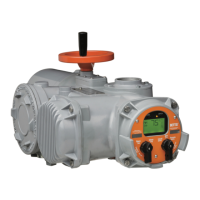
If the LDM does not receive communication messages from the CCM within 5 seconds after power is applied
or loses communication for 5 seconds or more, it will display a ashing message "CCM LINK FAILED" and
blink all three LEDs.
 Loading...
