Maintenance 10. Ball Screw Spline Unit
LS20 Rev.4 133
10.1.2 Cleanroom-model
Cover the surrounding area such as the end effector and peripheral equipment in case the
grease drips.
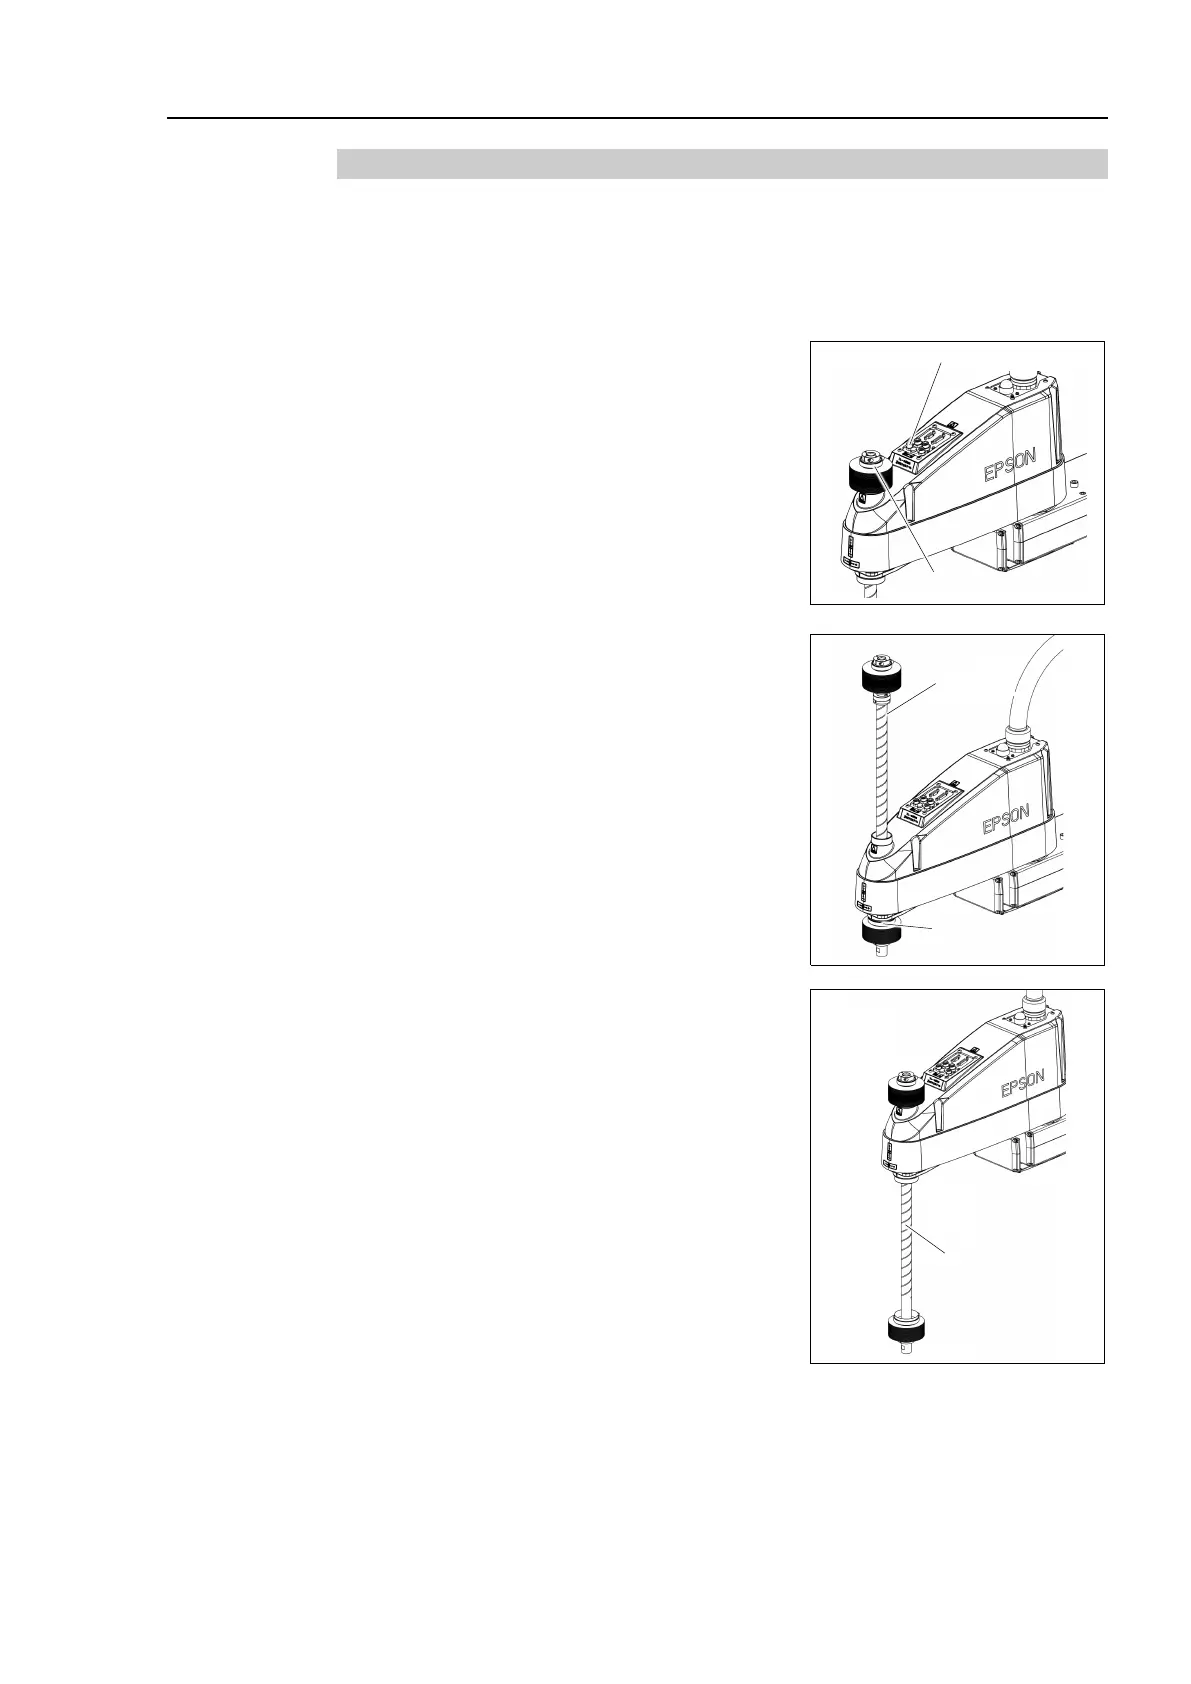
Shaft
Controller. Stop motor excitation. (MOTOR OFF)
Move the arm to a position where Joint #3 can be moved in full stroke.
the lower limit manually
while pressing the brake release switch.
Loosen the clamp band under the bellows, and
then lift the bellows.
the upper limit manually
while pressing the brake release switch.
Wipe off the old grease from the upper part of
the shaft, and then apply new grease.
Directly fill the grooves on the shaft inside the
bellows with grease by hand.
from the shaft.
Loosen the clamp band on the bellows,
and then
move the bellows downward.
the lower limit manually
while pressing the brake release switch.
Wipe off the old grease from the lower part of
the shaft, and then apply new grease
.
Directly fill the grooves on the
shaft inside the
bellows with grease by hand.
from the shaft.
shaft up and down several times while
pressing the brake release switch to
smooth out
Wipe off excess grease
 Loading...


