Maintenance
Checking and Cleaning
the Print Head
If the nozzles are clogged, the printouts become faint,
there is visible banding, or unexpected colors appear.
When print quality has declined, use the nozzle check
feature and check if the nozzles are clogged. If the
nozzles are clogged, clean the print head.
Note:
❏ Because print head cleaning uses some ink, clean the
print head only if quality declines.
❏ When ink is low, you may not be able to clean the
print head. Replace the ink cartridge first.
❏ If print quality has not improved after repeating
nozzle check and head cleaning about two times,
wait for at least six hours without printing, and then
run the nozzle check again and repeat the head
cleaning if necessary. We recommend to turn off the
printer. If print quality has still not improved,
contact Epson support.
❏ To prevent the print head from drying out, do not
unplug the printer while the power is on.
A
Load 3.5 × 5 in. (9 × 13 cm) size or larger paper in
the printer.
See steps 1 to 5 from “Printing Photos by
Selecting from a Memory Card” on page 27 for
more details.
B
Enter Setup from the home screen using the l or
r button, and then press the OK button.
C
Select Maintenance using the u or d button, and
then press the OK button.
D
Select Nozzle Check using the u or d button,
and then press the OK button.
E
Follow the on-screen instructions to print the
nozzle check pattern.
F
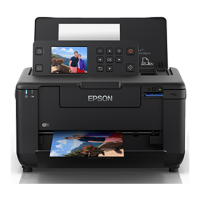
Compare the printed check pattern with the
sample shown below.
❏ All lines are printed: The print head nozzles
are not clogged. Select Finish Nozzle Check
using the u or d button and press the OK
button.
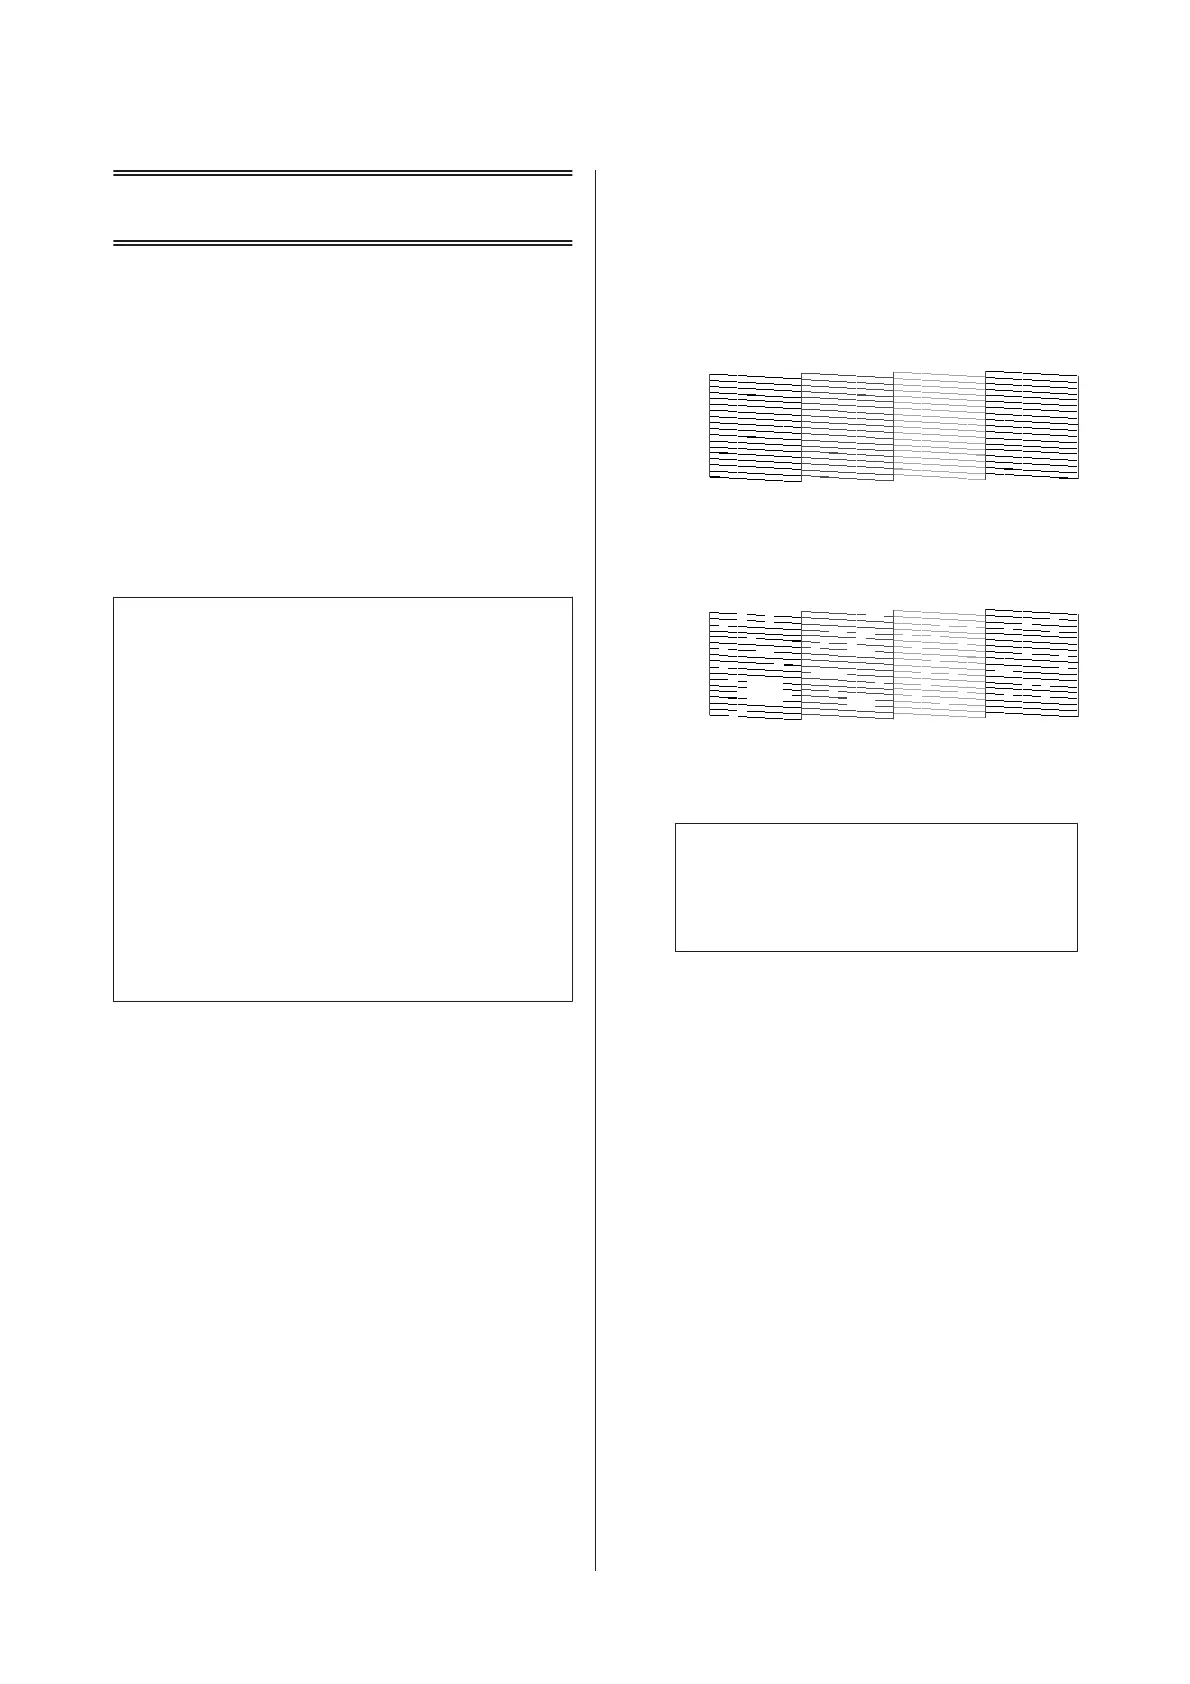
❏ There are broken lines or missing segments:
The print head nozzles may be clogged. Go
to the next step.
G
Select Head Cleaning using the u or d button,
and then press the OK button.
c
Important:
Do not turn off the printer during head
cleaning. If the head cleaning is incomplete,
you may not be able to print.
H
When cleaning is finished, select Nozzle Check
using the u or d button, and then follow the
on-screen instructions to print the nozzle check
pattern again. Repeat cleaning and printing the
pattern until all lines are printed completely.
Aligning the Print Head
If you notice a misalignment of vertical lines or blurred
images, align the print head.
A
Load 4×6 in. (10×15 cm) size Prem. Glossy photo
paper in the printer.
See steps 1 to 5 from “Printing Photos by
Selecting from a Memory Card” on page 27 for
more details.
B
Enter Setup from the home screen using the l or
r button, and then press the OK button.
PM-520 Operation Guide
Maintenance
50
 Loading...