Problems Solutions
No paper is fed ❏ Do not load more than the
maximum number of sheets
specified for the paper. For
plain paper, do not load above
the line indicated by the
triangle symbol on the edge
guide. If the paper still does
not feed, load one sheet of
paper at a time.
❏ Clean the paper path.
& “Cleaning the Paper Path”
on page 51
❏ Use paper that is 0.05 to 0.6
mm thick. However,
depending on the solidity of
the paper or transparency,
paper this thick may not be fed
or printed correctly.
Cannot Setup Wi-Fi
Check the following. If you cannot solve the problem,
see “Solving Problems” in the User’s Guide (digital
manual).
❏ Turn the printer off and on, and then setup Wi-Fi
again. If you cannot connect, restart the access
point (wireless router) considering other users who
may be using the network.
❏ If a privacy separator on the access point is enabled,
disable the privacy separator. See the
documentation provided with the access point for
details.
❏ If the printer cannot connect to the Wi-Fi network
that the smart device is connected to, it may be
connected to a frequency band other than the 2.4
GHz band supported by the printer. If you are using
the access point with its default settings, select the
SSID ending in “_G” to connect.
❏ If you cannot connect or suddenly cannot print,
check the network connection.
Printing a Network Connection
Report
A
Load A5 size plain paper in the printer.
See steps 1 to 5 from “Printing Photos by
Selecting from a Memory Card” on page 27 for
more details.
B
Enter Setup from the home screen using the l or
r button, and then press the OK button.
C
Select Network Settings using the u or d button,
and then press the OK button.
D
Select Connection Check using the u or d
button, and then press the OK button.
The connection check starts.
E
Press the x button to print the network
connection report.
If an error has occurred, check the network
connection report, and follow the printed
solutions.
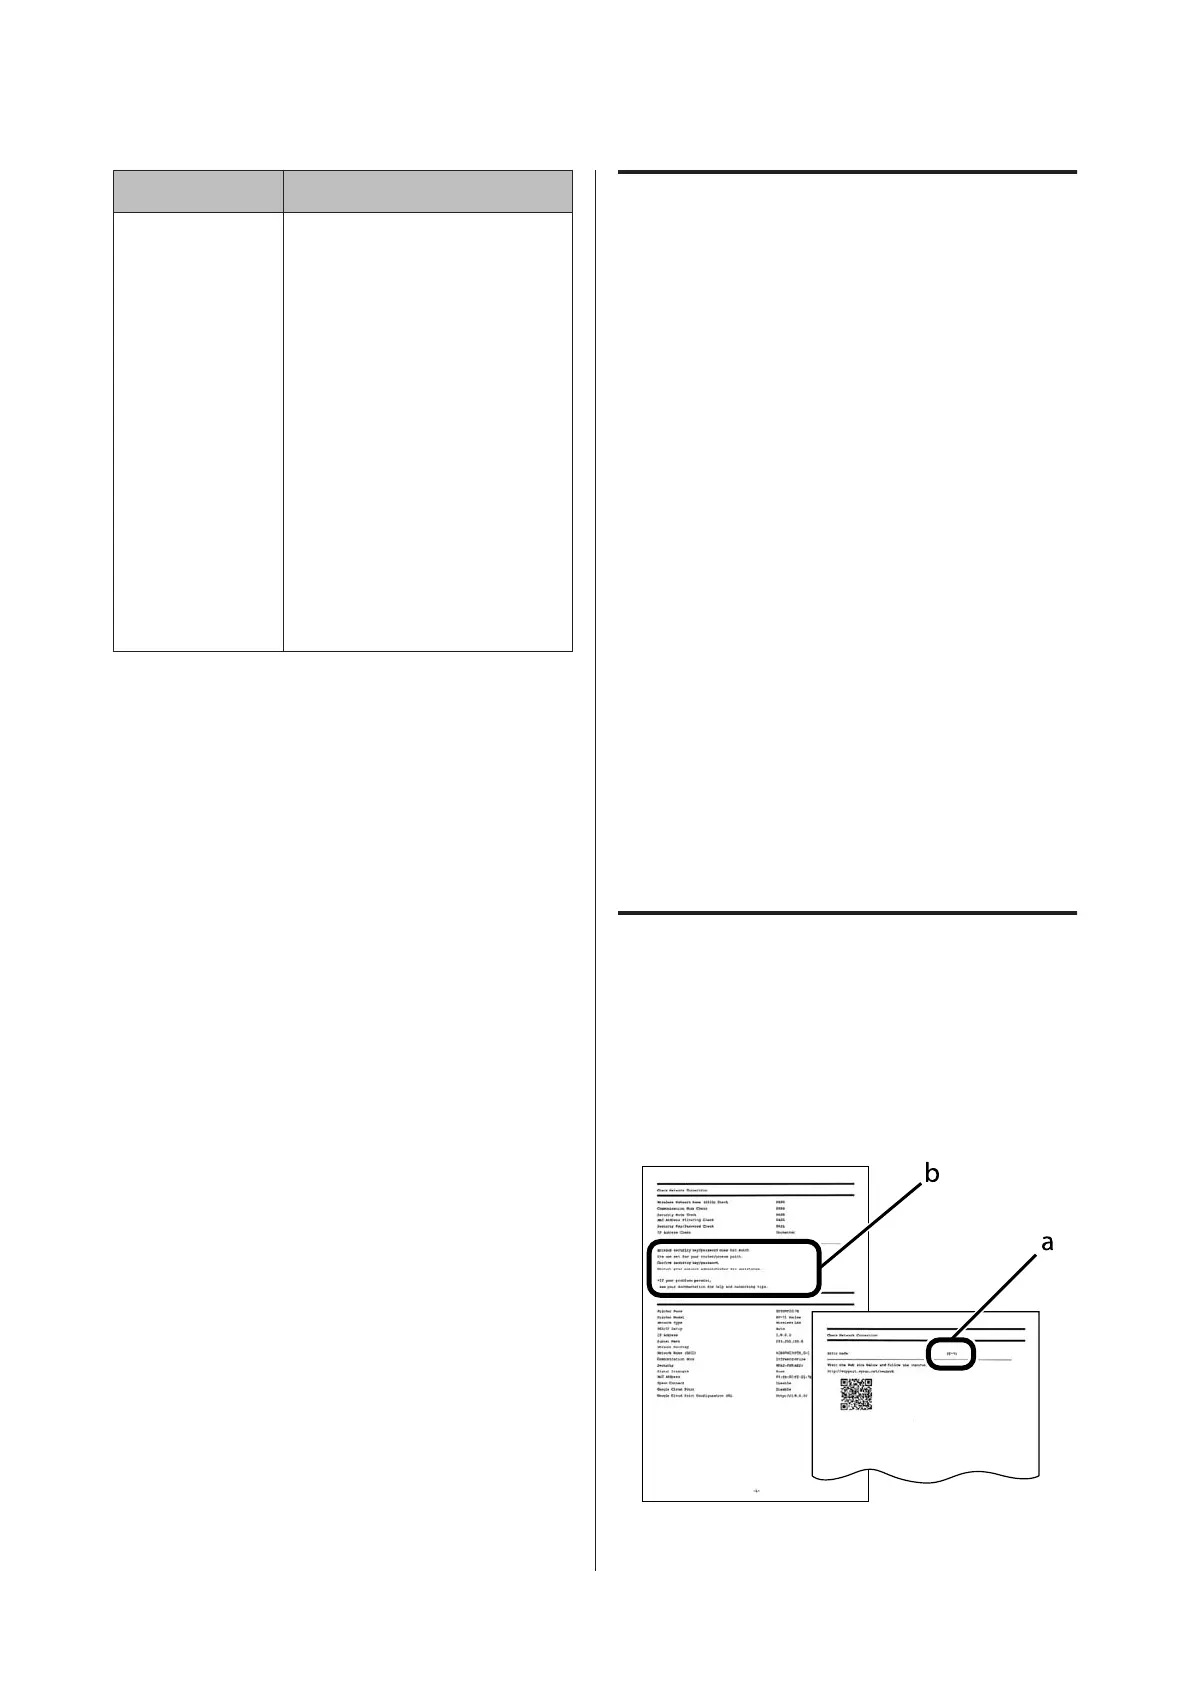
Messages and Solutions on the
Network Connection Report
Check the messages and error codes on the network
connection report, and then follow the printed
solutions. Access the shown URL or QR code to view the
website for more details.
http://support.epson.net/nwcheck2
PM-520 Operation Guide
Solving Problems
56
 Loading...