SC-F2000 Revision C
DISASSEMBLY & ASSEMBLY Disassembly and Assembly Procedure 177
Confidential
3.4.6.7 TF PULLEY ASSY
1. Remove the FRONT SUB COVER. (p80)
2. Remove the PLATEN. (p71)
3. Remove the BELLOWS ASSY. (p173)
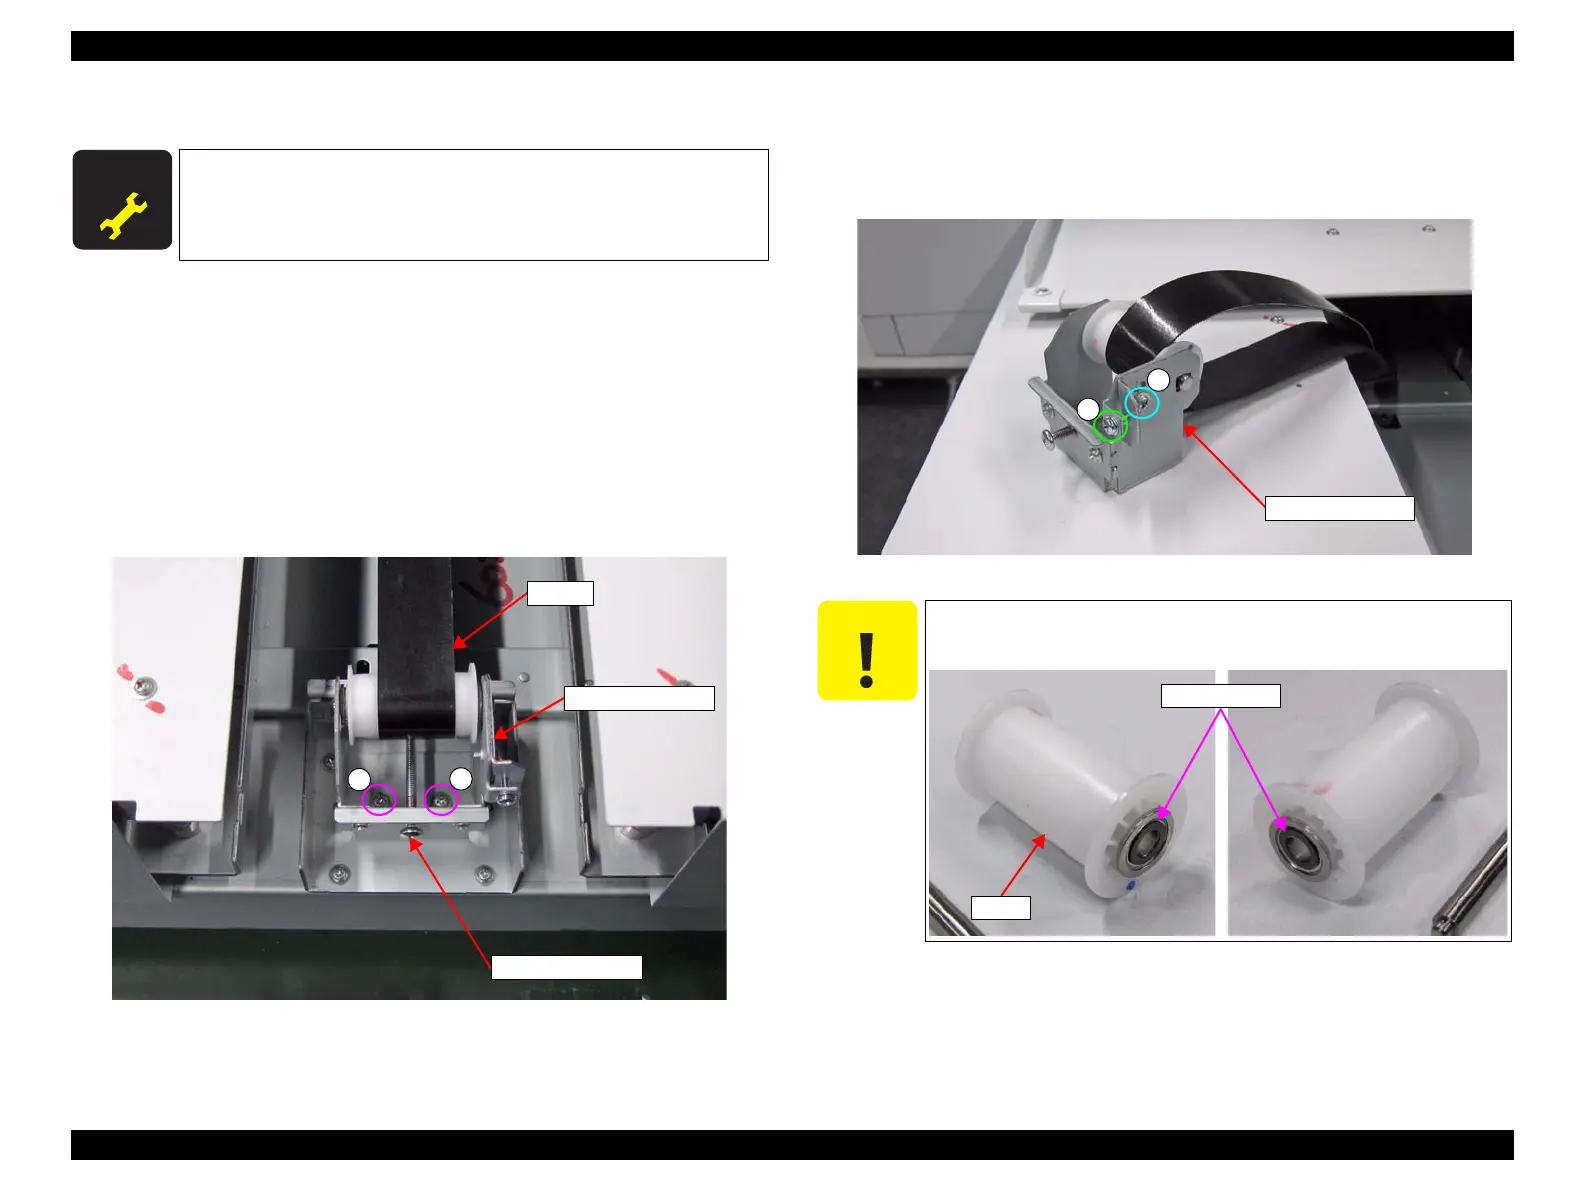
4. Loosen the two screws.
A) Silver M3x12 S-tite screw with built-in washer: 2 pcs
5. Loosen the Belt Tension Screw, and loosen the tension of the TF Belt.
6. Remove the two screws (A), and remove the TF PULLEY ASSY.
Figure 3-141. Removing the TF PULLEY ASSY
7. Remove the two screws, and remove the Pulley Shaft Holder.
B) Silver M3x12 S-tite screw with built-in washer: 1 pcs
C) Silver M3x6 Cup S-tite screw: 1 pcs
Figure 3-142. Removing the Pulley Shaft Holder
A D J U S T M E N T
R E Q U I R E D
When replacing/removing this part, refer to “4.1.2 Adjustment
Items and the Order by Repaired Part” (p194) and make sure to
perform the specified operations including required adjustment.
Belt Tension Screw
TF Belt
A
A
TF PULLEY ASSY
In the next step, the two plastic washers at the both ends of the
Pulley shaft will come off. Be careful not to lose them.
 Loading...


