SC-F2000 Revision C
DISASSEMBLY & ASSEMBLY Disassembly and Assembly Procedure 88
Confidential
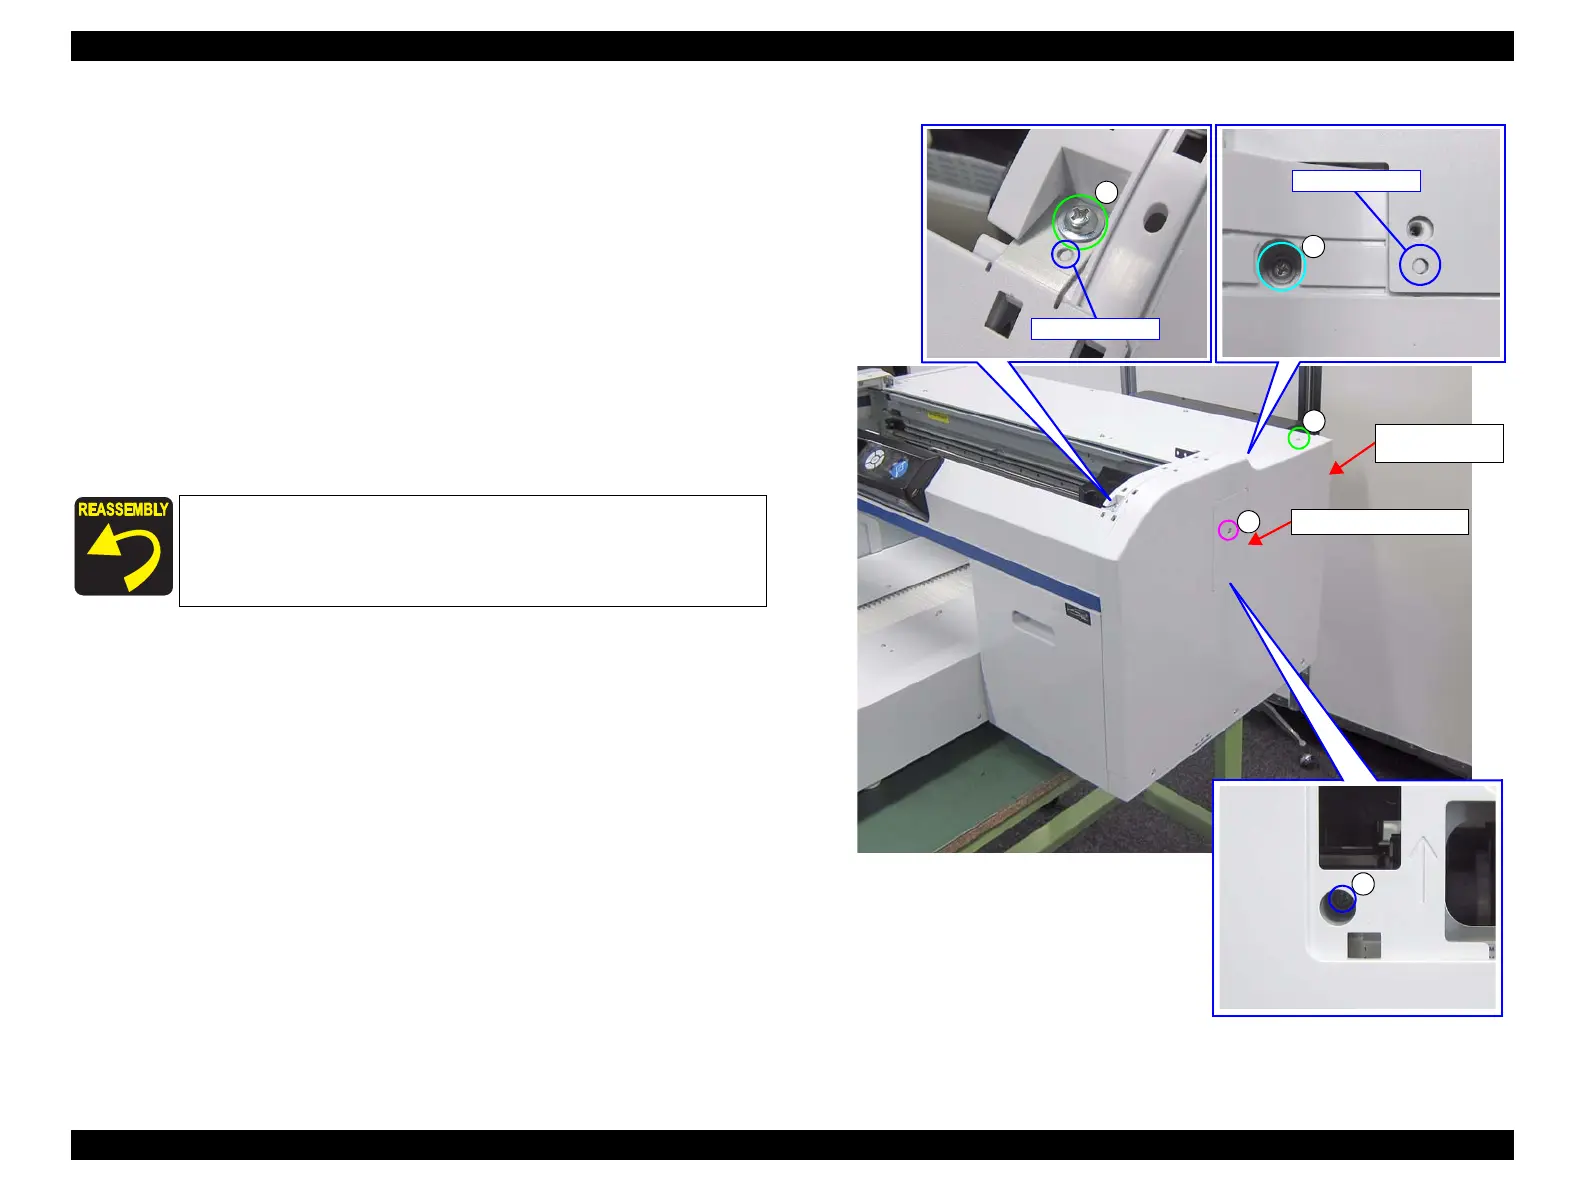
3.4.3.15 RIGHT HOUSING CAP / RIGHT COVER ASSY
1. Remove the PRINTER COVER. (p72)
2. Remove the RIGHT HOUSING PLATE. (p74)
3. Remove the screw, and remove the RIGHT HOUSING CAP.
A) Silver M3x8 Sems P-tite screw: 1 pcs
4. Remove the nine screws, and remove the RIGHT COVER ASSY (Figure 3-31,
Figure 3-32).
B) Silver M4x8 Cup P-tite screw: 3 pcs
C) Silver M3x8 Cup S-tite screw: 1 pcs
D) Silver M4x8 Cup S-tite screw: 4 pcs
E) Silver M4x10 Sems S-tite screw: 1 pcs
Figure 3-31. Removing the RIGHT HOUSING CAP / RIGHT COVER ASSY
Pay attention to the positioning points (See Figure 3-31).
RIGHT HOUSING CAP
A
B
RIGHT COVER
ASSY
 Loading...


