Integrated Network Analyzer
Using the Analyzer
21
Analyzer Network Connections
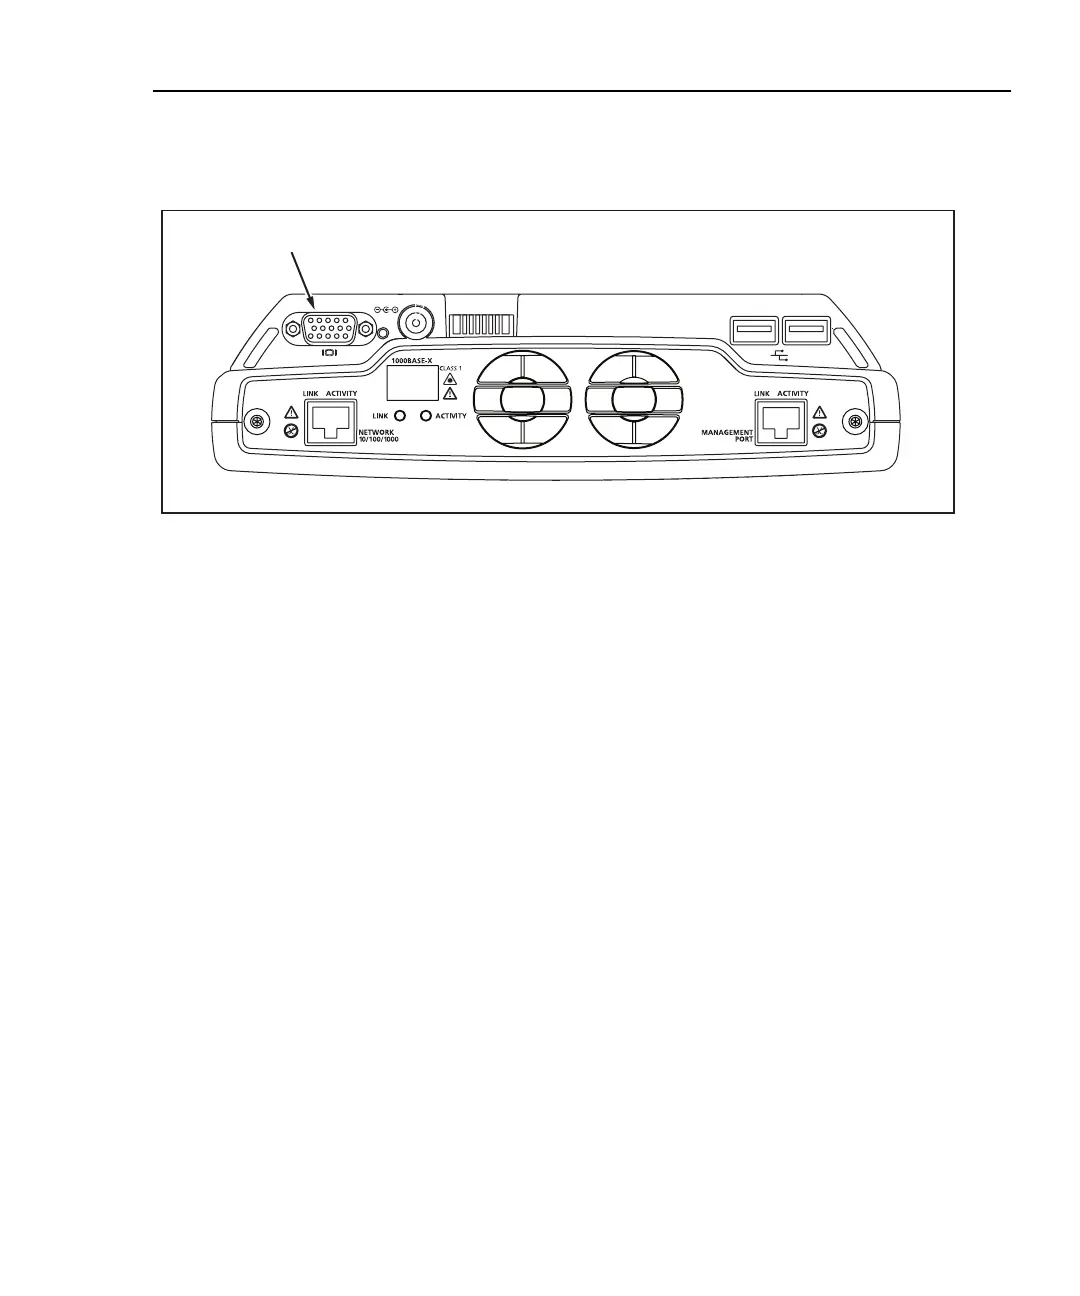
Figure 12 shows the top view of the OptiView
TM
Series III Analyzer.
15V
VGA Out Port
aww10f.eps
Figure 12. Top View of the OptiView
TM
Series III Integrated Network Analyzer
Setting Up the Analyzer to Test Your Network
Simply turn on the analyzer and connect a cable from the 10/100/1000 BASE-T
connector (or fiber cable) to the network. The analyzer will check the cable, find
the active network interface, and obtain a non-duplicate IP address. It will then
start discovering the network. Its advanced auto-discovery process does the rest!
You can always manually assign an IP address in the Setup | TCP/ IP screen. You
can also manually assign an IP address for an alternate network as long as it is in
the same broadcast domain.
The Front Page screen is the first screen that appears after the analyzer power-up
sequence is complete (connected to an active network), as shown in Figure 2.
 Loading...