4. POINTS, BOUNDARIES
4-18
4.15 Boundaries
Boundaries can be marked anywhere on the chart plotter screen, and can be used to
denote net position, avoidance areas, etc. Boundaries can be shown or hidden and
edited. Additionally, an audiovisual alarm can be set to alert when your vessel ap-
proaches a boundary.
Boundaries created with TIMEZERO Marine Software can be imported.
4.15.1 How to create a boundary
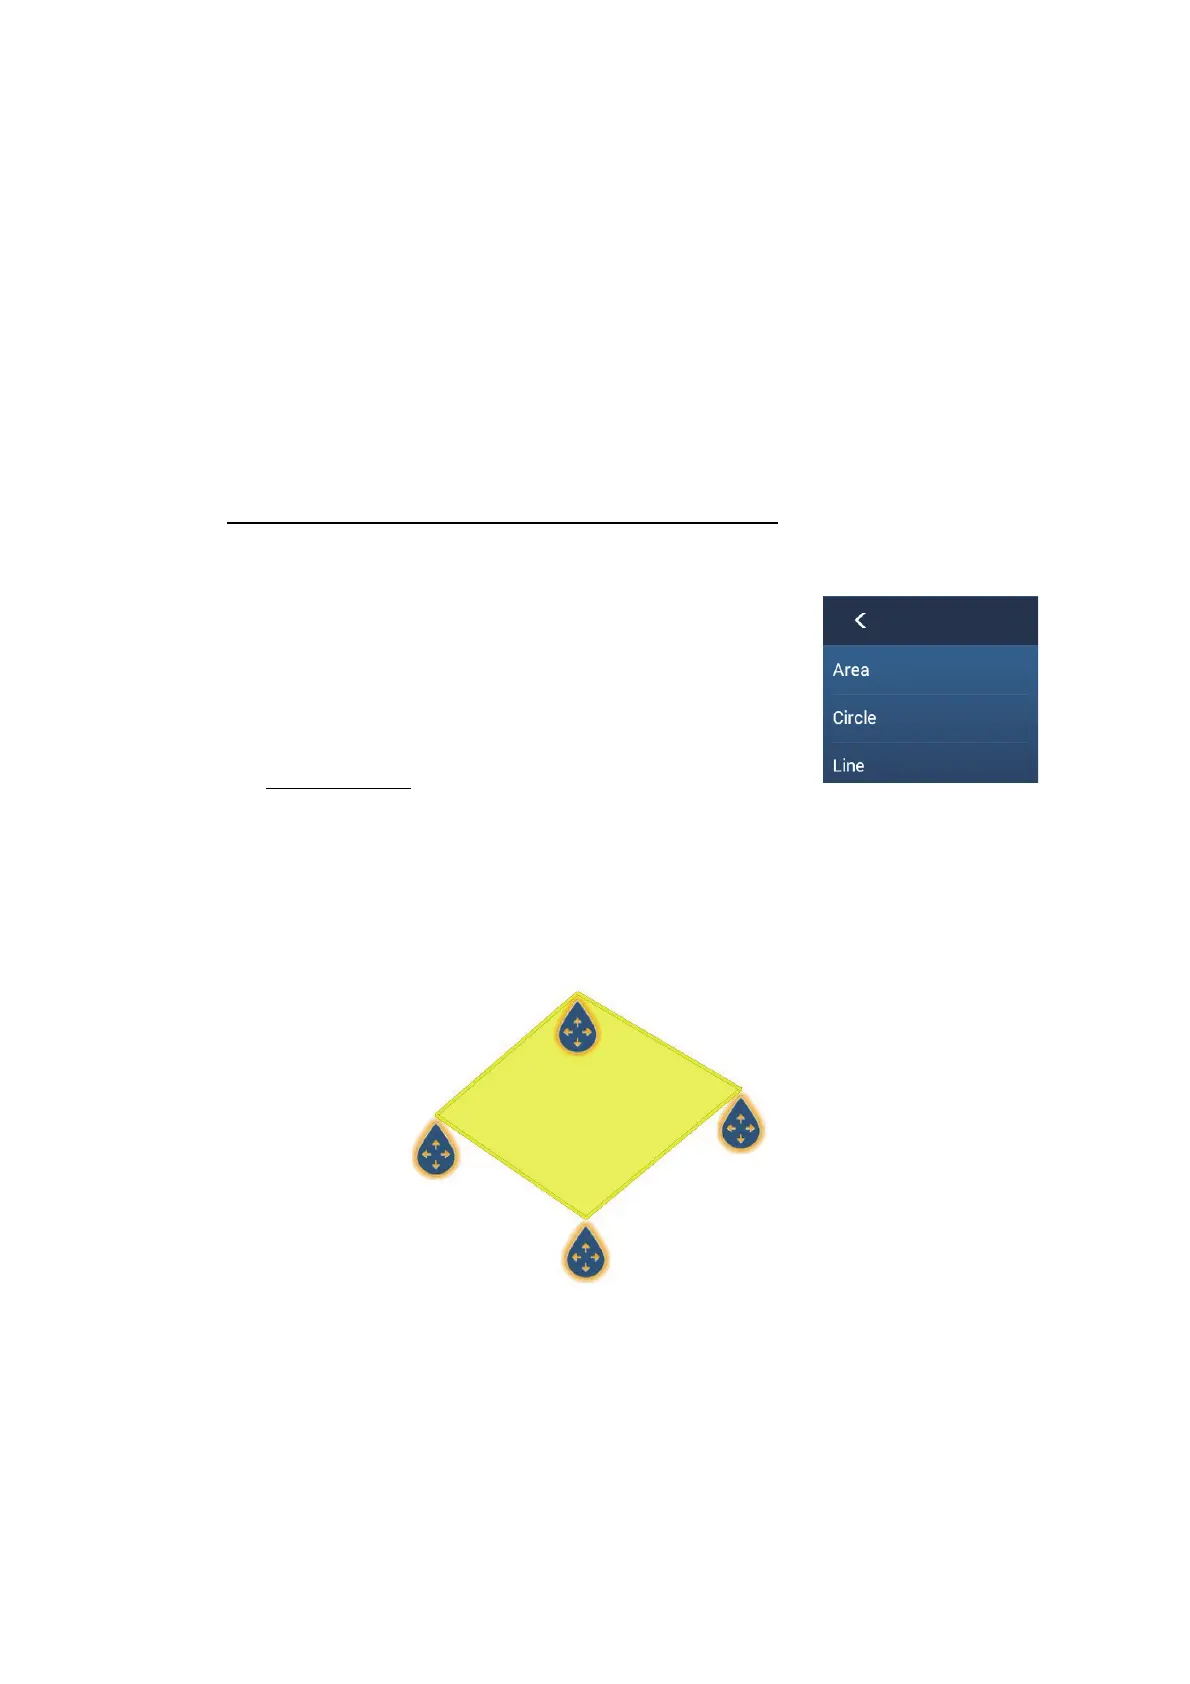
A boundary is available in three forms: area, circle, line. A boundary can be stored in
the unit as a screenshot and shared on a “cloud” (internet connection required) and
the local network.
Method 1: How to create a boundary on the screen
1. Tap the location where you want to place a boundary.
2. Tap [New Boundary] on the pop-up window.
3. Tap [Area], [Circle] or [Line] as appropriate. An icon cor-
responding to the boundary type selected appears at
the location selected at step 1.
4. Do one of the following depending on the boundary type
selected.
Area boundary
1) Tap the location for the next point of the area. A yellow line runs between the
1st location and the 2nd.
2) Tap the location for the next point of the area.
Repeat this step to complete the area. You can drag an icon to change the po-
sition of a point.
3) After selecting the ending point, tap [End Boundary] at the top-right corner.
Point #1
(starting point)
Point #2
Point #3
Point #4
(ending point)
 Loading...