GE HealthCare CONFIDENTIAL
Direction 5936427, Rev. 1 LOGIQ Totus Basic Service Manual
Chapter 3 LOGIQ Totus Setup 3 - 73
4.
Under Still Images, under Still Image Compression, set the Print button to use the same compression format as the Image Storage service.
NOTE: Suppose compression is specified on a print button, and also on an Image Storage service that is either assigned to the button or
assigned to the dataflow in use. Also, suppose the compression settings are different. At the point the Ultrasound system is to send an image
generated by the print button to the service, the Ultrasound system will first un-compress the compressed version of the print button, and then
recompress it using the settings of the service. If the compression of the print button is lossy, the un-compression will not completely restore
the original image. Then applying the compression of the service still generates a lossy image. The process of un-compressing and
recompressing only has a negative impact on system performance.
5.
Under Clips, set the following:
NOTE: This section covers those settings for clips and volumes that can affect the number, contents and properties of images sent to an Image
Storage service.
Add Multiframe Data: Stores multiple DICOM frames (one bitmap for each frame). Select this to either store multiple DICOM frames locally
on the Ultrasound system or to export cine loops to import elsewhere. This option requires more disk space and takes longer to store images
after the print button is pressed. This format captures the image area only. It allows measurements without calibration.
Clip Compression: Large files need to be compressed to improve transfer time.
Clip Quality: Select lossless or various numeric settings. The higher the setting, the less image data is compressed (bigger image file) and
the less image quality is degraded.
6.
Under Volumes, under Volume File Format, select one of the following:
NOTE: This only applies to volume images (3D, 4D).
1 - Standard DICOM: Allows the user to not store raw data, for space considerations.
2 - Standard DICOM with Raw Data: Stores the raw data.
NOTE: Allow Enhanced DICOM Objects needs to be enabled on DICOM Service Page for data to be transferred.
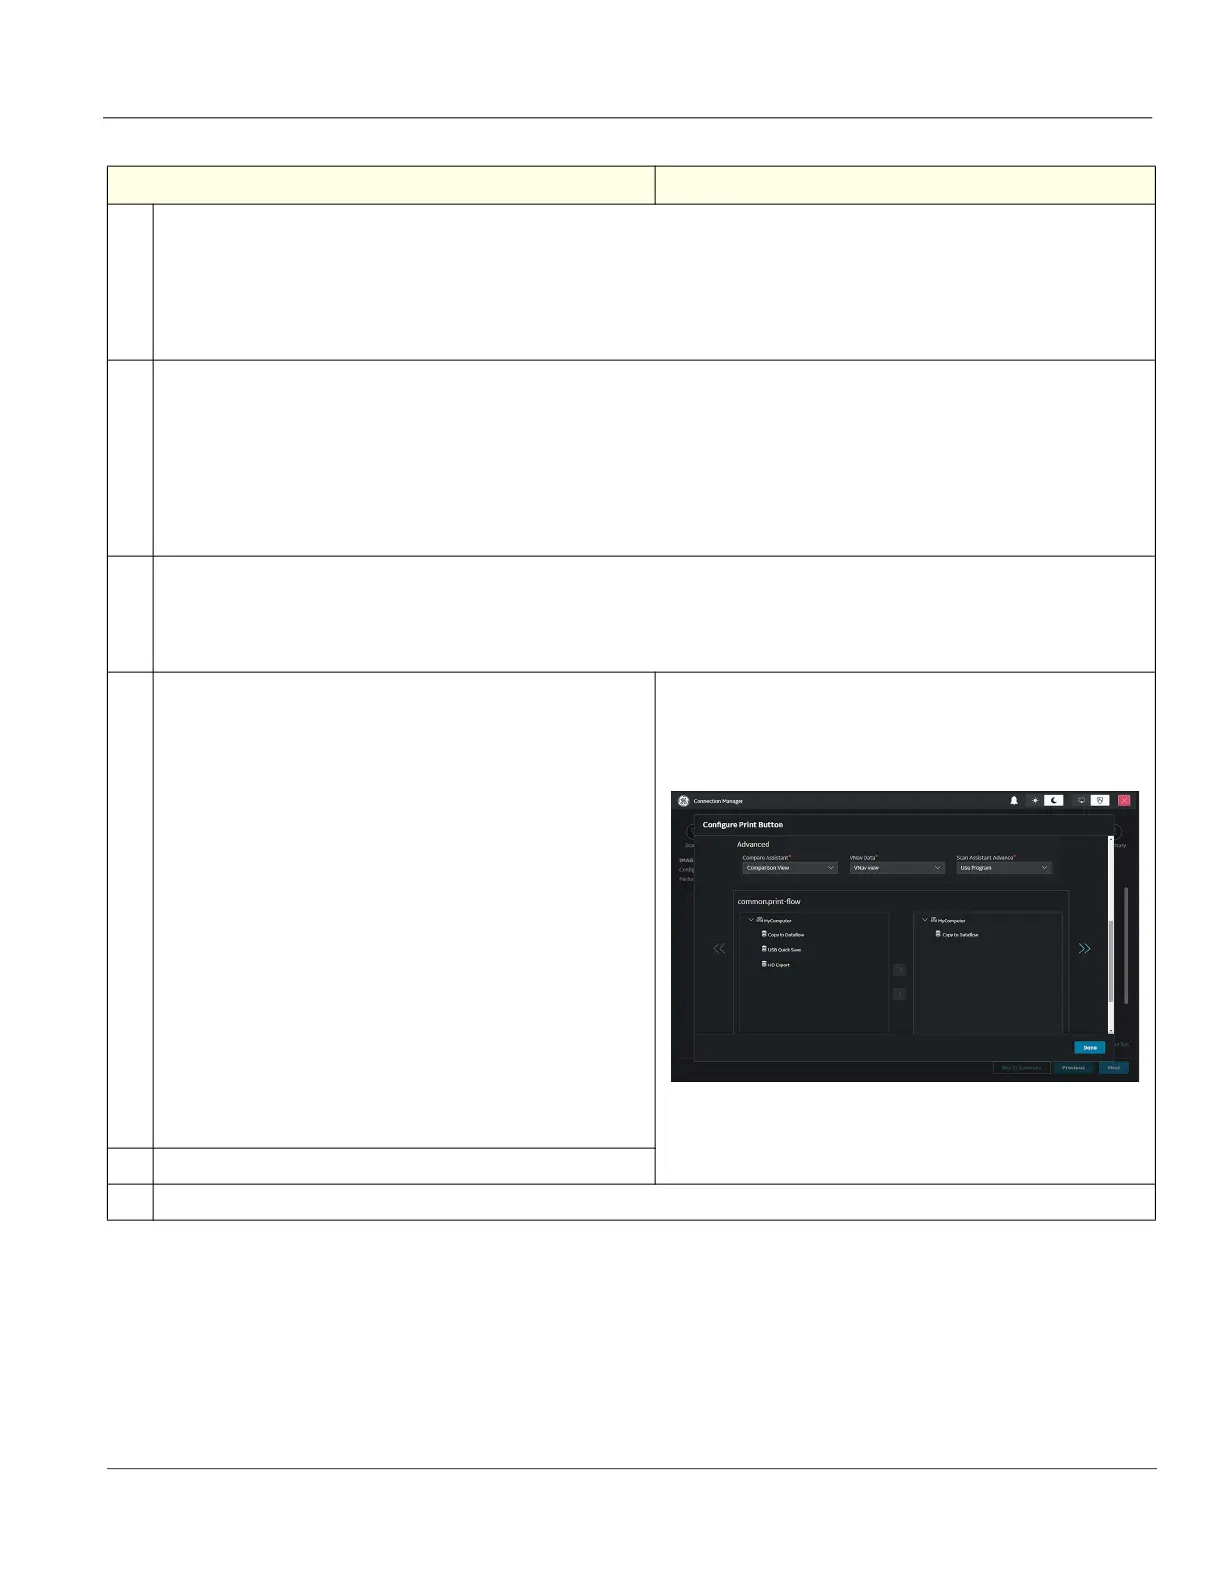
7.
Under Advanced, set the following:
Compare Assistant: Compare Assistant displays an image from a
previous exam next to the live scan.
VNAV Data: VNAVVNAV displays a non-Ultrasound series (such as
CT or MR slices) next to the live scan.
- VNAV view: Print the dual-screen image – the non-Ultrasound series
on one side and the live Ultrasound scan on the other.
- Ultrasound Only: Print only the Ultrasound image.
- VNAV & Ultrasound (2 files): Print one each of VNAV view and
Ultrasound Only.
- Comparison View: Print the dual-screen image – the previous image
on one side and the live scan on the other.
- New Image: Print only the live scan.
- Both Comparison & New (2 files): Print one each of Comparison View
and New Image.
Scan Assistant Advance:
- Use program: System uses setting from the Scan Assistant program
which allows a user to configure two print keys identically except that
one advances Scan Assistant and the other does not.
- On: Advances to the next step when that print key is pressed
independently of the program setting.
- Off: Does not advance to the next step when the print key is pressed
independently of the program setting.
8.
Under common.print- flow, add or remove devices as needed.
9.
Select Done.
Table 3-34 To Configure a Print Button (Continued)
Step Corresponding Graphic
 Loading...


