21
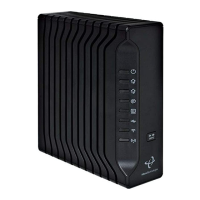
HITRON CGNV2 USER’S GUIDE
INTRODUCTION
NOTE: If you still cannot see the login screen, your CGNV2’s IP settings may have
been changed from their defaults. If you do not know the CGNV2’s new
address, you should return it to its factory defaults. See Resetting the CGNV2
on page 23. Bear in mind that ALL user-configured settings are lost.
1.4.1 MANUAL IP ADDRESS SETUP
By default, your CGNV2’s local IP address is 192.168.0.1. If your CGNV2 is using the
default IP address, you should set your computer’s IP address to be between
192.168.0.2 and 192.168.0.254.
NOTE: If your CGNV2 DHCP server is active, set your computer to get an IP address
automatically in step 5. The CGNV2 assigns an IP address to your computer.
The DHCP server is active by default.
Take the following steps to manually set up your computer’s IP address to connect to
the CGNV2:
NOTE: This example uses Windows XP; the procedure for your operating system
may be different.
1 Click Start, then click Control Panel.
2 In the window that displays, double-click Network Connections.
3 Right-click your network connection (usually Local Area Connection) and click
Properties.
4 In the General tab’s This connection uses the following items list, scroll
down and select Internet Protocol (TCP/IP). Click Properties.
5 You can get an IP address automatically, or specify one manually:
If your CGNV2’s DHCP server is active, select Get an IP address
automatically.
If your CGNV2’s DHCP server is not active, select Use the following IP
address. In the IP address field, enter a value between 192.168.0.2 and
192.168.0.254 (default). In the Subnet mask field, enter 255.255.255.0
(default).
NOTE: If your CGNV2 is not using the default IP address, enter an IP address and
subnet mask that places your computer in the same subnet as the CGNV2.
6 Click OK. The Internet Protocol (TCP/IP) window closes. In the Local Area
Connection Properties window, click OK.
Your computer now obtains an IP address from the CGNV2, or uses the IP address
that you specified, and can communicate with the CGNV2.
 Loading...