43
HITRON CGNV2 USER’S GUIDE
WAN/LAN
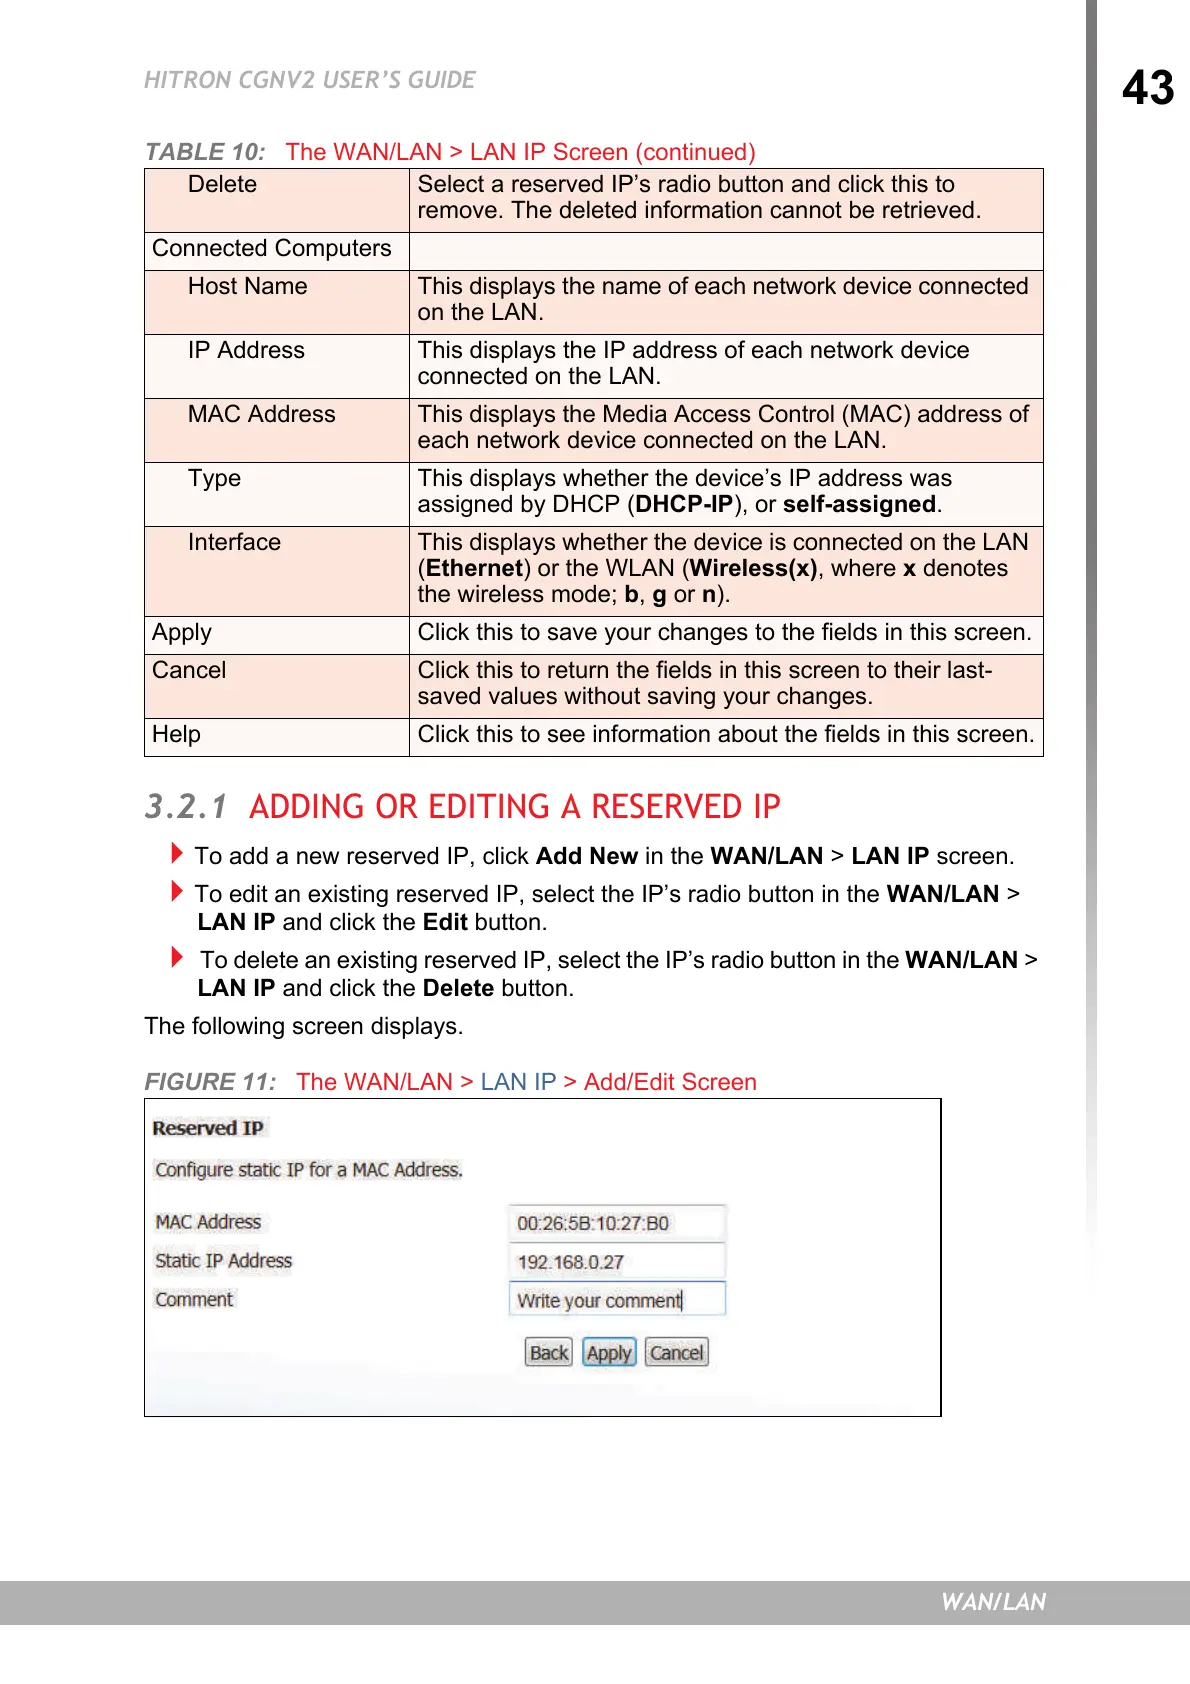
3.2.1 ADDING OR EDITING A RESERVED IP
To add a new reserved IP, click Add New in the WAN/LAN > LAN IP screen.
To edit an existing reserved IP, select the IP’s radio button in the WAN/LAN >
LAN IP and click the Edit button.
To delete an existing reserved IP, select the IP’s radio button in the WAN/LAN >
LAN IP and click the Delete button.
The following screen displays.
FIGURE 11: The WAN/LAN > LAN IP > Add/Edit Screen
Delete Select a reserved IP’s radio button and click this to
remove. The deleted information cannot be retrieved.
Connected Computers
Host Name This displays the name of each network device connected
on the LAN.
IP Address This displays the IP address of each network device
connected on the LAN.
MAC Address This displays the Media Access Control (MAC) address of
each network device connected on the LAN.
Type This displays whether the device’s IP address was
assigned by DHCP (DHCP-IP), or self-assigned.
Interface This displays whether the device is connected on the LAN
(Ethernet) or the WLAN (Wireless(x), where x denotes
the wireless mode; b, g or n).
Apply Click this to save your changes to the fields in this screen.
Cancel Click this to return the fields in this screen to their last-
saved values without saving your changes.
Help Click this to see information about the fields in this screen.
TABLE 10: The WAN/LAN > LAN IP Screen (continued)
 Loading...