Chapter 3 63
Remove/Replace System Components
Removing/Replacing System Components
Removing the Hard Disk Drive(s)
To remove the hard disk drive(s), follow this procedure:
1. Complete the procedure in the section “Removing the CD Drive” (steps 1 through
3; in this chapter), “Removing the DAT Drive” (steps 1 through 5; in Appendix
F), or “Removing the Flexible Disk Drive” (steps 1 through 5; in Appendix G).
2. Complete the procedure in the section “Removing the PCI Cage, I/O Card and PCI
Backplane Board” (steps 1 and 2) found in this chapter.
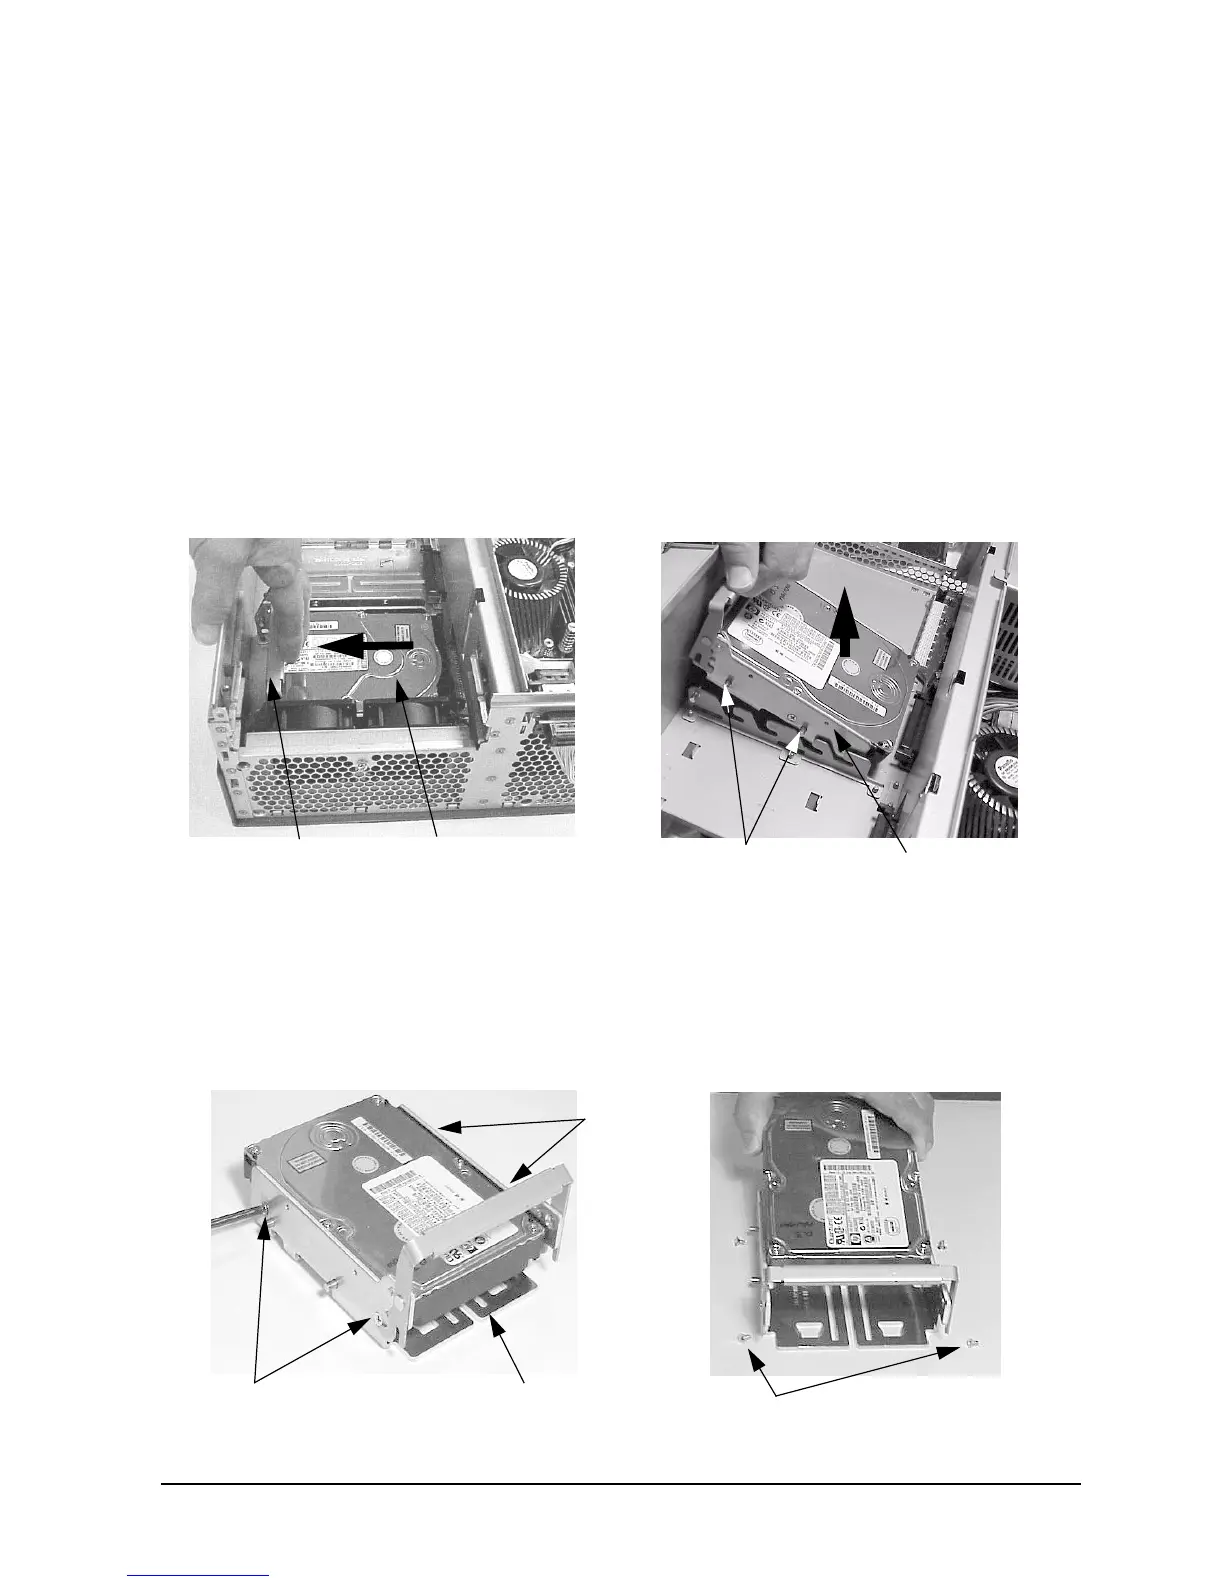
3. Grasp the hard disk drive handle and pull it back, then lift up on the handle. See Figure
3-39.
Figure 3-39. Removing the Hard Disk Drive and Its Mounting Bracket
4. Unscrew the four hard disk drive mounting screws and pull the hard disk drive out of
the hard disk drive bracket. See Figure 3-40. Note that for installation purposes, there
are four mounting screws located on the side of the unused hard disk drive bracket.
Figure 3-40. Removing the Hard Disk Drive from the Hard Disk Drive Bracket
Hard Disk Drive Handle
Hard Disk Drive
(Pull back in the direction of the arrow)
(Lift up in the direction of the arrow)
Hard Disk Drive
Mounting Bracket
Mounting Bracket
Pins
(remove the mounting screws)
(remove the hard disk drive from bracket)
Hard Disk Drive Mounting Screws
Hard Disk Drive Mounting Screws
Hard Disk Drive
(use a #2 Phillips screwdriver)
Bracket
Hard Disk
Drive
Mounting
Screws
 Loading...