Step 3 Power off the RH2288 V3. For details, see 4.2 Powering Off the Server.
Step 4 Remove all external cables such as power and network cables.
Step 5 Remove the RH2288 V3 and put it on an ESD desktop. For details, see 3.6 Removing the
Server.
Step 6 Remove the chassis cover. For details, see 7.11 Removing the Chassis Cover.
Step 7 Remove the cables from the M.2 SSD riser card. For details, see 2.7.1 Internal Cabling for
an M.2 SSD Riser Card.
Step 8 Remove the M.2 SSD riser card.
l For details about how to remove an M.2 SSD riser card from the mainboard, see 7.21.2
Removing a PCIe Card from the Mainboard.
l For details about how to remove an M.2 SSD riser card from a riser card, see 7.21.1
Removing a PCIe Card from a Riser Card.
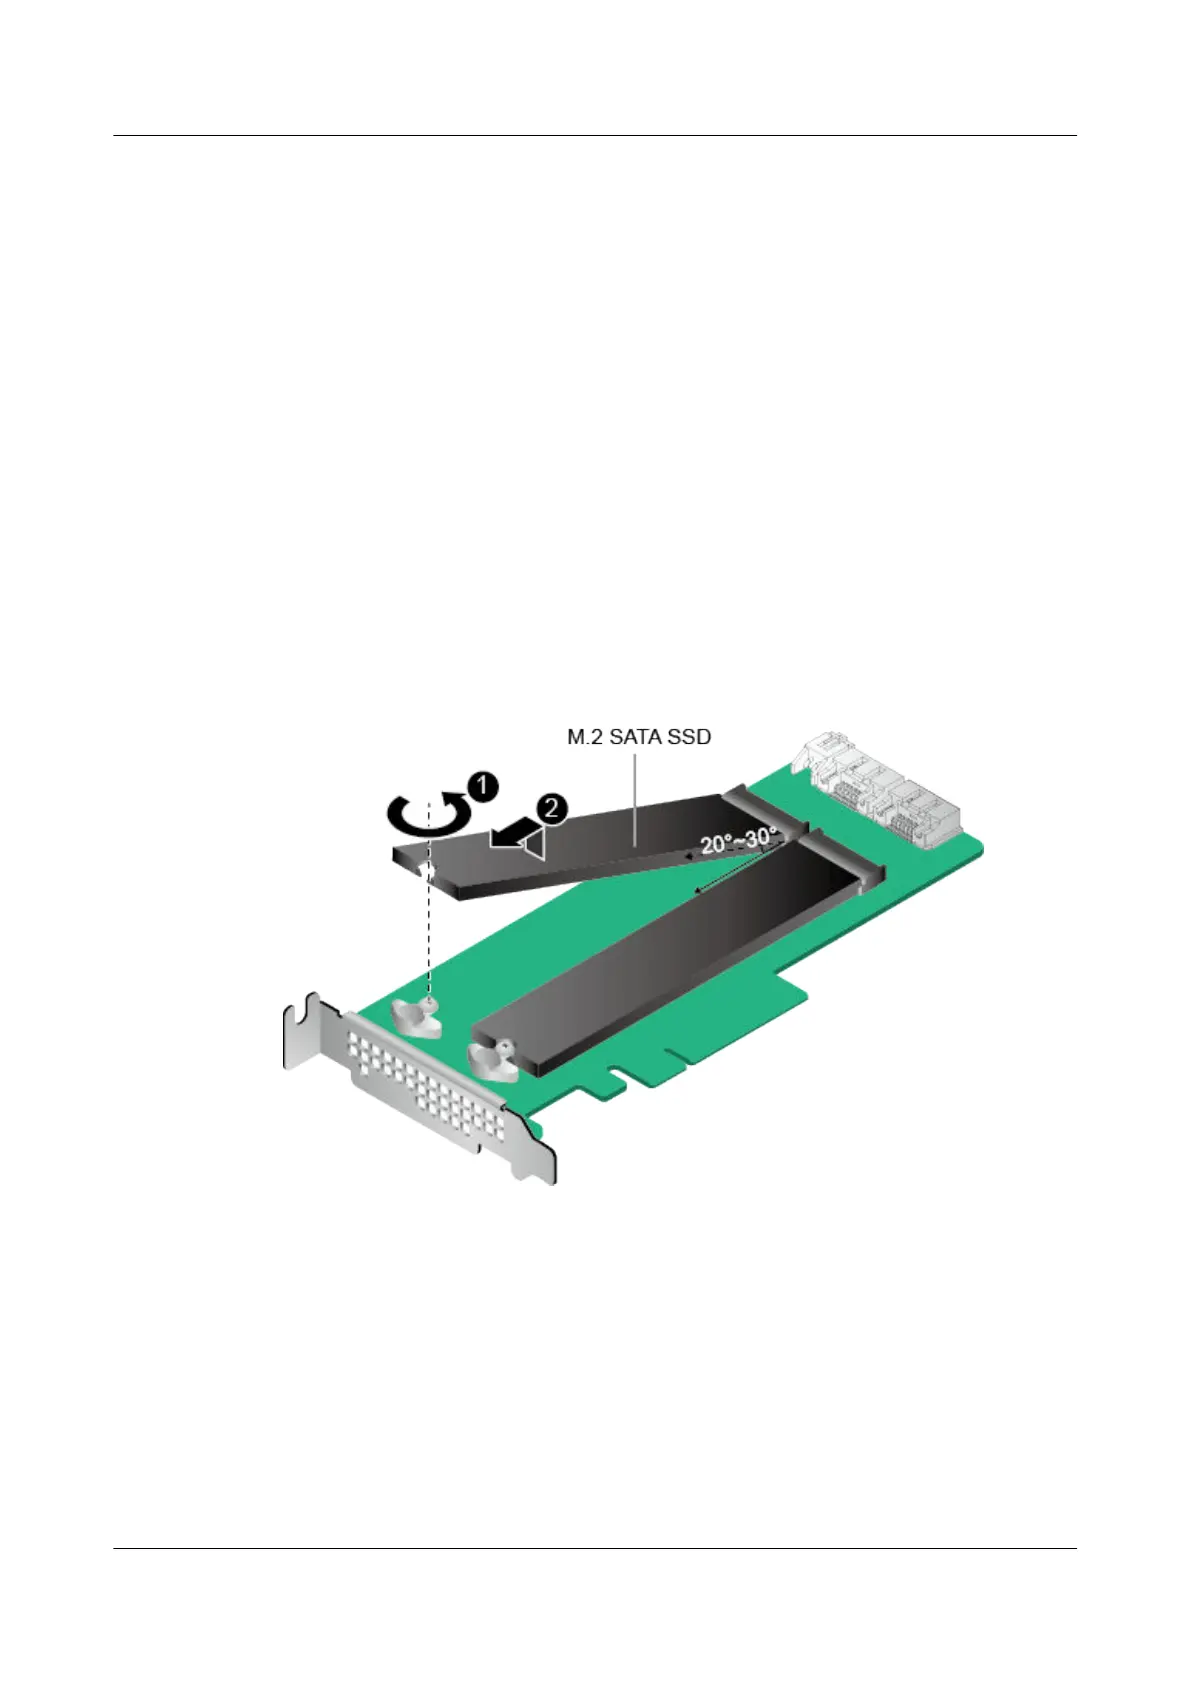
Step 9 Loosen the screw on the M.2 SATA SSD card using an M3 Phillips screwdriver. See step (1)
in Figure 7-148.
Figure 7-148 Removing an M.2 SATA SSD card
Step 10 Lifting the M.2 SATA SSD card at a 20° to 30° angle upwards, pull it out of the slot. See step
(2) in Figure 7-148.
Step 11 Place the removed M.2 SATA SSD card in an ESD bag.
----End
7.64 Installing an M.2 SATA SSD Card
Install an M.2 SATA SSD card to replace the faulty one.
RH2288 V3 Server
User Guide
7 Replacing Parts
Issue 32 (2019-03-28) Copyright © Huawei Technologies Co., Ltd. 262
 Loading...