70 Chapter 6: Working with system board components
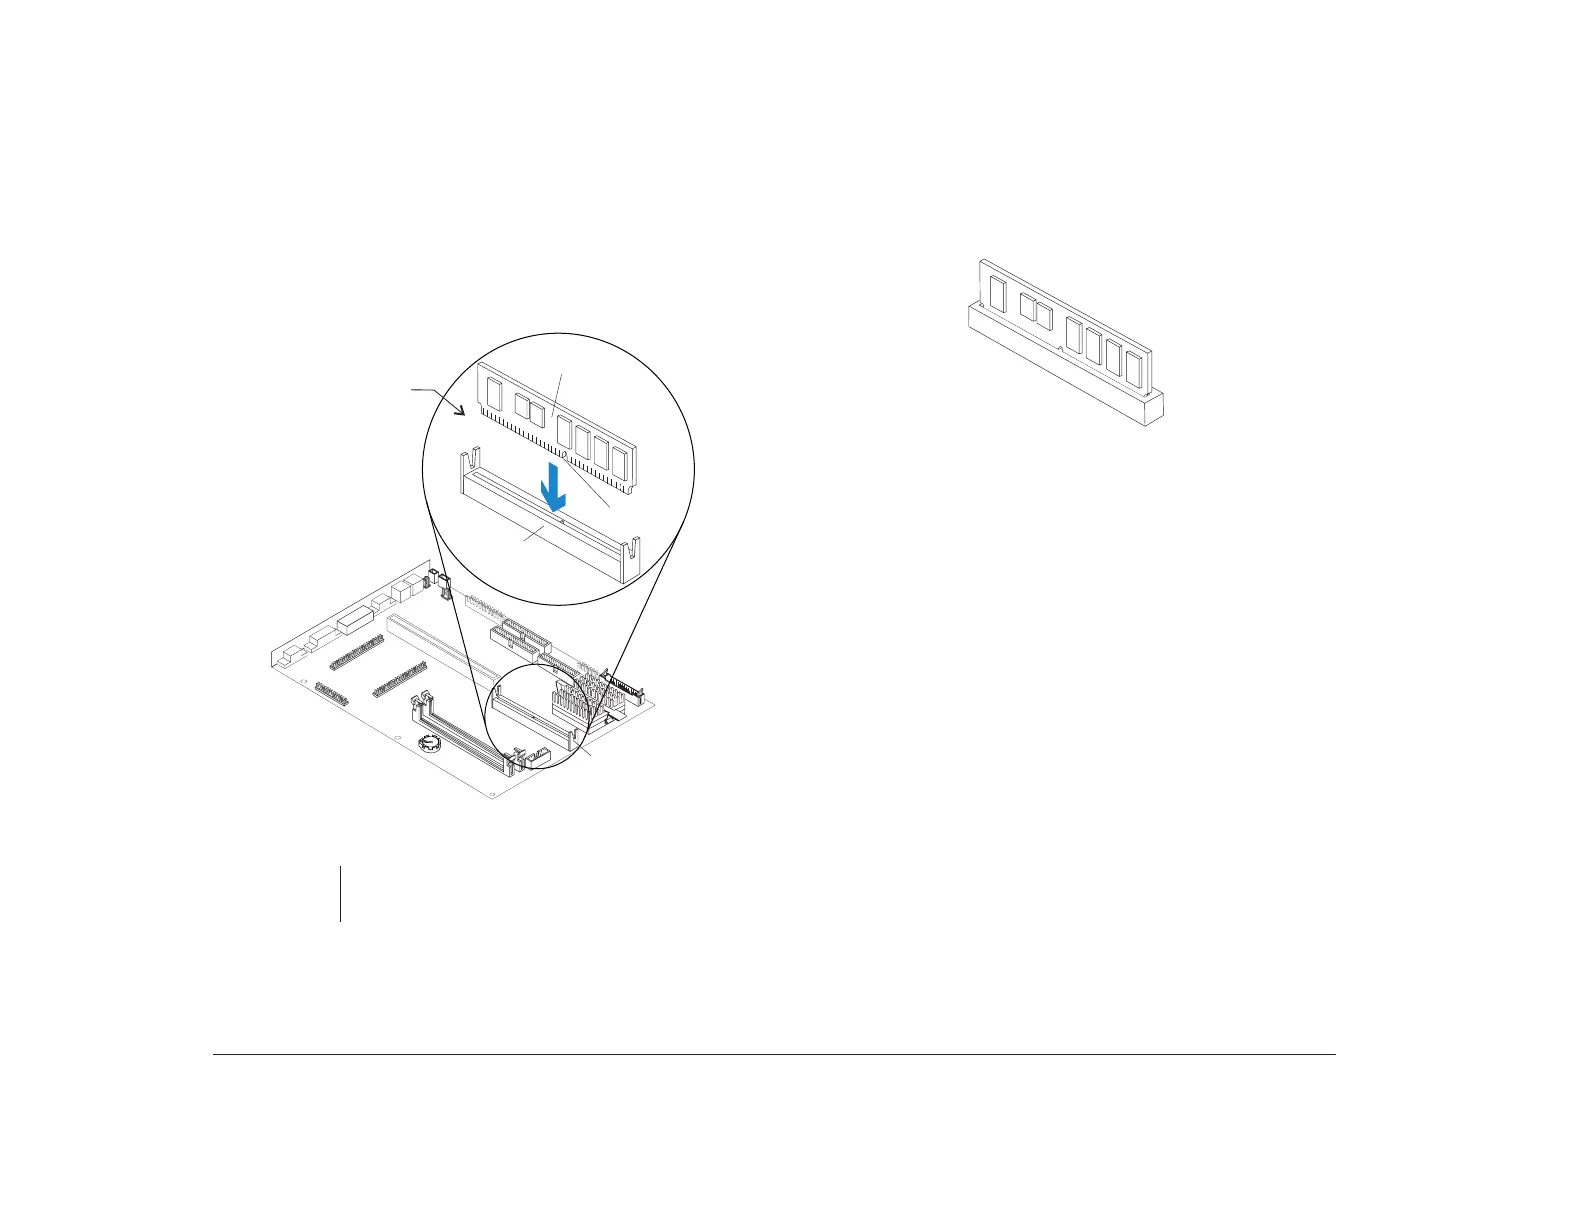
2. Position the new cache module over the cache
socket so that the notch at the bottom of the
module lines up over the divider in the socket. As
shown in the next picture, match the wide part of
the module to the wide part of the opening in the
socket.
Important:
The module can be installed only when the notch
is aligned correctly.
Cache Memory
Module Socket
Cache
Memory Module
Notch
Cache
Memory
Module Socket
To insert cache
module, position
bottom notch
over socket
divider as shown.
3. Push the module straight down into the socket.
A properly-inserted module looks like this:
Replacing an existing module
If you want to upgrade from 256 KB of cache memory to
512 KB of cache memory, you must replace the existing
256 KB module with a 512 KB module.
To replace an existing module, remove the installed
module by pulling straight up on the module. Then
follow the instructions in “Inserting a new module” on
page 69 to install the new module.
 Loading...


