72 Chapter 6: Working with system board components
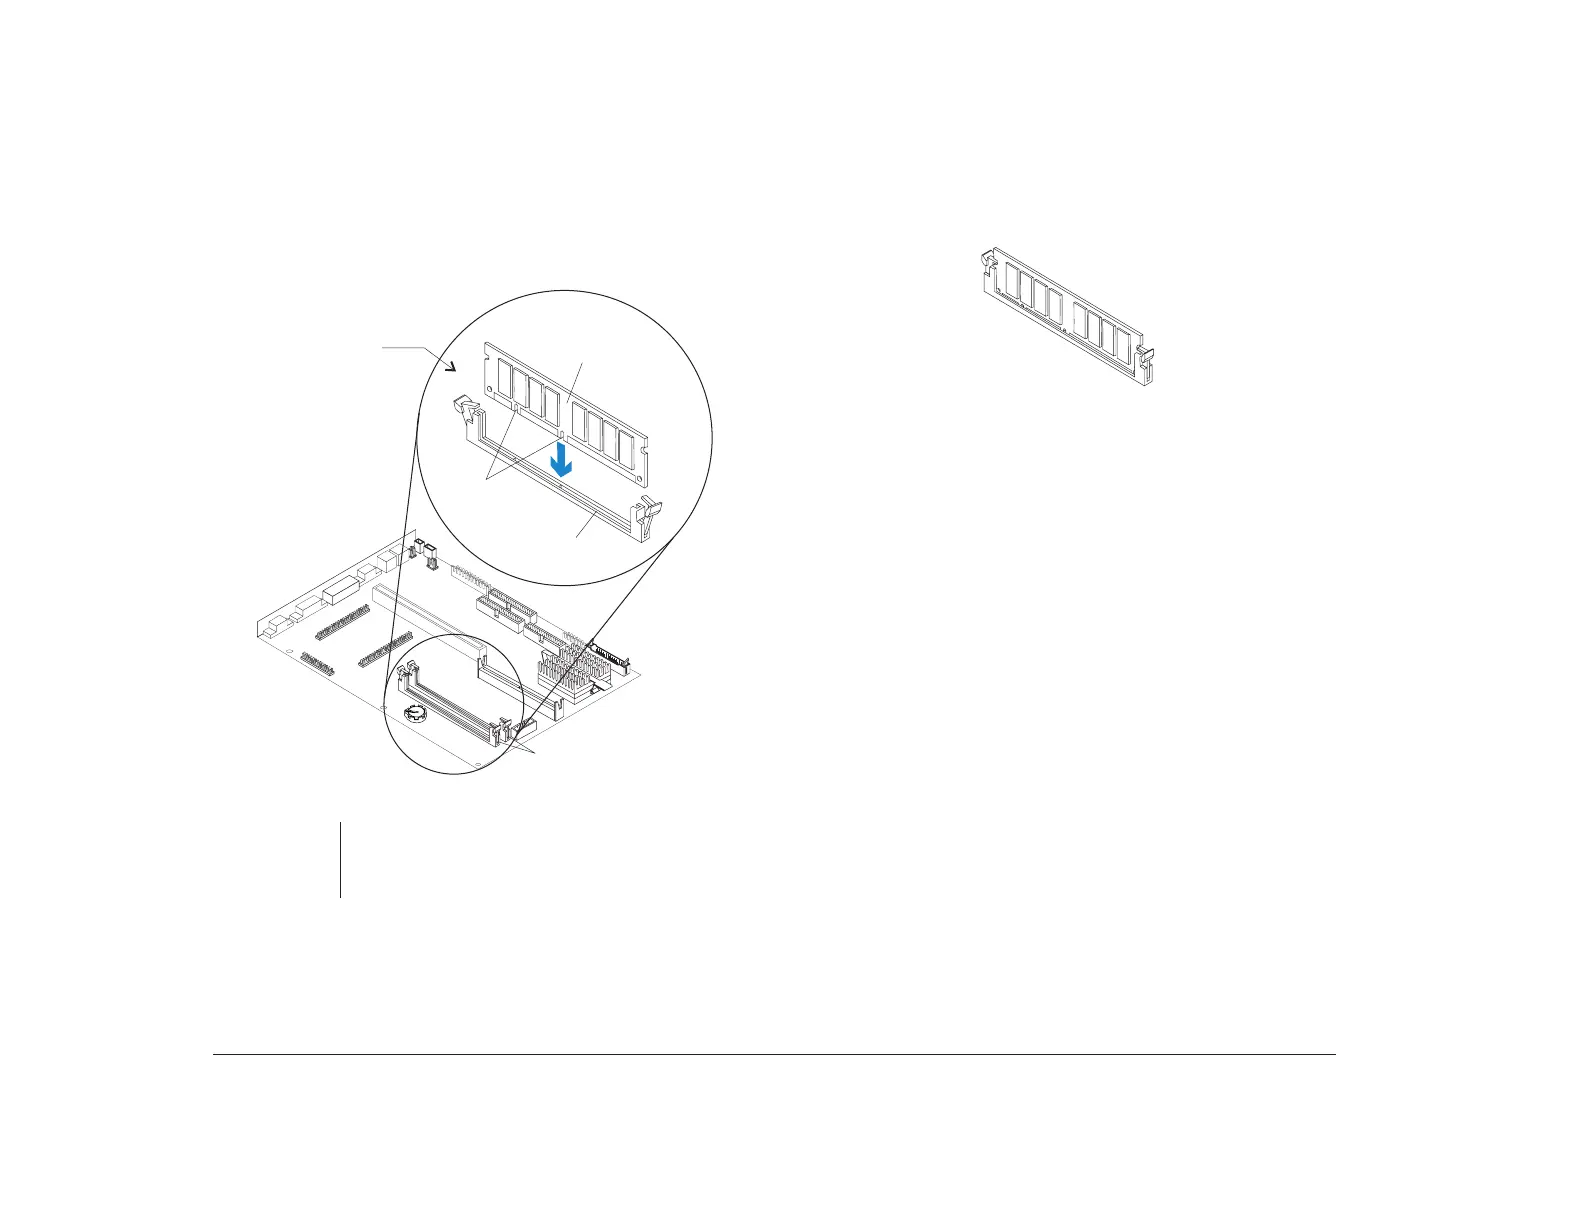
3. Position the DIMM over the socket so that the
notch at the bottom of the module lines up over
the divider in the socket. As shown in the next
picture, match the wide part of the module to the
wide part of the opening in the socket.
Important:
The module can be correctly installed only when
the wide set of contacts is inserted into the wide
socket opening.
DIMM Sockets
DIMM
Memory Module
DIMM Socket
Notches
To insert DIMM
module, position
bottom notches
over socket
dividers as shown.
4. Push the module straight down into the socket.
A properly-inserted module looks like this:
The clips on the right and left sides of the socket
should automatically lock into the notches on both
sides of the DIMM. If the clips do not lock, make
sure you have inserted the DIMM correctly and
have pushed it all the way down.
 Loading...


