ENGINE MECHANICAL 6A–83
1. Remove the cylinder head assembly.
Refer to “Cylinder Head Removal” in this manual.
2. Remove the oil pan.
Refer to “Oil Pan Removal” in this manual.
3. Remove the piston with connecting rod.
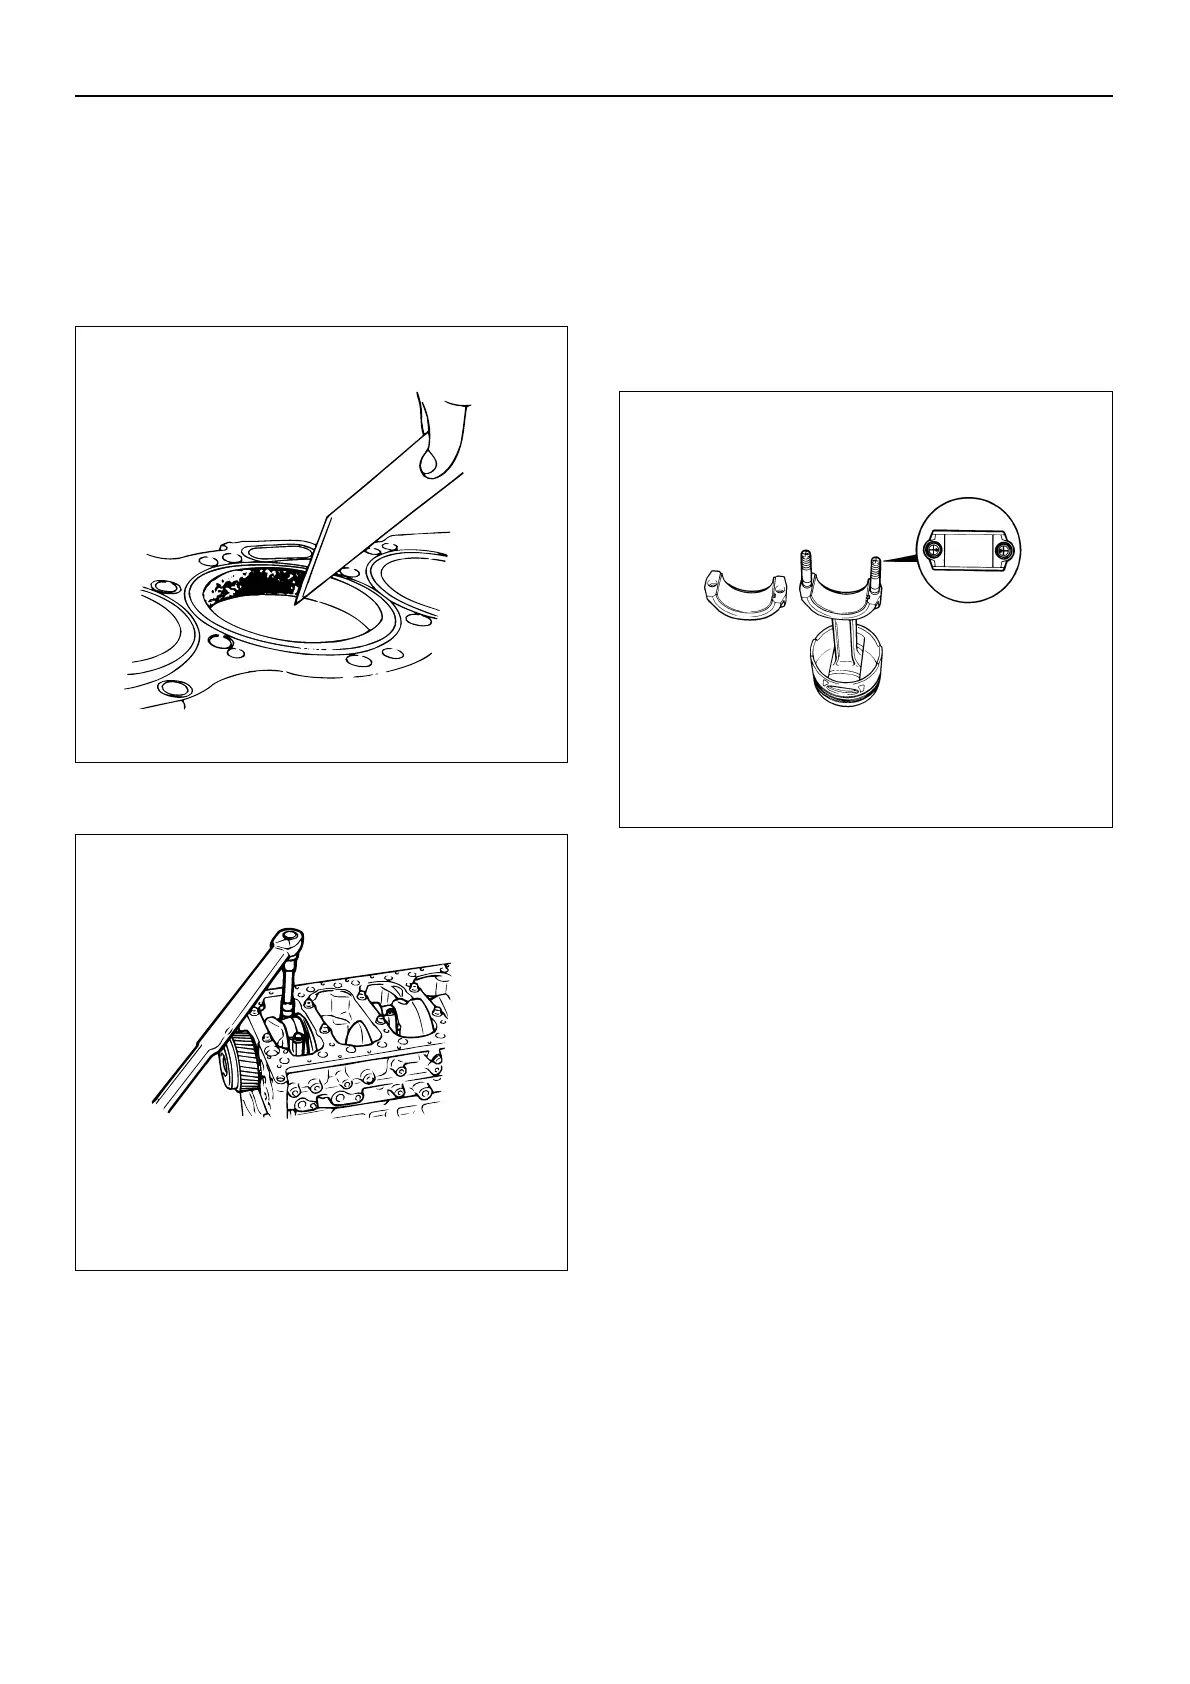
1. Remove carbon deposits from the upper position
of the cylinder wall with a scraper.
2. Loosen the connecting rod cap bolts.
3. Move the piston to the top of the cylinder and tap
it with a hammer grip or similar object from the
connecting rod lower side to drive it out.
CAUTION : Take care not to damage the oil jets.
4. Remove the connecting rod bearings.
• Keep the connecting rod bearings in order for
reinstallation to their original positions.
• Inspect the connecting rod bearings for damage
and wear.
Installation
1. Install the piston with connecting rod.
1. Clean the piston in solvent to remove all sludge.
2. Wipe away any foreign material in the cylinder
bores and on the pistons and connecting rods.
3. Install the upper connecting rod bearings to the
connecting rods.
4. Install the lower connecting rod bearings to the
bearing caps.
5. Apply engine oil to the cylinder wall, upper/lower
bearing surfaces and crank pins of the crankshaft.
Apply engine oil to the entire circumference of the
piston rings.
6. Position the piston ring gap as shown in the
illustration.
Gap position:
(1) 1st compression ring
(2) 2nd compression ring
(3) 3rd compression ring
(4) Oil ring
(5) Coil expander
012EY00018
015EY00083
 Loading...