Basic Job Settings
9
bizhub PRO C6501 9-53
– To register the desired custom size:
(1) Touch [Size Setting], then touch [Custom].
(2) Select the lengthwise/widthwise dimension key to highlight it,
then use [+], [,], or touch screen keypad to enter the desired spe-
cial size.
Entered size should fall within 140 - 330 mm in lengthwise dimen-
sion, 182 - 487 mm in widthwise dimension.
(3) Similarly, touch the trimming width key to highlight it, then enter
the desired amount. With the Trimming mode selected, the ma-
chine will output printed sets trimmed by the specified amount.
Entered amount should fall within 1 - 40 mm.
(4) Touch [Lead Edge], [Rear Edge], or [Center] to specify the de-
sired image position.
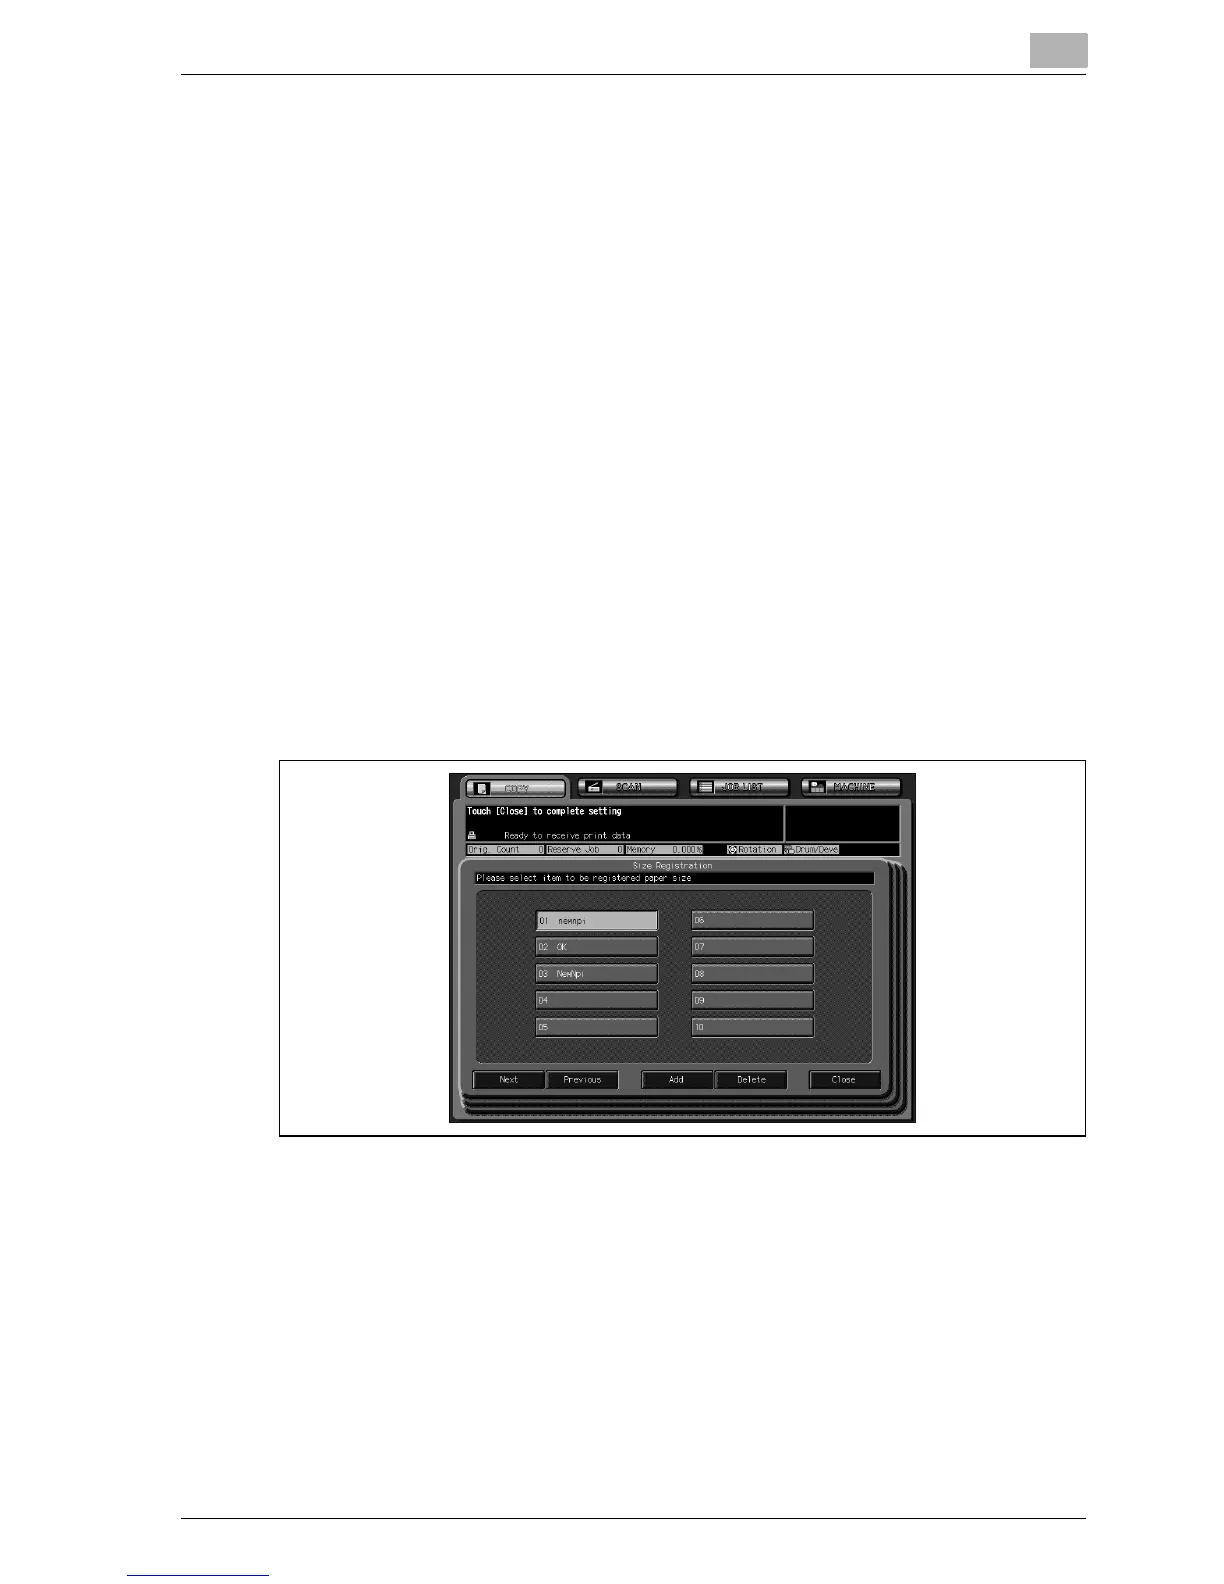
(5) Touch [Size Registration] to display the Size Registration
Screen.
(6) Touch the desired number key to highlight it, using [Next] and
[Previous] as needed. Select the key with a name displayed to over-
write the size and name registered for that key.
(7) Touch [Add] to display the Input Custom Size Name Screen.
Touching [Delete] will display a popup menu to confirm the data de-
letion. Touch [Yes] to delete the data registered for that key.
(8) Enter the desired name, then touch [OK] to return to the previous
screen.
(9) Touch [Close] to restore the Size Setting Screen.
(10) Touch [OK] to complete the setting and return to the Paper Set-
ting Screen.
Touching [Fix] will complete the setting and directly return to the
Copy Screen.
 Loading...