Maintenance
51
Pos: 20.33.22 /Ü berschriften/Ü berschriften 3/K- O/Messerschr aubverschluß @ 0\mod_11 97270941296_7 8.doc @ 16578
8.11.1 Blade Screw Connection
Pos: 20.33.23 / BA/Wartung/Mäh werke/Beschr eibung Messer wechsel Mess erschraubversc hluss @ 0\mo d_119727019 7046_78.doc @ 16559
EC-0-250
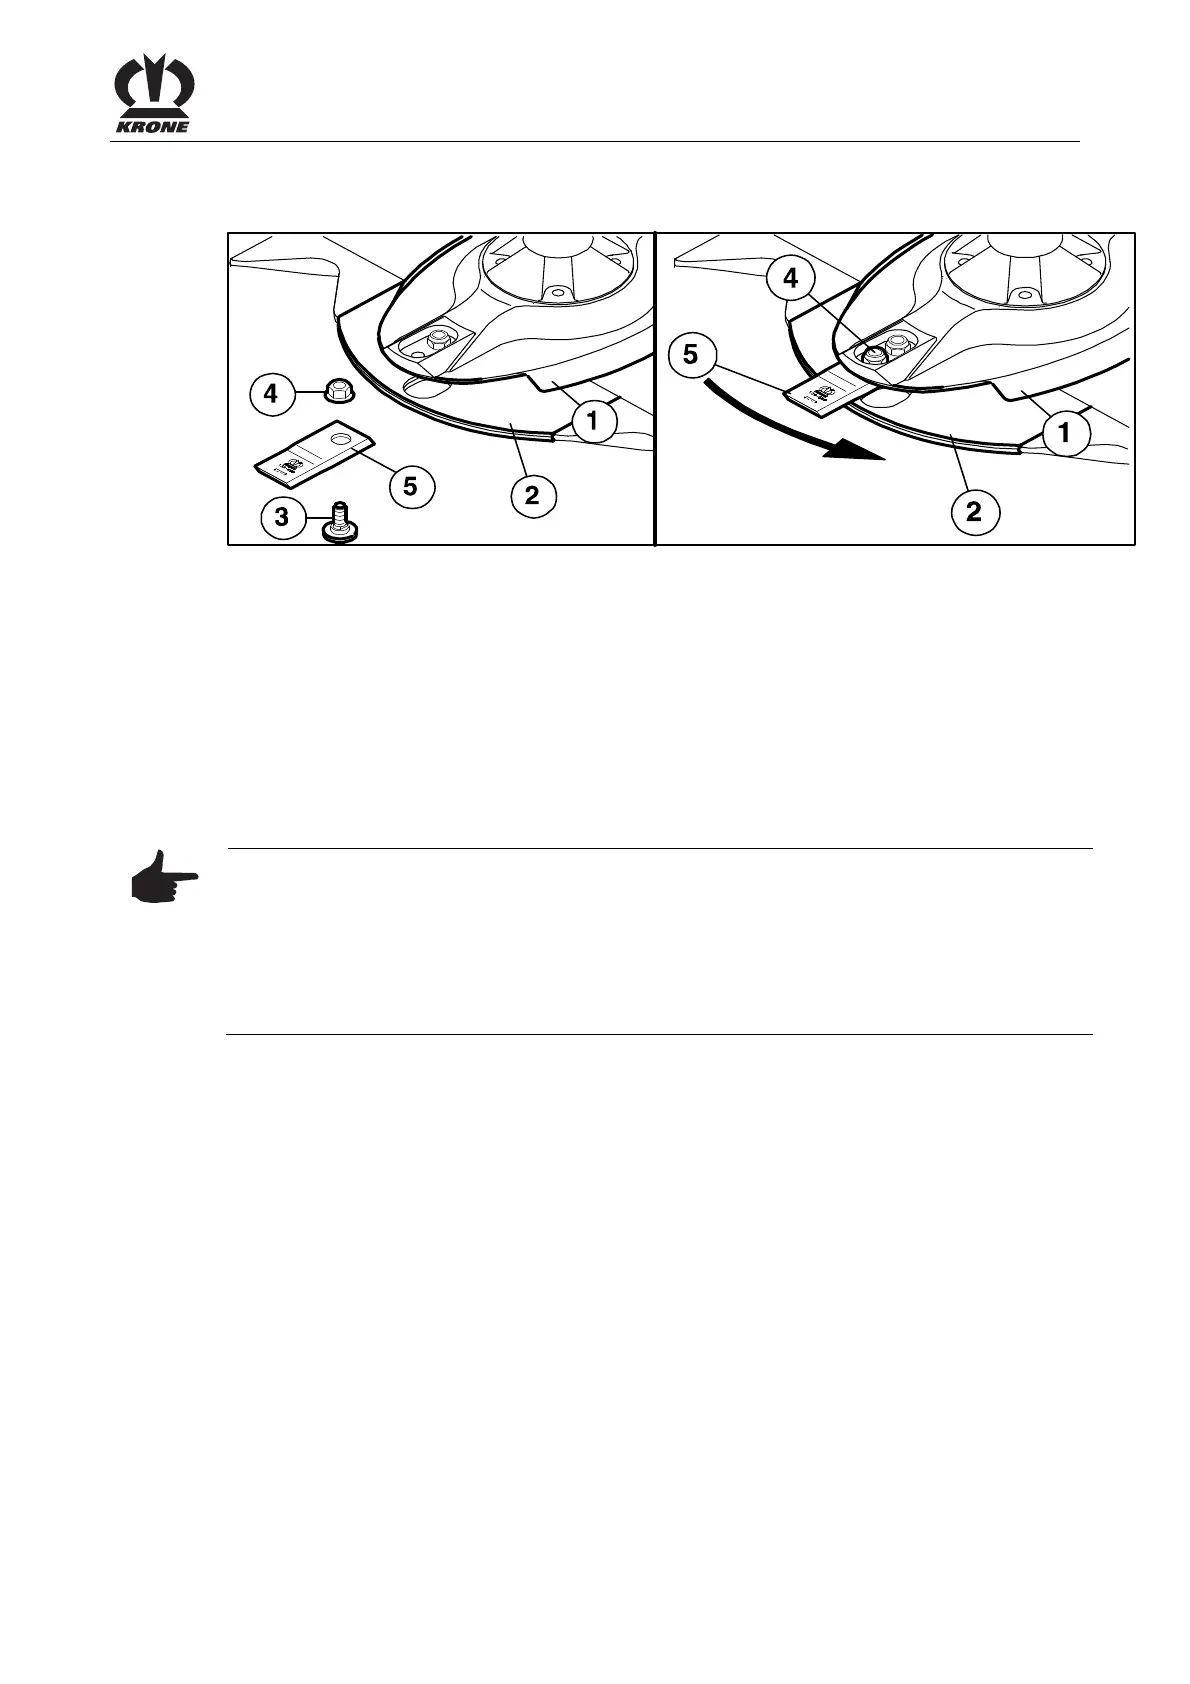
Fig. 27
• Clean the area.
• Remove damaged or worn blades.
• To fit the blades, insert the blade (5) between the wear plate (2) and the cutting disc (1).
• Insert the retaining bolt (3) from below through the wear plate, the blade and the cutting
disc.
• Place the hex nut (4) on the retaining bolt from above and tighten it firmly. (for tightening
torque see chapter entitled "Torques")
• Repeat this process for all blades, even on the blade drums.
• After fitting the blades, fold the protective device down again.
Note
• The cutter blades of anticlockwise rotating cutting discs / blade drums are different than
those of clockwise rotating ones. Make certain the direction of rotation is correct when
installing!
• The arrow on the cutter blades must match the direction of rotation of the corresponding
cutting discs / blade drums.
• The hex nut (4) used to secure the retaining bolts must not be used more than once.
Order No. for clockwise rotating blade: 139-889
Order No. for anticlockwise rotating blade: 139-888
Pos: 20.33.24 / BA/-----Seiten umbruch------ @ 0\mod_11961 75311226_0.doc @ 4165
 Loading...