KiSC issued 09, 2007 A
0.04
to
0.07
mm
0.0016
to
0.0028
in.
·
-
--
-
-
--
---
0.10
mm
0.0039
in.
0
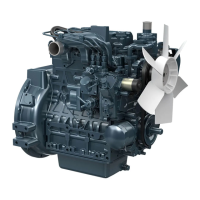
Checking and Refining Valve Seat Width
1)
Clean the val ve seat su rface.
2)
Measu re the width of the seat usi ng a set of vern ier
cal
i
pers.
3)
Appl y red lead on the val ve to check if the seat is scratch-
ed or not.
(
A) How to repair the valve seat
C
(a) Valve contacting width
•
To correct the dimensions of the valve seat usi ng a valve
seat cutter, follow the steps.
1) Use a cutter suitable for the valve guide and the valve
seat. (0.785 rad.(45°),¢8m m(0.315
in.))
2)
Grind off the front surface of the valve seat by 0.262
rad. ( 15°), since the seat surface becomes wider than
before.
3)
Grind off the rear surface of the seat by usi ng 1.134 or
1.308 rad. (65 or 75°) cutter to finish the seat 2.1 m m
( 0.0827
i
n .) wide.
4) Reface the valve.
(b)
Corrected
of valve seat
(cl U ncorrected surface
of va Ive seat
C 019 F016
(d)
A-0.785
rad.(45°)
cutter
B
-0.262
rad.(15°)
cutter
C-1.134
or
1.308
rad.(65
or 75°) cutter
51
C+)
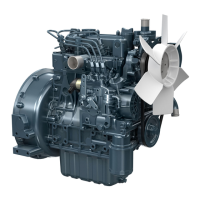
Checking Valve Recessing
1)
Clean the face of the val ve.
2)
Measu re the si n ki ng with a depth gau ge.
3)
I
f the measu rement exceeds the al
l
owa ble
l i
m
i
t, repl ace.
C 019
01
(i)
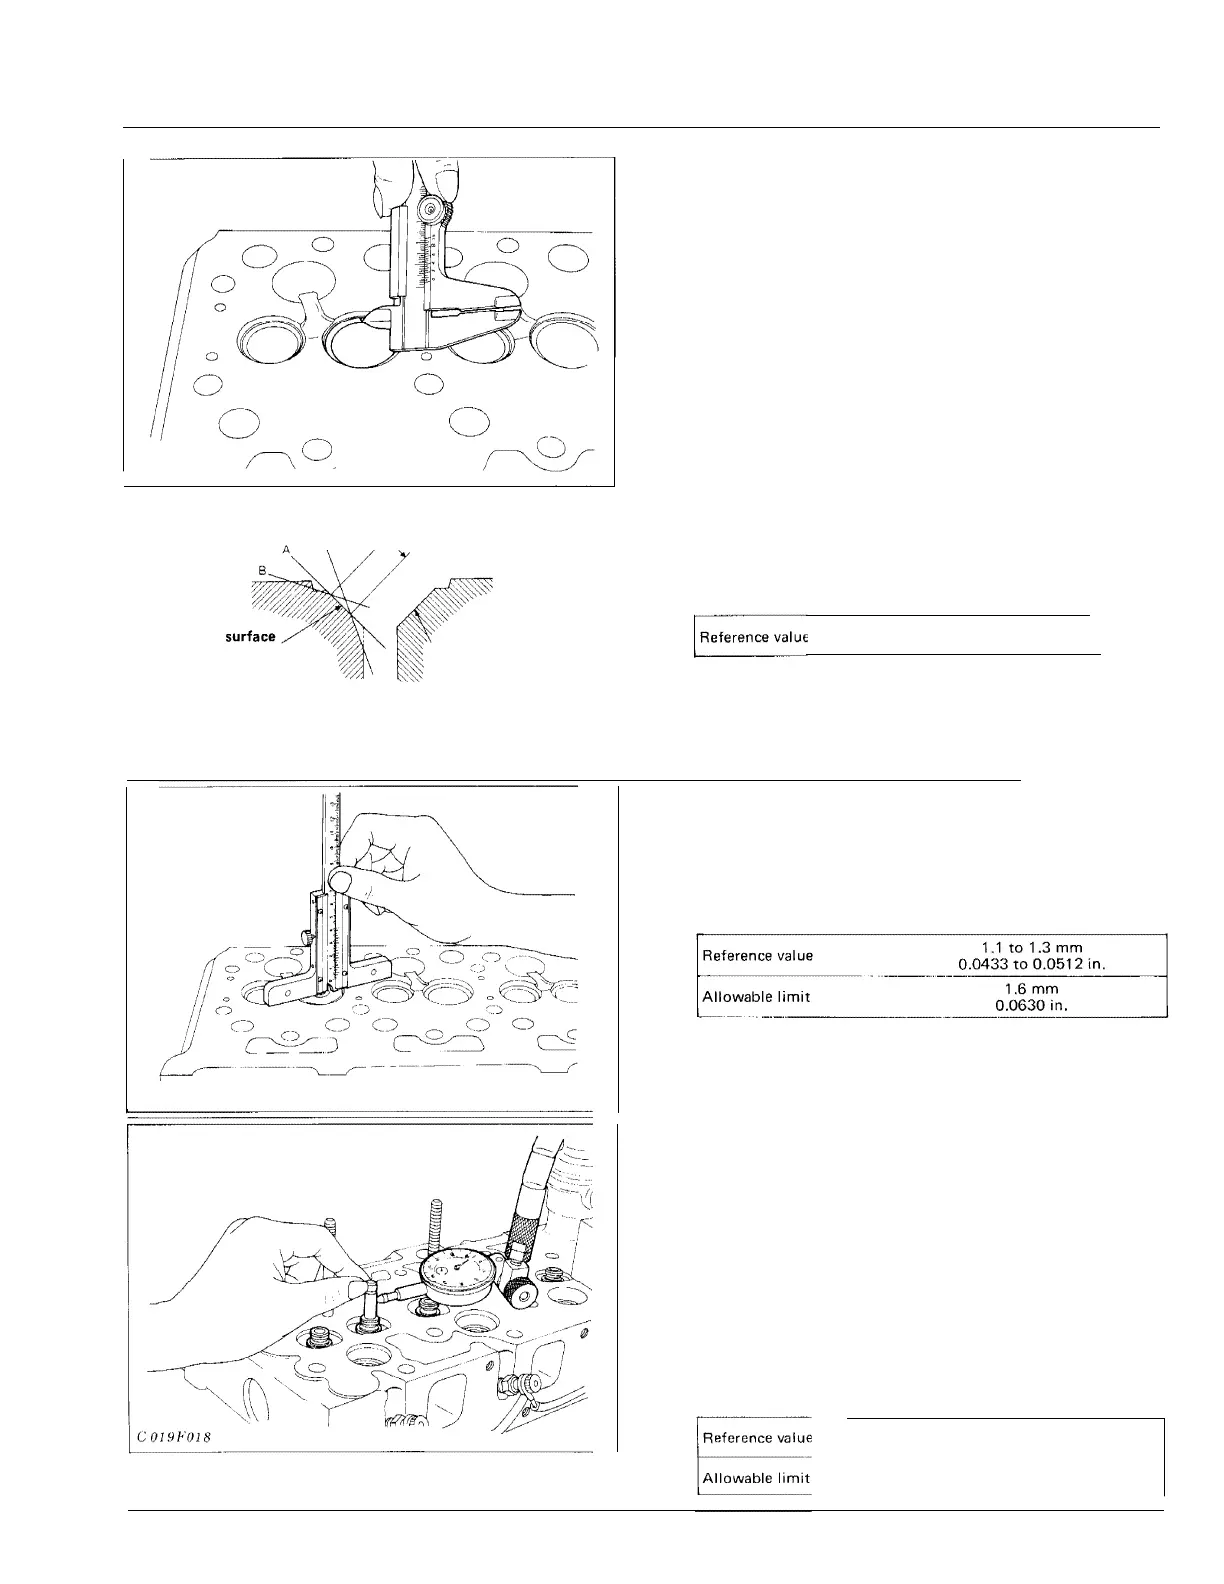
Checking Stem Guide Clearance
1)
Remove carbon from the val ve gu
i
de.
2)
Af ter ma ki ng su re th at the val ve stem is straight,
i
nsert
the val ve
i
nto the val vegu ide.
3)
Measu re the stem gu ide clea rance wi th a d ial gauge.
4)
I
f the measu rement exceeds the al
l
owa ble
l i
m
i
t, repl ace
the stem gu
i
de and the val ve.
( Note for replacing )
•
I
nlet and exhaust valve guide resem ble each other
i
n
shape. To
i
nstall them, be su re that they a re on the proper
side.
019
01 5
2.1
mm
0.0827
in.
 Loading...