5-40
Operation on the Machine > Scanning
Scan the Image by Selecting the Destination (Quick Scan)
Execute scanning from KYOCERA Client Tool.
1
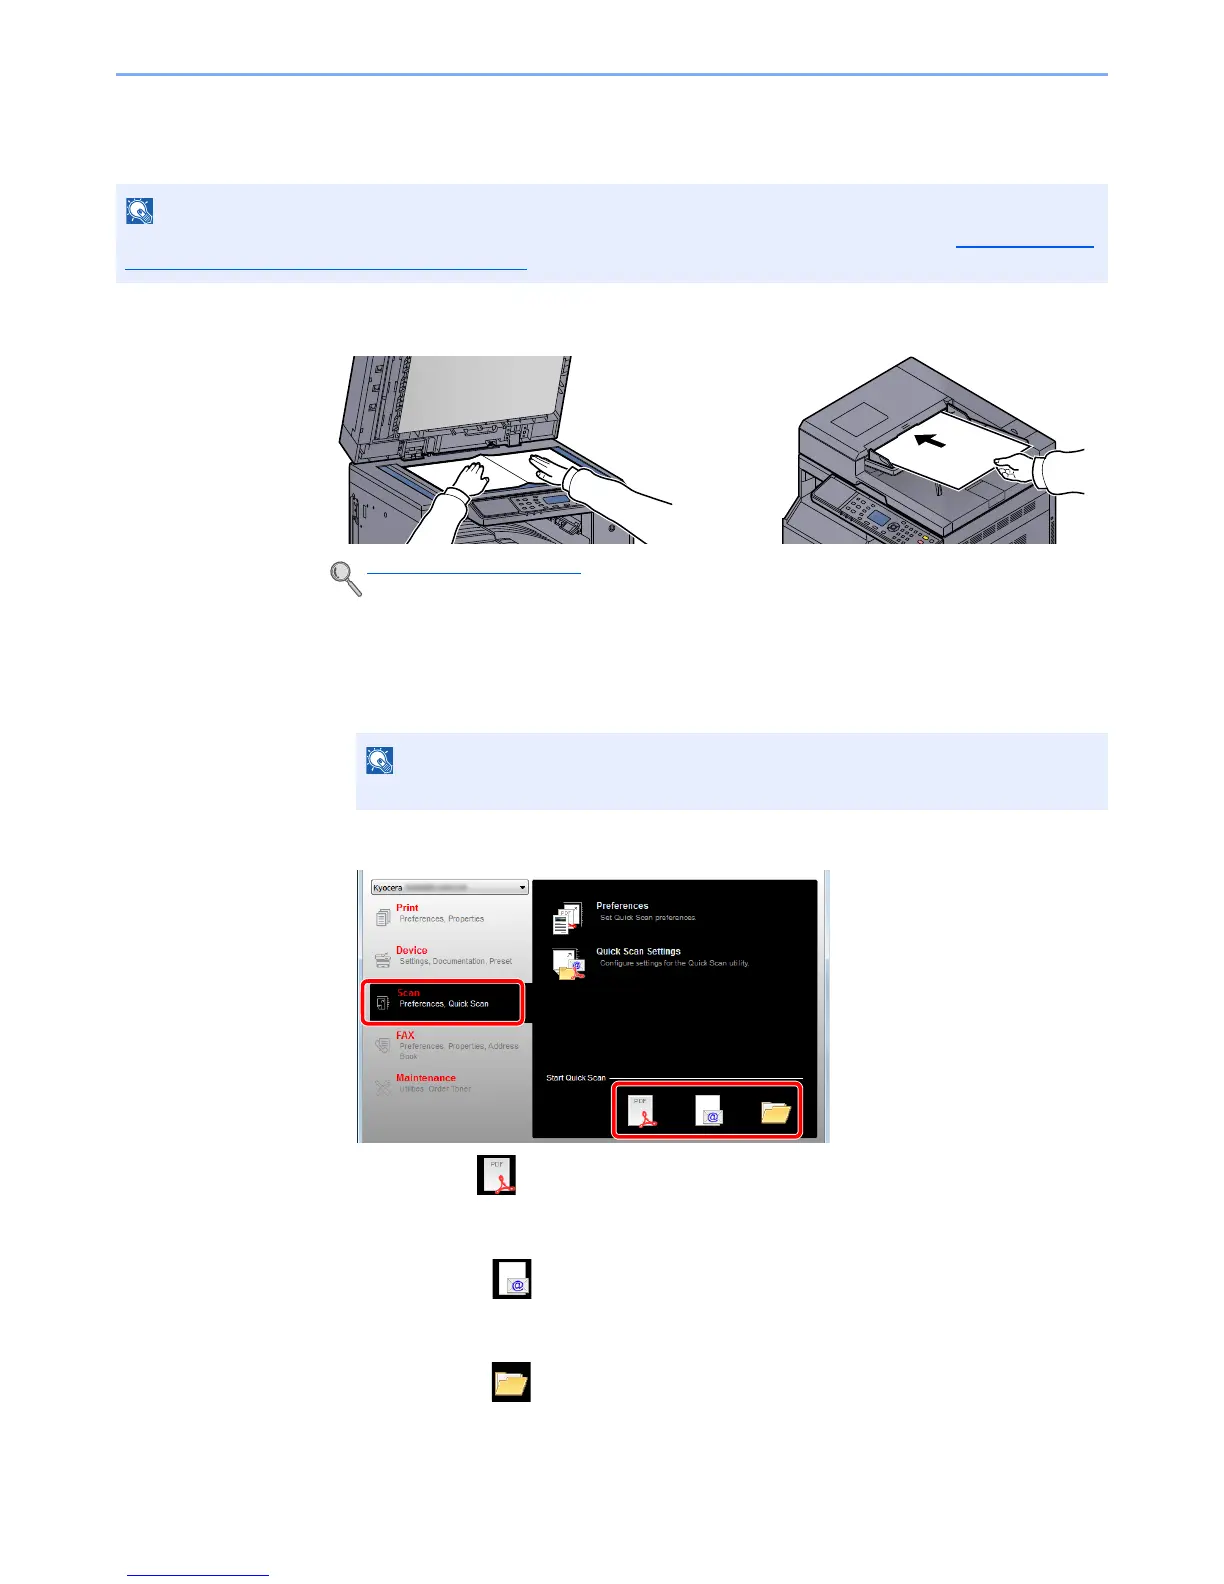
Place the originals on the machine.
2
Execute scanning on the Host PC.
1 Click [Start] button on the Windows and then select [All Programs], [Kyocera], [Client
Tool] and [KYOCERA Client Tool] to start KYOCERA Client Tool.
2 Click [Scan to PDF], [Scan to E-mail] or [Scan to Folder] icon on the [Scan] tab.
• Scan to PDF
Scanning starts. When scanning finishes, the [Save PDF File As] dialog appears. Specify
the PDF file name and the folder in which the image will be saved.
• Scan to E-mail
Scanning starts. When scanning finishes, the mailer starts and the scanned image is
attached. Enter the address, subject and message, and then send.
• Scan to Folder
The [Browse for Folder] dialog appears. Specify the folder in which the image will be
saved, and click [OK]. Scanning starts.
You need to configure the settings of Quick Scan and TWAIN using KYOCERA Client Tool. Refer to Default Settings
on the PC (KYOCERA Client Tool) on page 7-22.
Loading Originals (page 5-2)
In Windows 8, select [Search] in charms, [Apps], and then [KYOCERA Client Tool].
 Loading...