97
Section 3: Configuring the Access Point
LAPAC1750PRO Access Point Software User Manual
Table 60: Captive Portal Upload Custom Images
Field Description
Upload Web
Customization
Image
To select an image to upload to the AP for use
in the CP authentication page, click Browse and
browse to the image to upload. After you select the
appropriate image, click Upload.
Delete Web
Customization
Image
To remove an image that has been uploaded, select
the name of the image from the available menu
and click Delete.
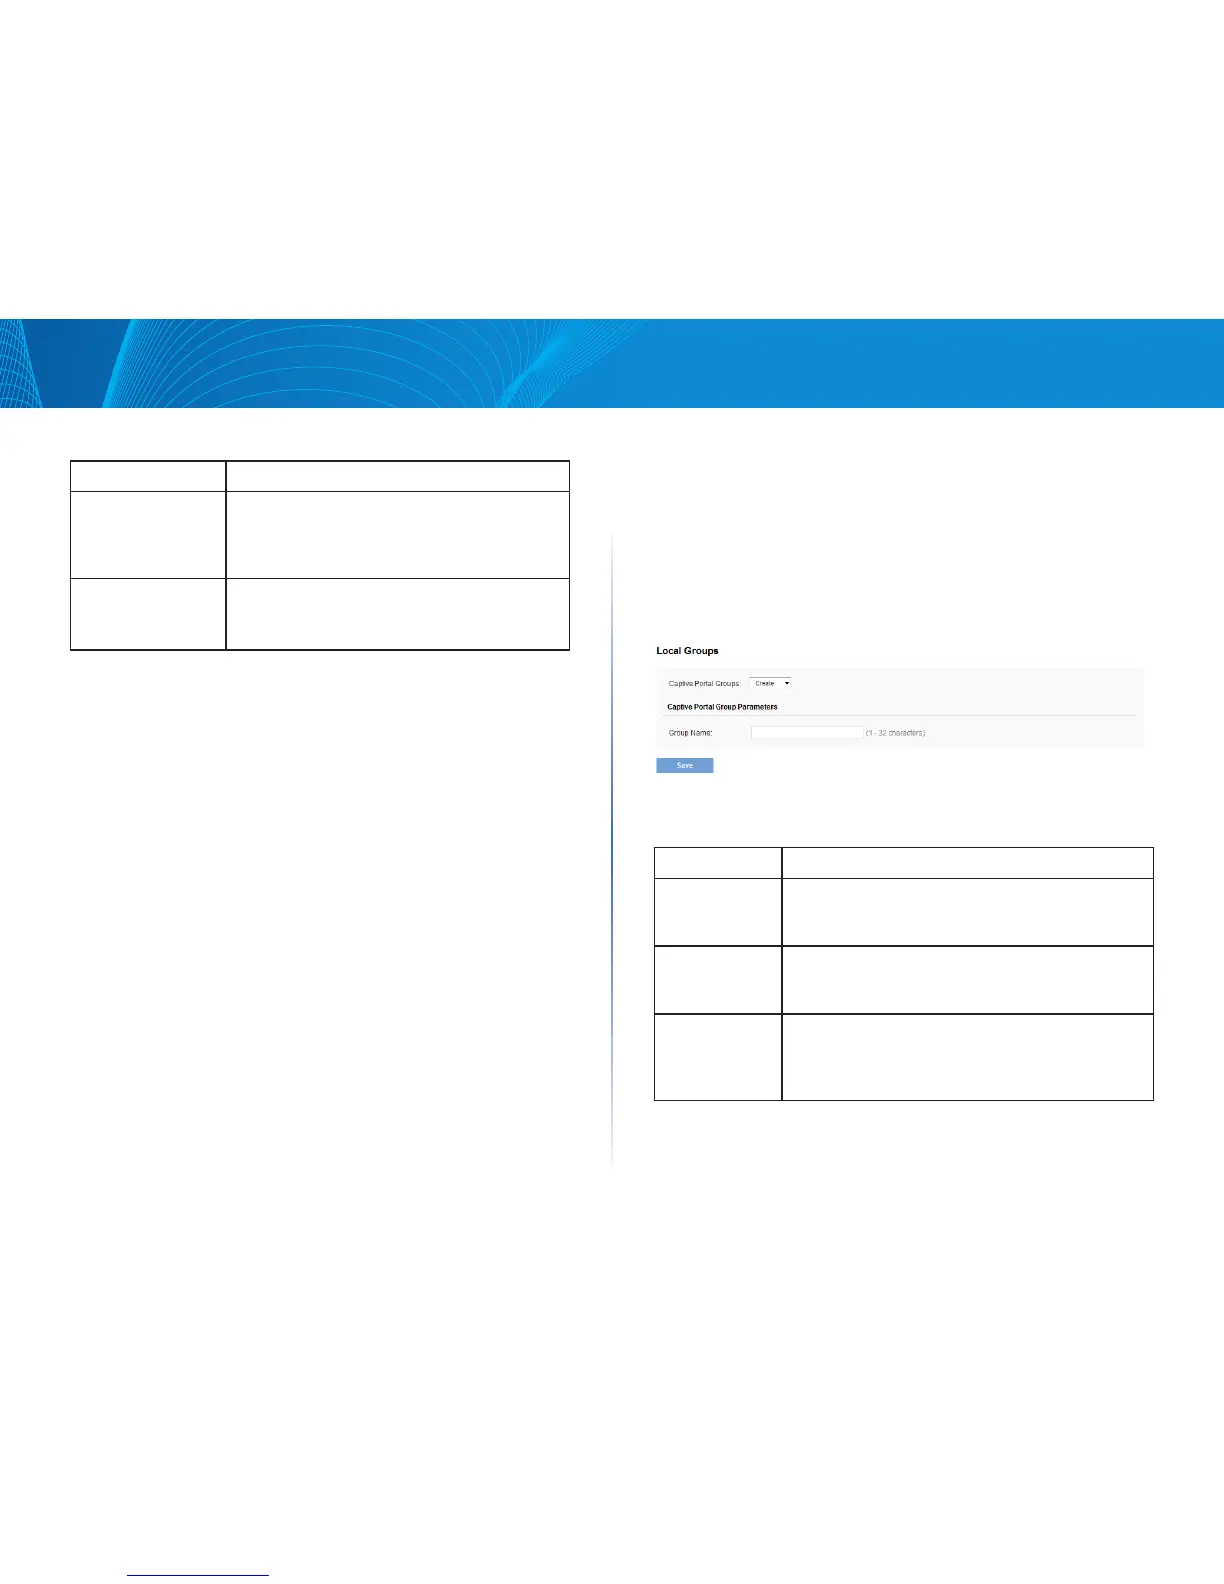
Local Groups
Each local user is assigned to a user group. Each group is assigned to a CP
instance. The group facilitates managing the assignment of users to CP
instances.
The user group named Default is built-in and cannot be deleted. You can
create up to two additional user groups. The fields available on the page
depend on the option selected from the Captive Portal Groups menu.
Click the Configuration > Captive Portal > Local Groups tab to access the page,
which the following figure shows.
Figure 54: CP Local Groups
The following table describes the fields on the CP Local Groups page that you
use to create a CP local group.
Table 61: Captive Portal Local Group Configuration
Field Description
Captive Portal
Groups
The menu includes all CP groups that exist on the
switch. To create a new group, select Create. To delete a
CP group, select the group name.
Group Name This field is available only if the option selected from
the Captive Portal Group menu is Create. Specify a
name for the local user.
Delete Group This field is available only if the option selected from
the Captive Portal Group menu is a user-created CP
group. To delete the selected group, select the check
box and click Save.
 Loading...