30
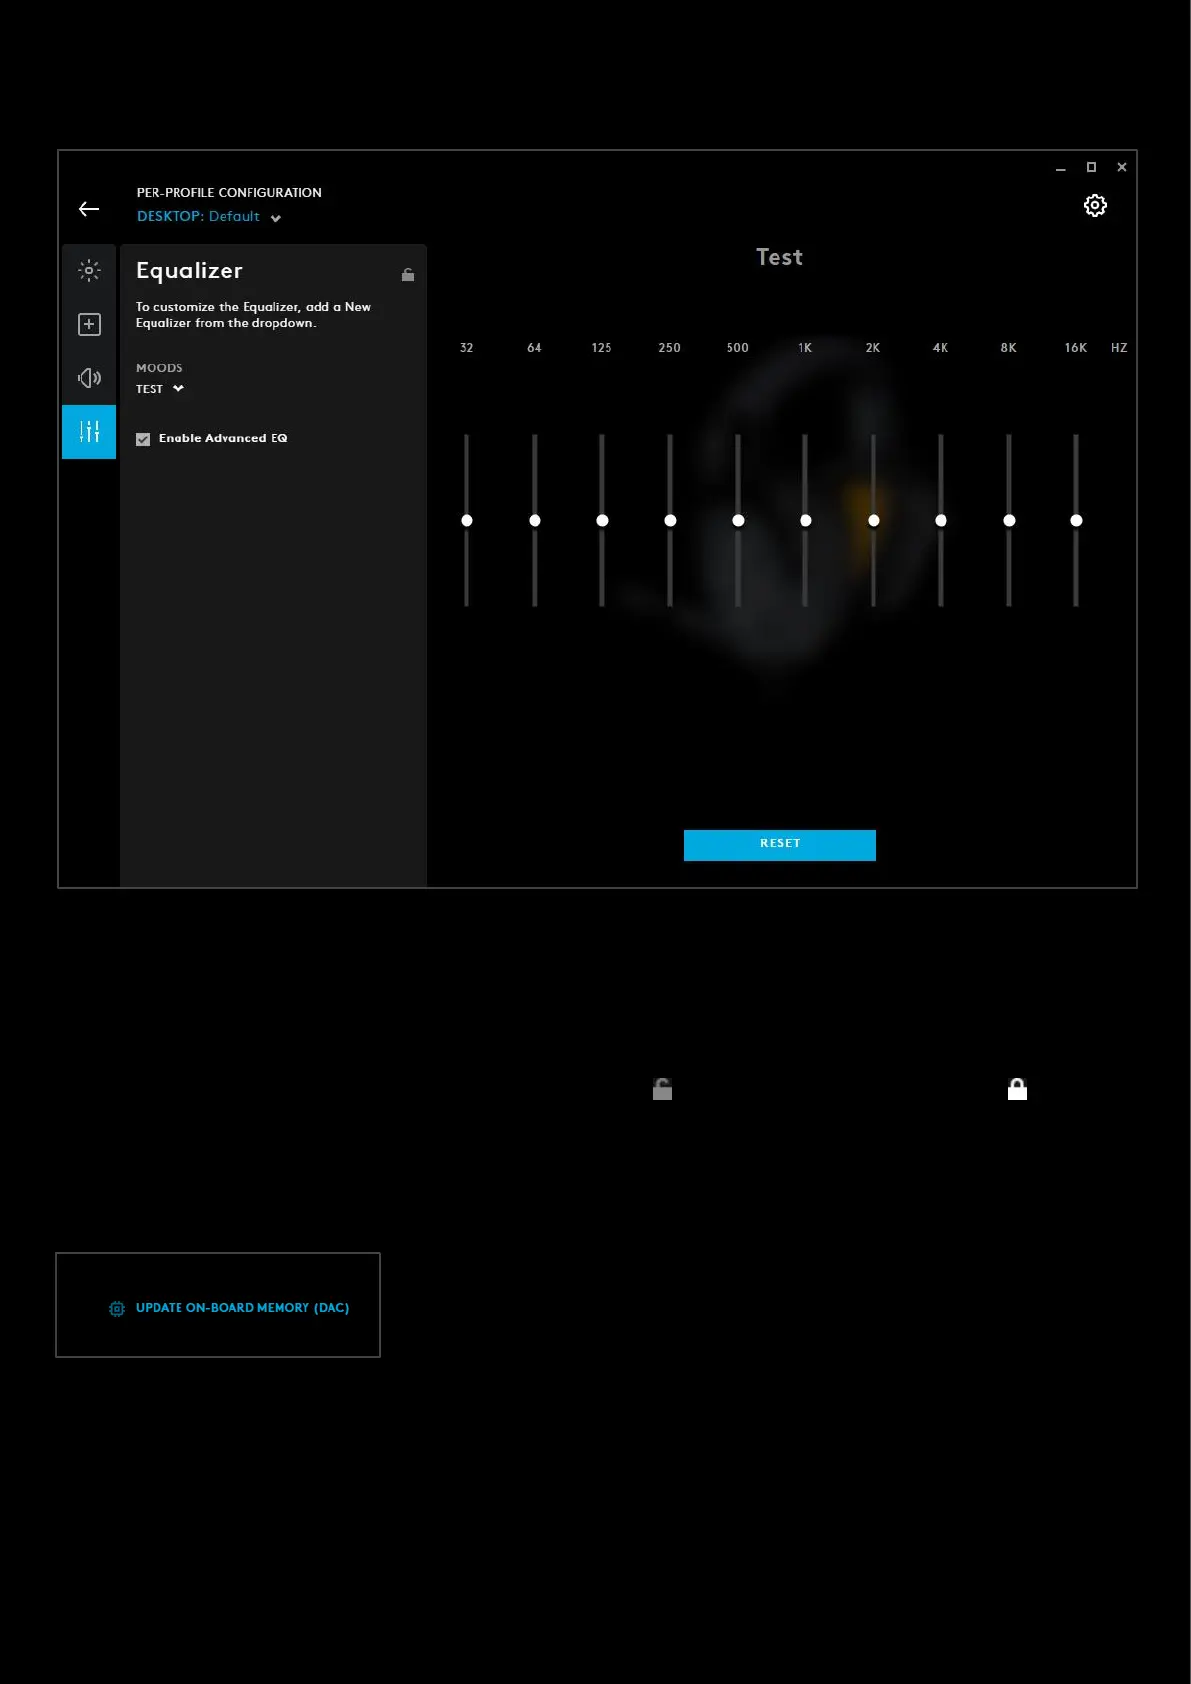
2. Enable Advanced EQ. Available when you select + ADD NEW EQUALIZER. Checking this box will switch to the
full EQ view. You will also see the option to RESET the values back to default if you want to start again.
3. Simple Equalizer View. Drag the BASS and TREBLE sliders to your preferred settings.
4. Equalizer Profile Name. If you have selected + ADD NEW EQUALIZER, click here to rename your Equalizer.
5. PER-PROFILE EQUALIZER LOCK. Lock this to set the Equalizer configuration for all your profiles.
6. GEAR SETTINGS. Click this to take you to the Gear Settings page
7. PROFILE SELECTOR. Use the drop down to change the User Profile you want to configure for. Also it will
indicate if the profile is in a PER-PROFILE CONFIGURATION or in a PERSISTENT CONFIGURATION
8. BACK ARROW. Click the arrow to take you back to the Homepage.
Blue VO!CE Equalizer
For enabled devices, you will also have the option to UPDATE ON-BOARD
MEMORY (DAC). This writes the Equalizer preset to the onboard memory so you
can use this preset on a different machine that does not have G HUB installed.
Note: The On-board memory update does not include the Blue VO!CE Preset. You will need to create a new preset and
share that online. You can then download that preset onto another computer that has G HUB installed.
Browsing for more Blue VO!CE Equalizer presets
You can search for more Blue VO!CE Equalizer presets that have been shared by other users within G HUB.
 Loading...