Part III Appendix
Electrical Safety Maintenance 261
Electrical safety check
4-Protection ground impedance
Overview
Prerequisite: L1 and L2 are turned on.
To measure the protection ground impedance, connect a red lead to the protection ground end,
protection ground metal shell, or equipotential pole of the device under test. Press AMPERRES
(soft key 3) to select the test current. You can switch among 1 A, 10 A, and 25 A. During the test,
the output power of the front panel is turned off.
Test process
Preparations
1) Press AMPERRES (soft key 3) to select the test current for measuring the protection ground
impedance.
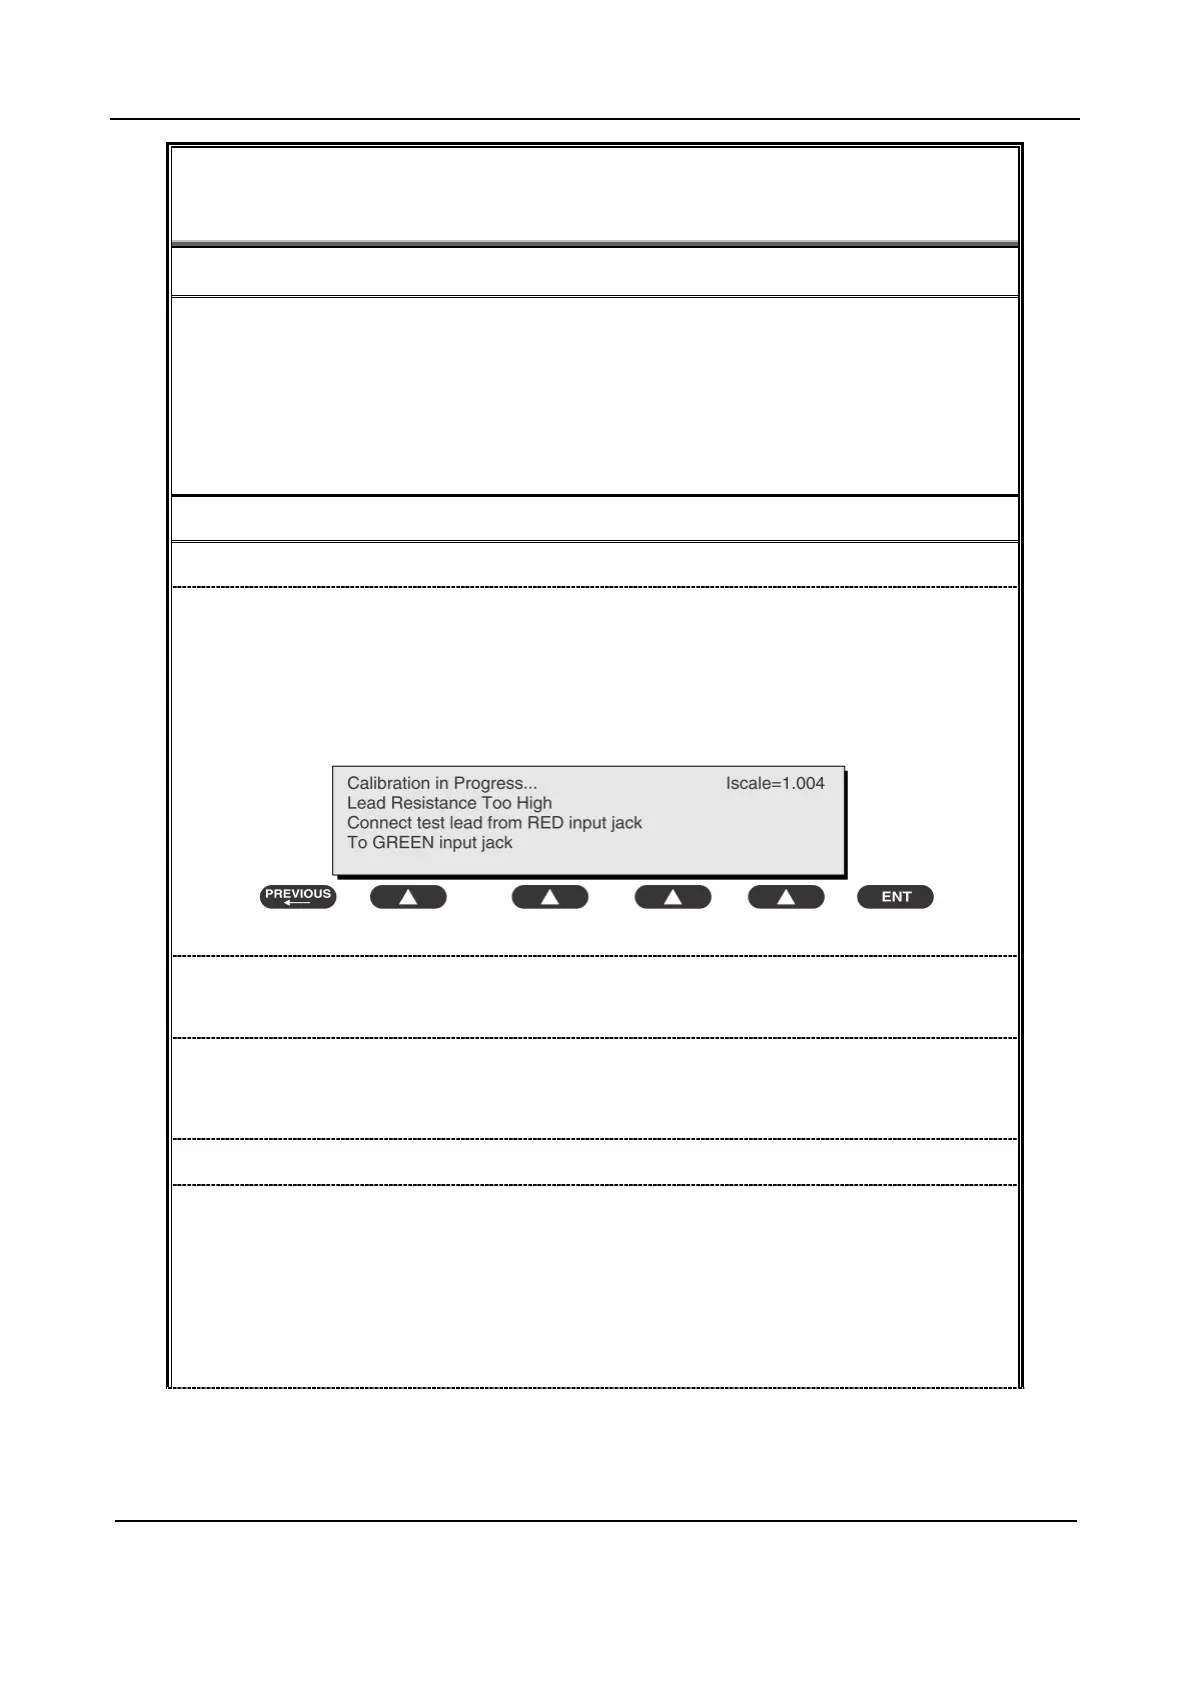
2) Connect the test lead between the red input and the green output.
3) Press CAL LEADS. The 601 PRO tester will measure the lead impedance. If the measured
value is less than 0.15 ohm, the tester saves the measured value and deducts it from all ground
impedance values that are measured under the calibration current.
4) If the calibration fails, the saved value is used until an acceptable calibration value appears.
WARNING
In the ground impedance test, the device under test (DUT) must be connected to the output end on
the front panel of the 601 PRO tester. If the DUT ground impedance test fails, end the test and
mark that the device is out of operation.
Running the test
1) On the main panel, insert the DUT plug into the auxiliary output interface on the front panel of
the 601 PRO tester when there is no power on the output end.
2) Insert the red lead of the 601 PRO tester into the red input (on the front panel of the 601 PRO
tester), and the other end to the protection ground or bare metal part of the device.
3) Press 3 to show the protection ground impedance test.
4) Press AMPERES to select the test current (1 A, 10 A, or 25 A). The selected current appears
in the upper right corner of the display in real time.
 Loading...


