S350 Series 24-Port (PoE+) and 48-Port Gigabit Ethernet Smart Managed Pro Switches
Configure Switching User Manual180
2. Launch a web browser.
3. In the address field of your web browser, enter the IP address of the switch.
If you do not know the IP address of the switch, see
Discover or Change the Switch IP
Address on page 12.
The login window opens.
4. Enter the switch’s password in the Password field.
The default password is
password.
The System Information page displays.
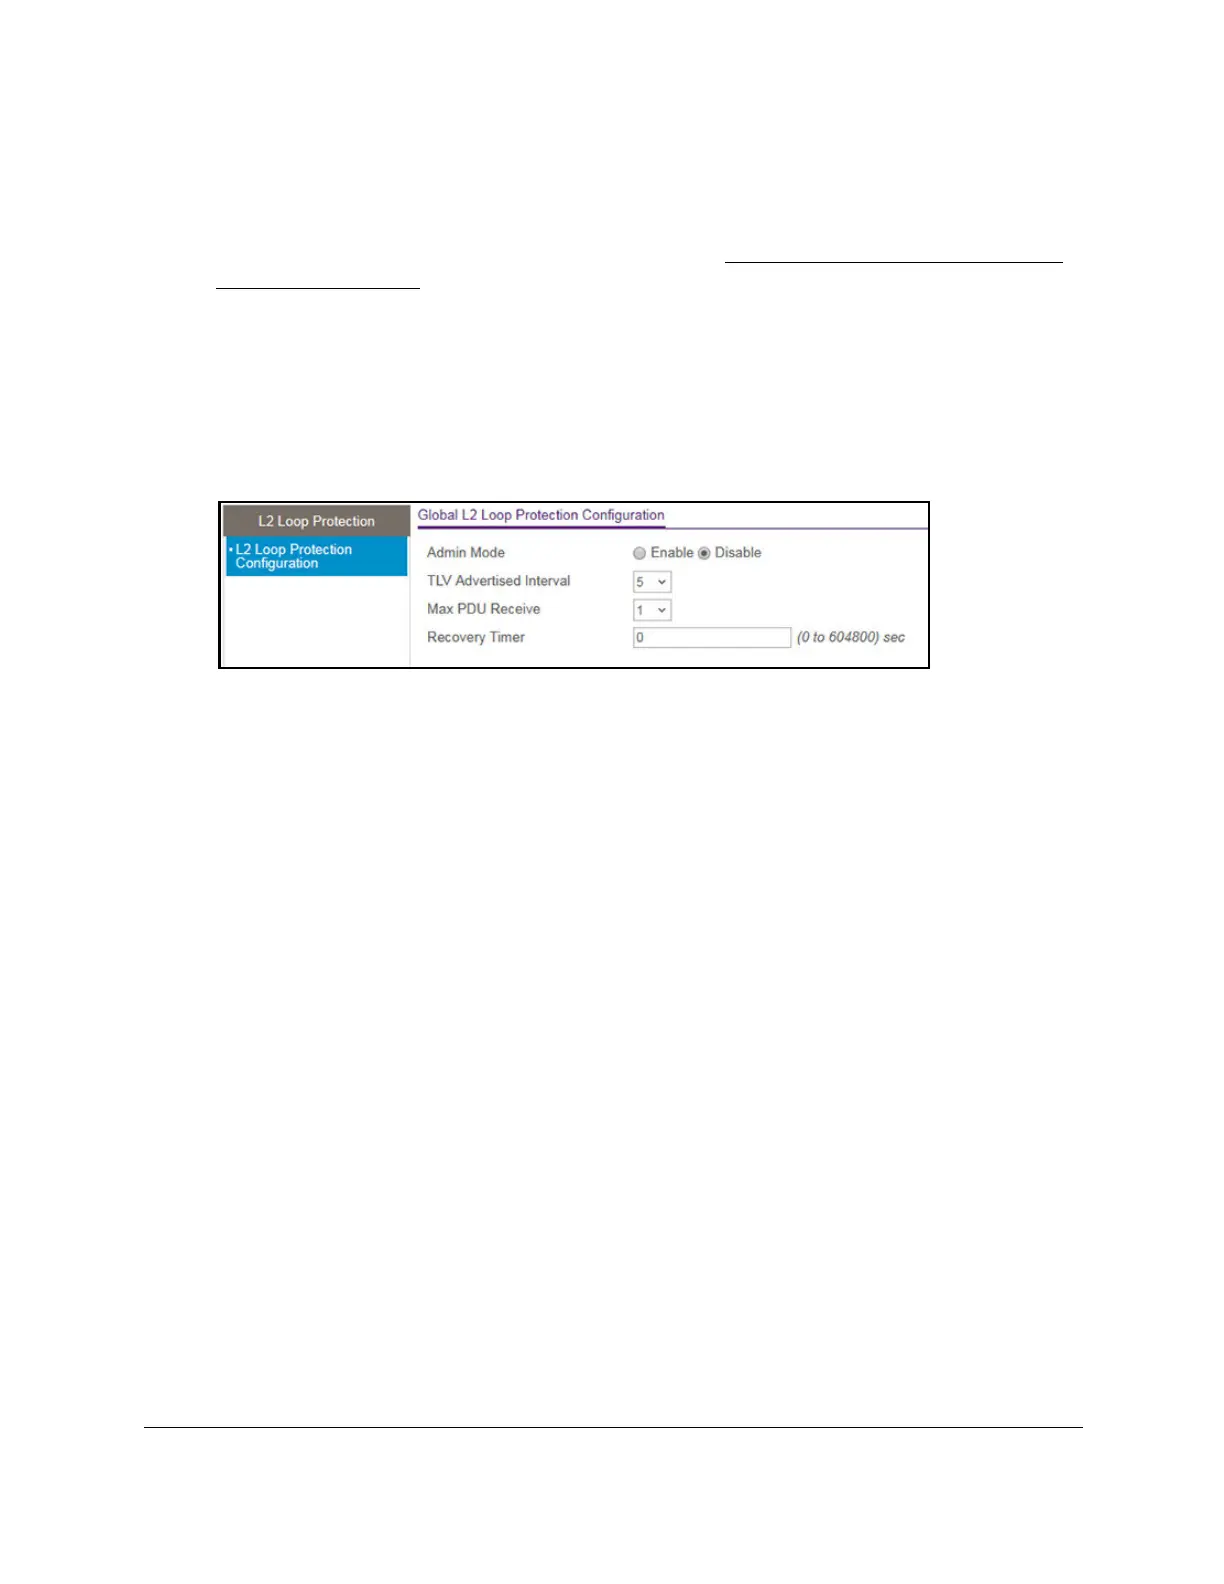
5. Select Switching > L2 Loop Protection > L2 Loop Protection Configuration.
6. To enable or disable loop protection feature, select the Admin Mode Enable or Disable
radio button.
By default, the Disable radio button is selected.
7. From the Transmit Interval menu, select the time in seconds between transmission of loop
packets.
The default transmit interval is 5 seconds.
8. From the Max PDU Receive menu, select the maximum number of packets to be received
before an action is taken.
The default is 1.
9. In the
Disable T
imer field, enter the time in seconds after which a port is disabled when a
loop is detected.
The range is from 0 to 604800 seconds.
The default is 0 seconds.
10. Click the Apply button.
Your settings are saved.
View and Configure Layer 2 Loop Protection on a Port
To view and configure L2 loop protection on a port:
1. Connect your computer to the same network as the switch.
You can use a WiFi or wired connection to connect your computer to the network, or
connect directly to a switch that is off-network using an Ethernet cable.
 Loading...