6 - 19
6 Installation
NX-series EtherNet/IP Coupler Unit User’s Manual (W536)
6-1 Installing Units
6
6-1-9 Removing Units
Commercially Available Markers
Commercially available markers are made of plastic and can be printed on with a special printer.
To use commercially available markers, purchase the following products.
The markers made by OMRON cannot be printed on with commercially available special printers.
Always turn OFF the power supply before removing any Unit.
If the power supply is not OFF, the Unit may malfunction or may be damaged.
Precautions for Correct Use
• When removing an NX Unit, remove multiple Units together which include the one you want
to remove. If you attempt to remove only one Unit, it is stuck and hard to pull out. Do not
unlock the DIN track mounting hooks on all of the NX Units at the same time. If you unlock
the DIN Track mounting hooks on all of the NX Units at the same time, all of the Units may
come off.
• When you remove a Unit, be careful not to touch or bump the pins in the NX bus connector.
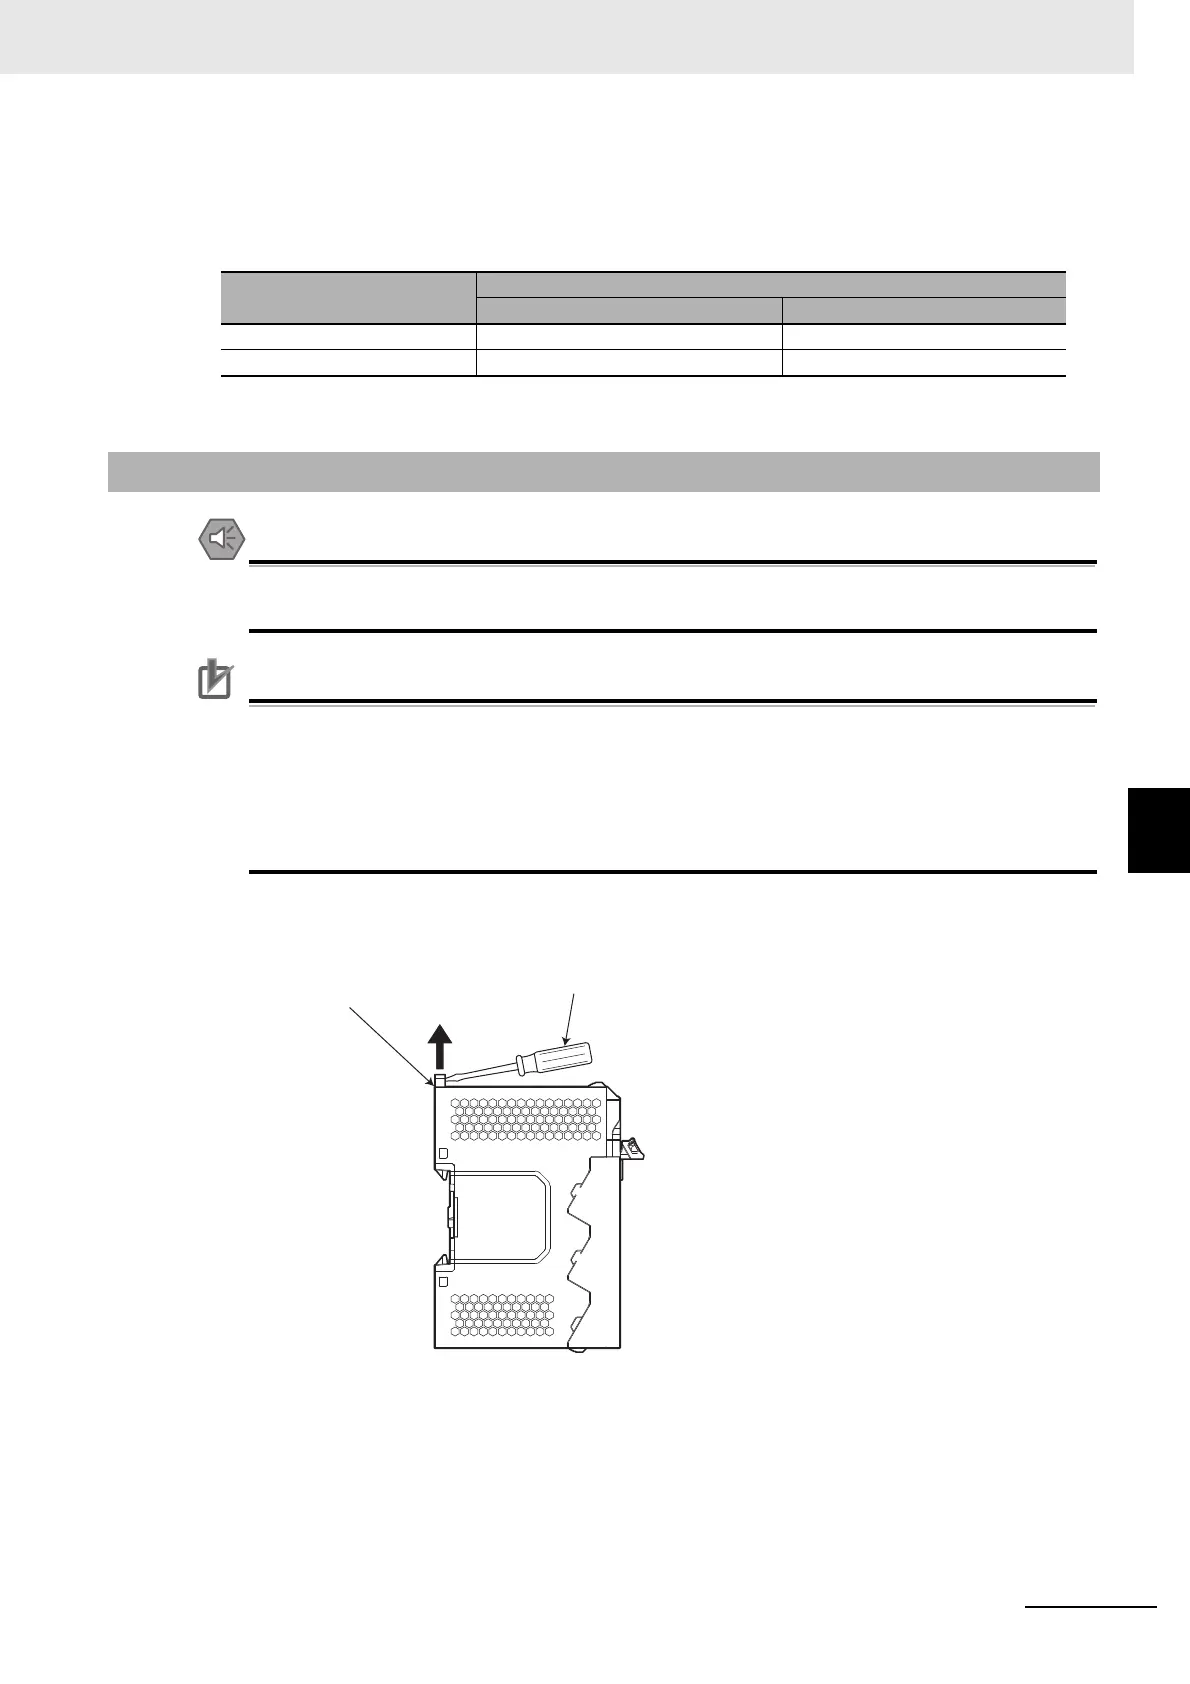
1 Use a flat-blade screwdriver to pull up the DIN Track mounting hook on the Unit to remove.
Product name
Model number
Manufactured by Phoenix Contact Manufactured by Weidmuller
Markers UC1-TMF8 DEK 5/8
Special marker printer UM EN BLUEMARK X1 PrintJet PRO
6-1-9 Removing Units
Flat-blade screwdriver
DIN track mounting hook

 Loading...